
Update from 05/23/19: There’s a known bug only in console version 19.03 where the ResetPIN command does not get executed upon checking in the device. This was resolved in console version 19.04. You may read more via this post in the VMware community forum. The workaround, in this case, is to send a clear passcode command from the AirWatch console.
“Apparently in 19.03 the “ResetPIN” command is simply never sent to the device upon check in. Once our environment was updated to 19.04 the issue was resolved and is now working as desired.”
As parents, my wife and I often have to be the referees when kids refuse to share their toys during playtime. To be fair, I learn that sharing doesn’t mean giving up your toy instantly when someone asks for it. Instead, it simply means to let someone else uses it once you finish. I think the same analogy goes for shared devices in specific use cases within the hospitality and healthcare industries where task workers are more common. Unlike dedicated devices, providing shared devices will result in increased usage among various staff members and a reduction in investment cost.
In this post, I will share the basic steps to set up and configure VMware Workspace ONE to support shared devices for iOS. I will have a separate post on the setup for Android.
For additional security measures and controls, my shared device will be supervised through Apple DEP. This means I will:
- Create a staging account with the specific setting for a multi-user device
- Configure an Apple DEP profile with this staging account
- Deploy VMware Workspace ONE Intelligent Hub app after staging completes
Let’s get started!
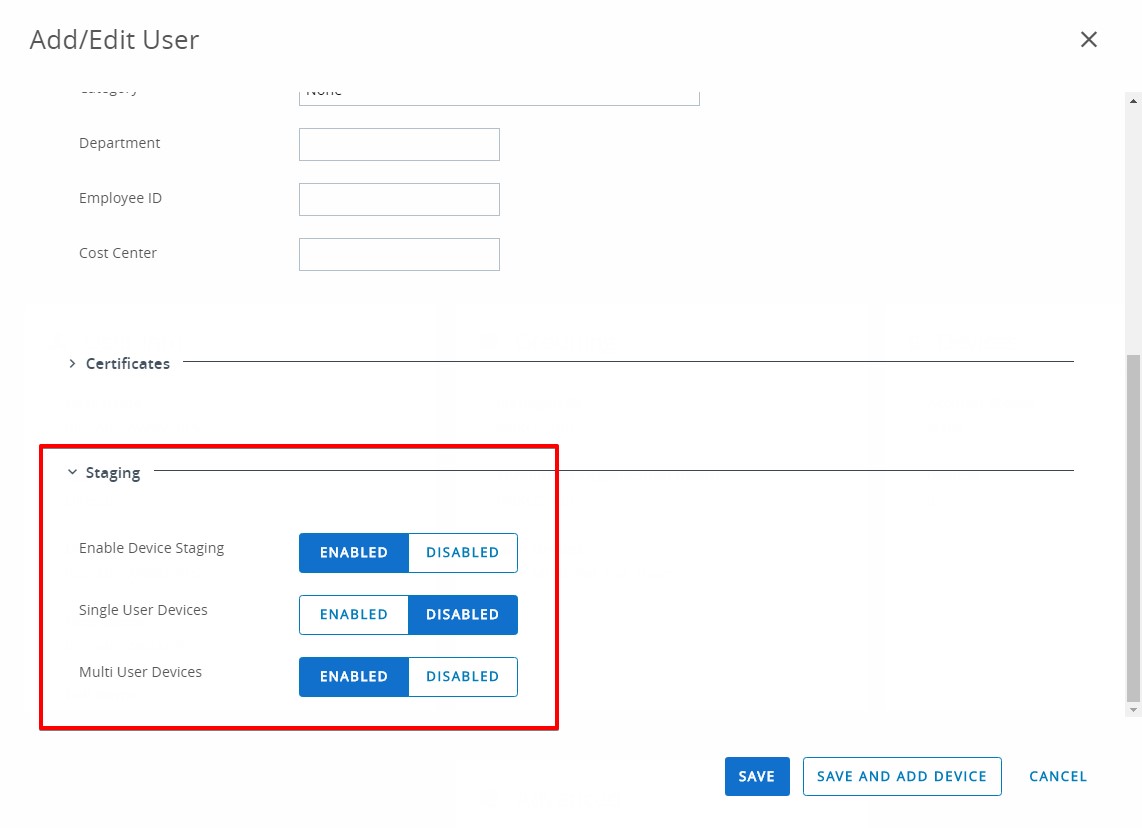
Step 1: Create a staging account with the specific setting for a multi-user device
For the staging account, it’s best to create a directory account for centralized management within your directory service. Once it’s created and synced to the web console, click on the Advanced tab and scroll to the bottom of the page. Then, expand the Staging section.
- Next to Enable Device Staging, click ENABLED which will then reveal additional setup options.
- Since I am staging through Apple DEP, we can select DISABLED next to Single User Devices.
- Select ENABLED next to Multi User Devices.
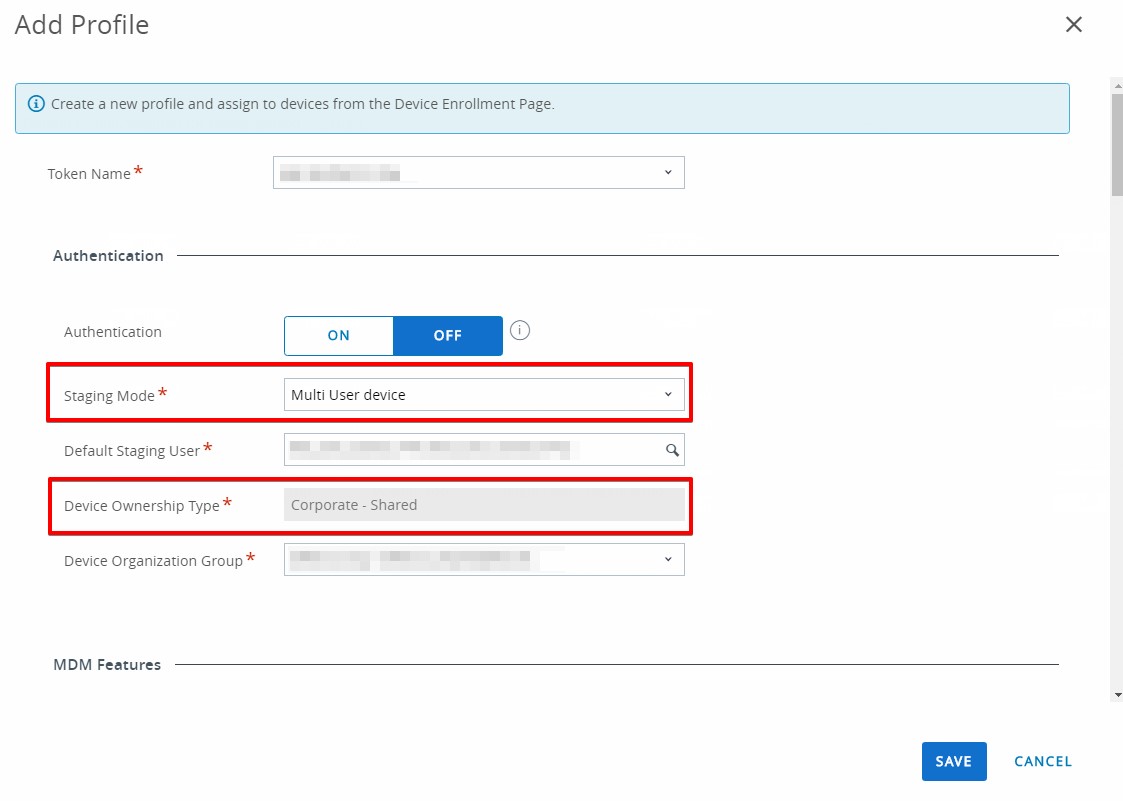
Step 2: Configure an Apple DEP profile with this staging account
For the DEP profile, select Multi User device next to Staging Mode which subsequently changes Device Ownership Type to Corporate – Shared (this cannot be changed manually after.) For the default Staging User, simply select the account created from the previous step. Then, complete the remaining setup in the MDM Features section and click SAVE.
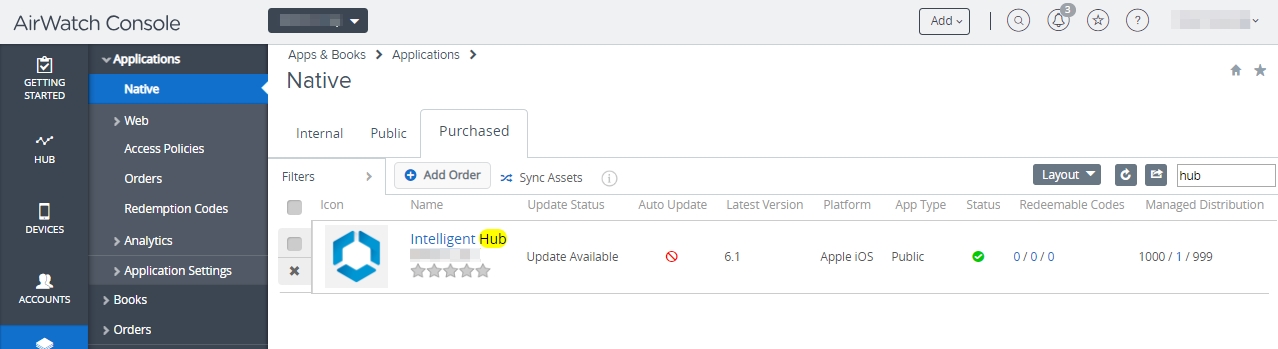
Step 3: Deploy VMware Workspace ONE Intelligent Hub app after staging completes
Since this is a supervised COBO (Corporate-Owned, Business-Only) device, I normally would not allow access to iTunes & App Stores. Also due to the fact that this device will be used in various locations (thanks to mobility), we most likely won’t see this shared device again soon after it’s given to the end users. Thus, deploying the Intelligent Hub as a purchased app from Apple VPP is best as we can easily manage its configuration and update it to future release easily. Be sure the app is converted to device-based assignment for a seamless experience.
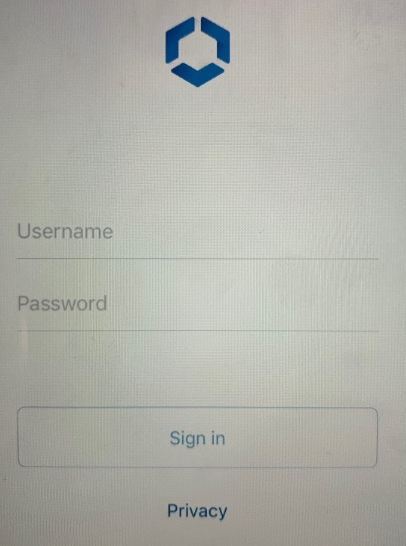
With the setup above, the VMware Intelligent Hub app should download and install automatically on the device once you go through the Setup Assistant.

At this stage, the device is ready for checkout (or login) by the user which will subsequently receive various profiles, applications, and policies based on settings within the web console.

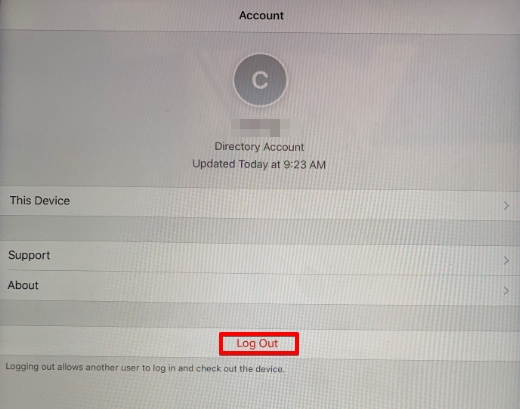
When the user logs out of the device from the Hub app, this is the same as a check-in of the device and effectively returns it to the original state ready for checkout again.
I forgot to mention that once the user logs into the device, it may end up enrolling in a different organization group (OG) based on user’s account and grouping setup.
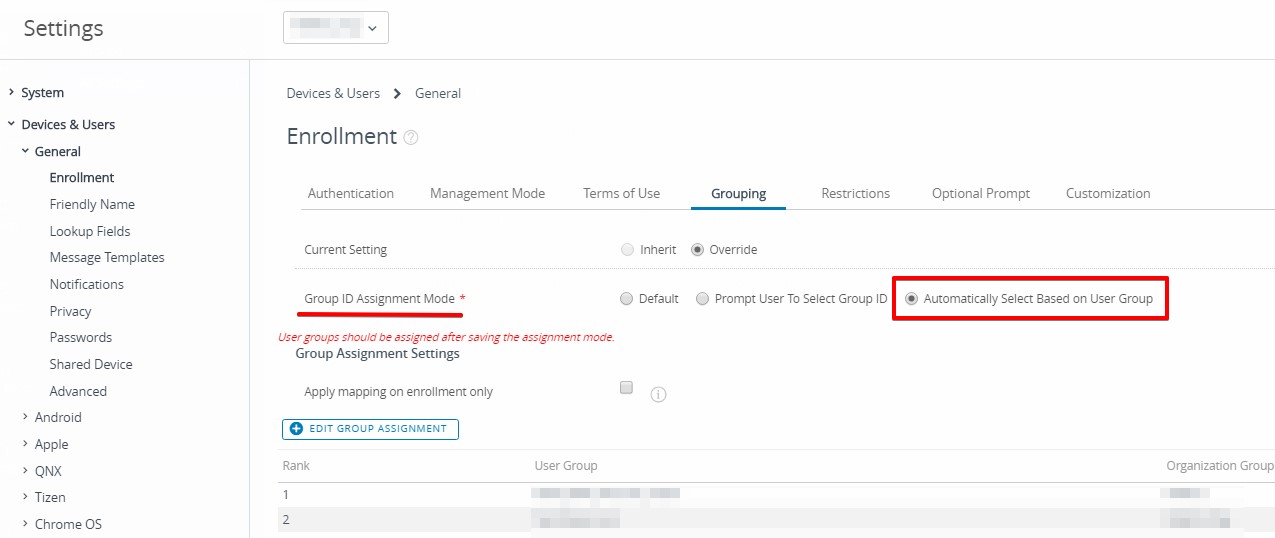
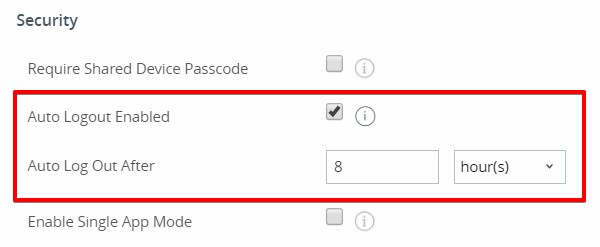
What if you want to make sure the device stays in the same OG regardless who logs into it? This is especially important in some use cases where consistent experience regardless of the user (i.e. task workers) is key. For this use case, we will configure Shared Device setting under GROUPS & SETTINGS -> All Settings -> Devices & Users -> General. Additional information on this setting can be found via the link below.
Devices & Users / General / Shared Device
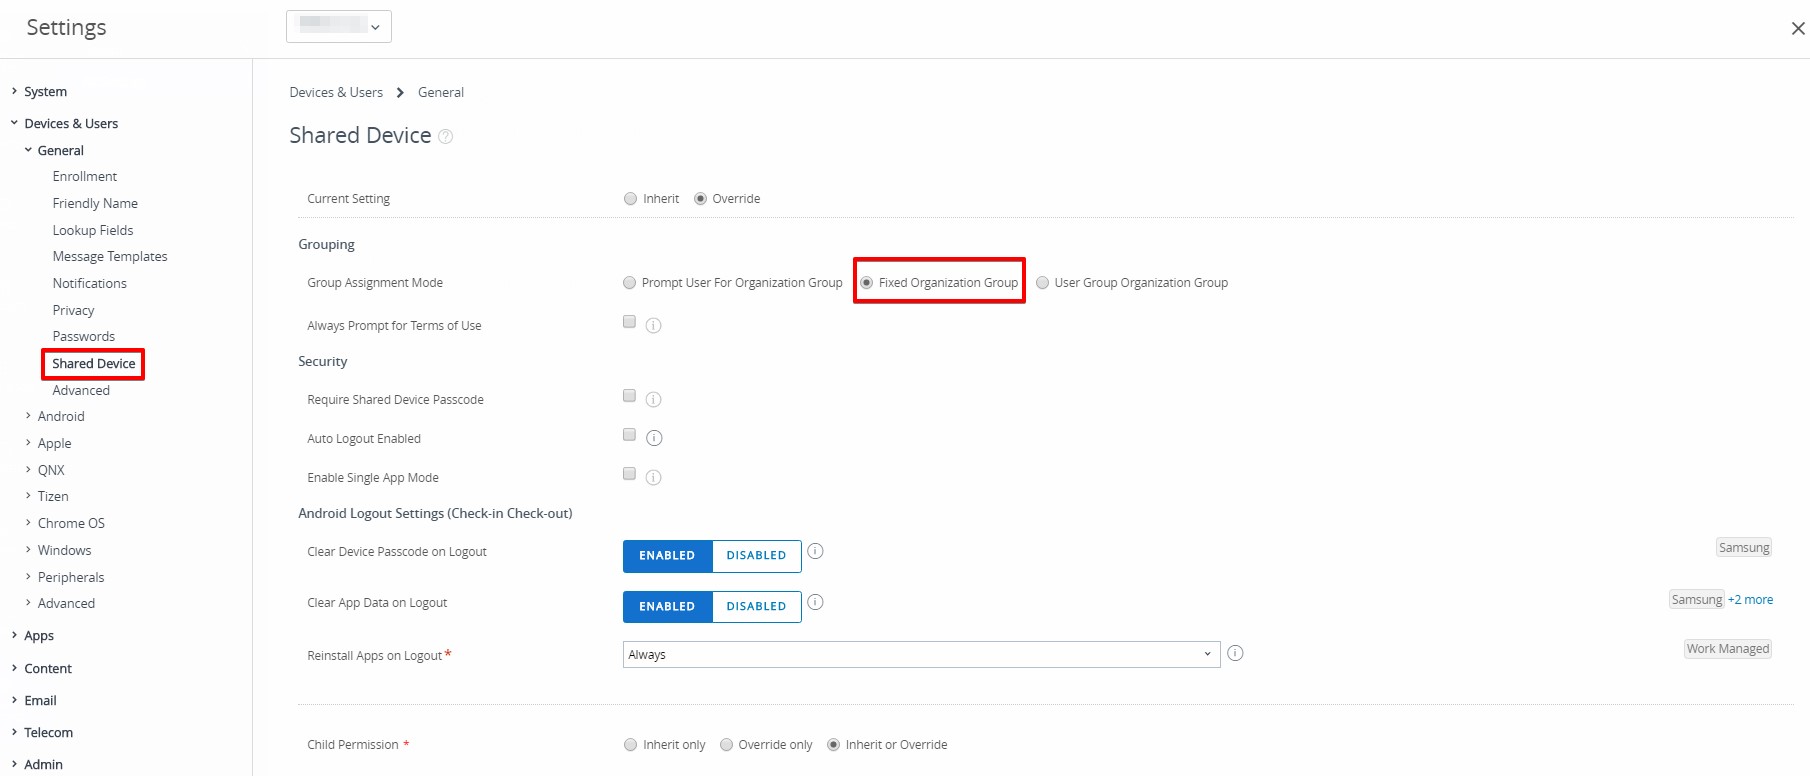
The Auto Logout Enabled option can be particularly useful for users who work in shifts. Generally speaking, no one else can log into the device after it’s already logged in unless:
- either the current user logs out through the Hub app, or,
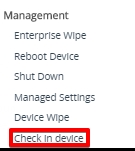
- an administrator executes the Check In Device command from the web console under MORE ACTIONS -> Mangement. (Please note: this option was introduced since console version 9.7)
To minimize the manual labor, enabling this option will automatically log off the current user after a set period of time (minutes, hours or days) has passed.
Also, a word of caution if you have a passcode profile in place for extra security. In the Minimum Passcode Length field, you can set a value between 0 (or none) to 16. If you set it between 1 to 5, however, the user will still get prompted to enter 6 or more characters.
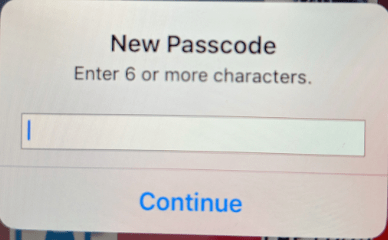
This is because Apple has set the default passcode length from 4 to 6 digits starting with iOS 10, and you might have seen a similar requirement as well when logging onto Apple DEP or ABM with 2-factor authentication. Interestingly, the user can certainly enter a passcode less than 6 characters just fine.
As always, stay mobile!
