
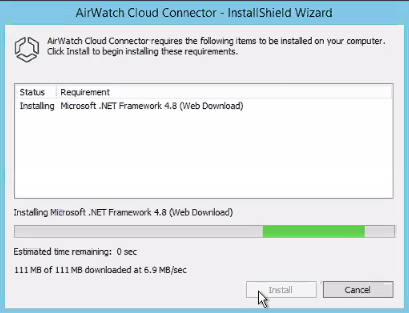
Updated on 08/25/20: It turns out the ACC installer will pull in the .Net Framework 4.8 during the process. Thus, there is no need to install that separately ahead of time.
Updated on 07/15/20: While upgrading the ACC from version 19.07 to 20.05, I encountered two different errors and the software was completely uninstalled after the first attempt. I was able to resolve by re-running the installer. I will update this post once I hear back from VMware support on the errors.
Updated on 05/12/20: I’ve updated this post based on my latest experience with upgrading the ACC from version 19.07 to 20.06. A notable step that was already mentioned is to review the UEM console release notes and the AirWatch Cloud Connector guide to be familiar with any changes ahead of time. For instance, I learned once again that the .Net framework 4.8 is now required for the auto-update to work.
From the UEM release notes:

From the AirWatch Cloud Connector guide:

Please note there is no need to install this separately. The ACC installer will pull down the .net framework 4.8 during the upgrade process.

Other than than, the steps are pretty much the same. I hope you find this post helpful!
While I’m just as happy not having to manage the core infrastructure (i.e. Windows patching just to name a few) of my beloved AirWatch since it’s hosted, I still have upkeep with other auxiliary components such as AirWatch Cloud Connector (ACC). As a result, this post is created so I can identify and record any difference from my previous upgrade.
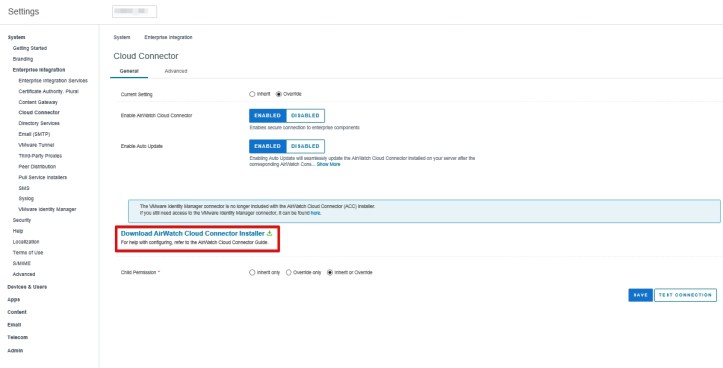
You may wonder why this is necessary as ACC is supposed to be updated automatically after each console version upgrade. I’m upgrading ACC manually due to a known bug with console version 9.4 where ACC wouldn’t upgrade by itself even with Auto Update set to Enabled in the web console under GROUPS & SETTINGS -> All Settings -> System -> Enterprise Integration -> Cloud Connector.
While this post was created when I upgraded from version 9.4 to 19.02, the steps should be more or less the same for newer versions including 19.05 and beyond.
Before I start, I always review the documentation since changes happen relatively quickly from one version to the next.
VMware AirWatch Cloud Connector Guide
As an example, my server already has .NET Framework 4.6.2 installed. To avoid additional downtime in the future, I would take advantage of the maintenance window and update .NET to the latest version as long as it’s supported by AirWatch per documentation.

Check out the link below if you are not sure what .NET version is installed on your server.
How to: Determine which .NET Framework versions are installed

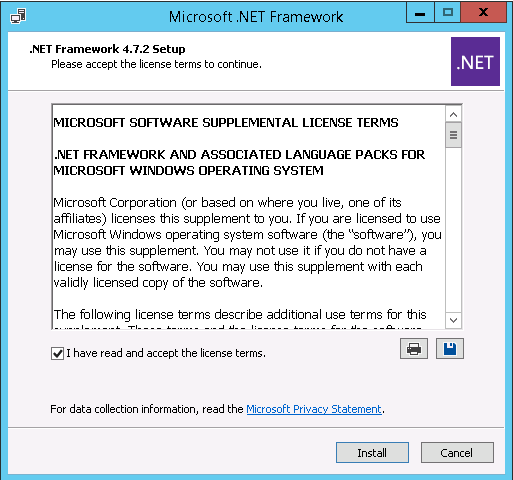
And here are the download links and the steps required to download and install .NET Framework 4.7.2.


Here’s a screenshot before installing .NET Framework 4.7.2

Here’s a screenshot after installing .NET Framework 4.7.2

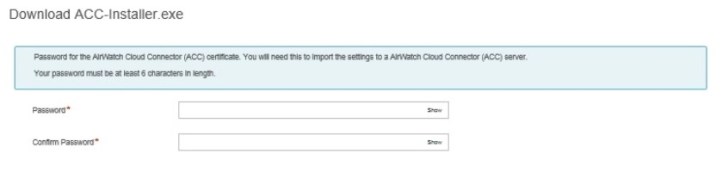
To download the installer, go to GROUPS & SETTINGS -> All Settings -> System -> Enterprise Integration -> Cloud Connector. Then, click on Download AirWatch Cloud Connector Installer.
Enter a password and click DOWNLOAD at the bottom of the page.
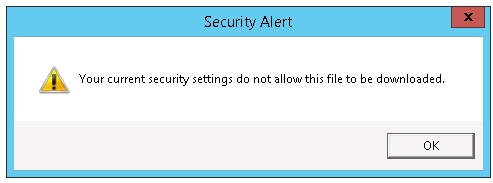
If you happen to download the installer directly from within your ACC server with the Internet Explorer, you may come across the error below. In this case, download it from another machine and copy it to the server afterward.
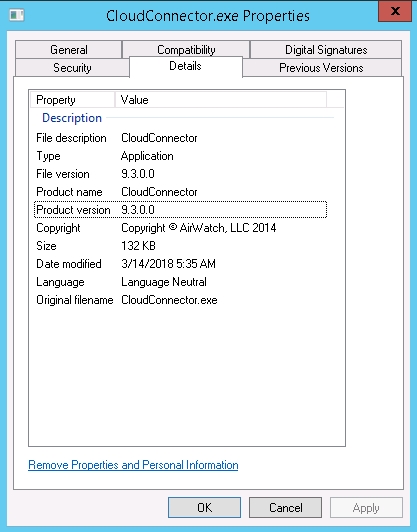
My ACC was previously updated with an auto-update. To me, this presents another challenge as below is the version shown in Programs and Features which may lead one to believe it’s far more outdated than it actually is.

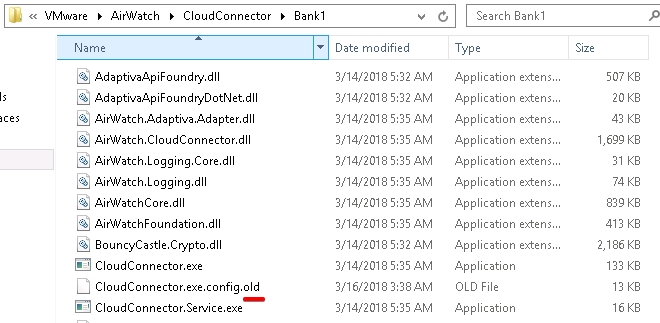
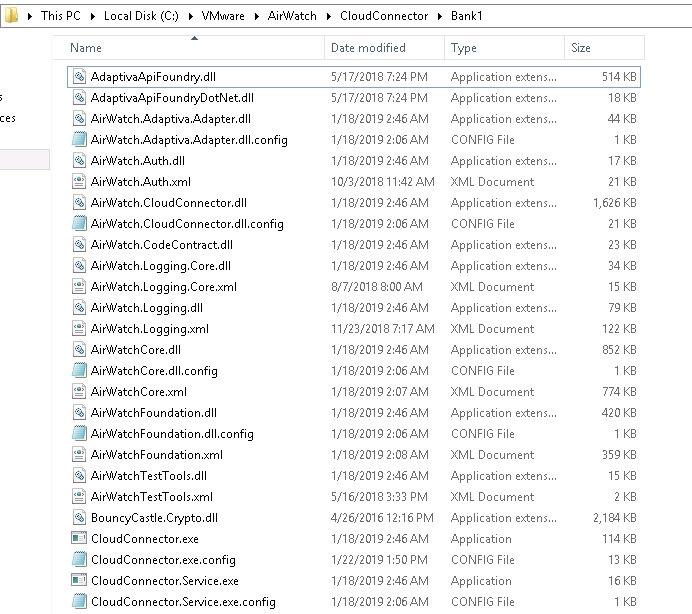
If you go to the folder where ACC is installed, you will see 2 different folders: Bank1 and Bank2. One of these two folders will contain the current version of ACC installed on the server. You need to dive into each folder to confirm which is not necessarily a productive use of time.
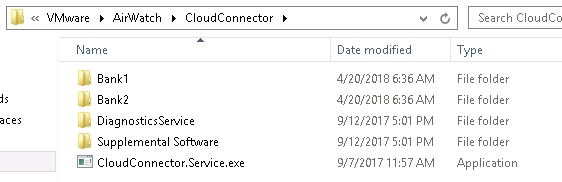
A hint that the folder doesn’t contain the latest version is if you notice .old extension after the file name CloudConnector.exe.config.
This other folder certainly contains the actual version of ACC installed.


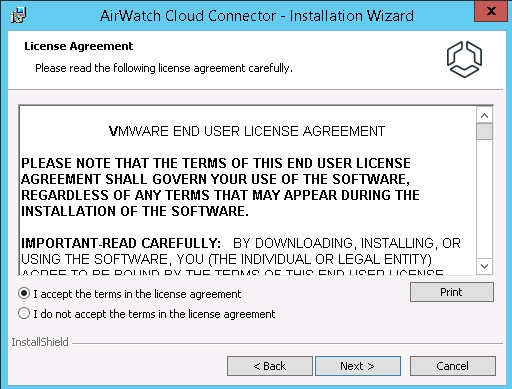
Let’s proceed with the installation. Right-click the installer and run as administrator. Then, follow the rest of the prompts accordingly.


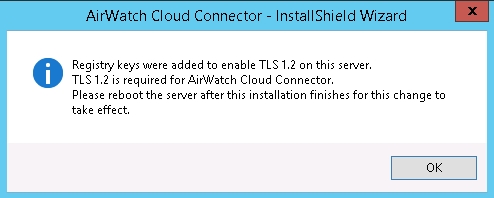
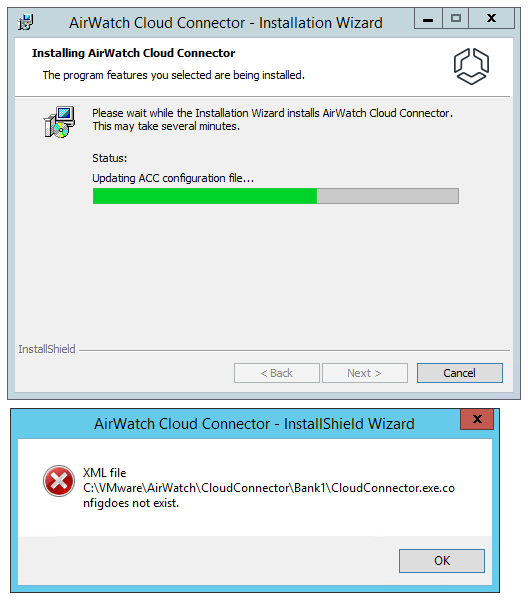
Not sure why I came across the prompt below, but it happened on both of my ACC servers when upgrading from version 9.4 to 19.02/03. Despite the error, the installation completed successfully. Yet, I didn’t encounter this error when upgrading from say version 19.02 to 19.05.

When I mentioned this to technical support, I was reminded that it’s necessary to uninstall existing ACC software first before installing a newer version. However, I think differently as again I didn’t encounter this error when the version being upgraded from is not too far apart from the version I’m upgrading to.
How do you manually update the AirWatch Cloud Connector?
As I mentioned earlier, I encountered two different errors while upgrading the ACC from version 19.07 to 20.05. The software was completed uninstalled, but I was able to resolve by re-running the installer.

If all goes well, you will see the message below.
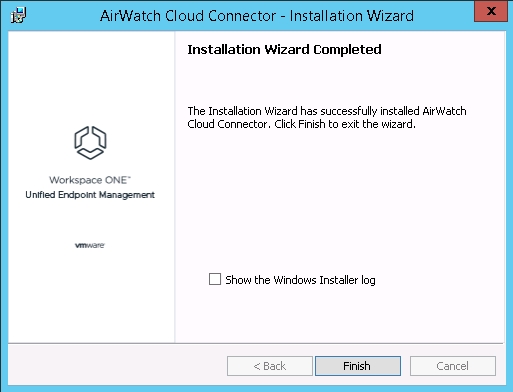
Even if you are not prompted to restart, restart anyway to ensure it gets a fresh start.

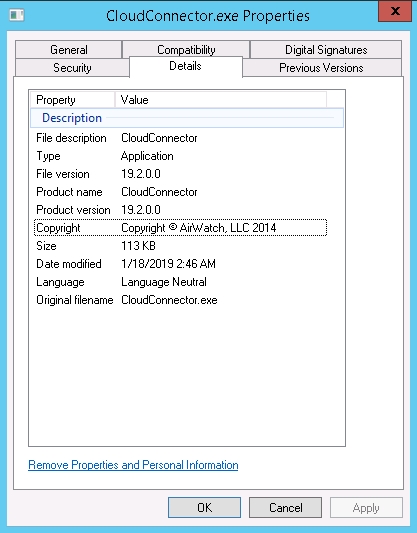
Once the upgrade completes, version 19.2 is now shown in Programs and Features.

Earlier, the Bank2 folder contained the updated version (i.e. 9.4) of ACC from the previous auto-update. Each time you upgrade the ACC component, the alternate folder will get updated instead. In other words, the Bank1 folder now contains the updated version of ACC (i.e. 19.2).
As always, stay mobile!
