
04/25/2020: This post was previously published and has been updated based on additional research and testing.
The pandemic in 2020 introduces and/or accelerates the use of mobile technology especially in the healthcare industry like no has ever seen before. Thanks to many generous donors, patients are now able to stay connected with their loved ones virtually which oftentimes is one of the best medicines during this difficult time. You can unlock far more potential with these ‘donated’ iPads by supervising them through Apple Business Manager (formerly known as DEP) and assigning them with various apps and policies through VMware Workspace ONE. Let me show you how.
What is this?
In the past, acquiring supervised devices through Apple Deployment Program (DEP) requires going through a rigorous application process with Apple and purchasing devices directly either from either Apple or mobile carriers. Nowadays, any unsupervised/non-DEP devices running iOS 11 and above can also be added into DEP through Apple Configurator. This capability is the main focus of this post as there are many other use cases with Apple Configurator which I will share via separate posts. So let’s wipe off those dusty iPhones/iPads from the closet and put them in good use once again!
One clarification for those who are not familiar with Apple DEP as I get this question a lot: Can I still use a DEP device without any restriction from MDM once it’s added to DEP? What we attempt to accomplish here is to make a device eligible to be enrolled in DEP as a supervised device with an MDM solution such as VMware Workspace ONE UEM. Whether you choose to enroll such a device and apply applicable restriction with an MDM solution afterward is totally up to you.
A few more key points to make after consulting with VMware Workspace ONE technical support on this setup:
- A device can be supervised either through Apple Configurator or Apple DEP.
- If a device is supervised through DEP, the supervision is permanent.
- If a device is supervised through Apple Configurator, the supervision will be lost with a device wipe.
- If a device is on iOS 11 and above, it’s best to add the device to DEP and let it enroll through the DEP program. The DEP enrollment procedure is an automated procedure where an MDM profile is installed on the device over the air (OTA).
- One would not need to add the MDM profile to a BluePrint as part of enrollment if we are adding the device to DEP. Doing so will create conflict with the MDM profile being pulled in over the air.
Why do we need it?
Being able to supervise a device will give you much more management capabilities once it’s enrolled with an MDM solution. With Apple Configurator, we can now turn devices with iOS 11 and above that were once not eligible for DEP to participate in the same program without additional cost.
How does it work?
Once the device is supervised with Apple Configurator, it will install a device profile that keeps the device “Provisionally Managed” for up to 30 days. While the user can remove this device profile from his/her device within this grace period, the option will no longer be available once the period is over.
Check out the link below for ideas on how to prevent users from removing this profile during the grace period.
Can Apple Configurator prevent removal of the management profile?
Admin can repeat this process if the user purposely or accidentally removes his/her device from the DEP program before the grace period. This also works for devices purchased through the DEP program from Apple or mobile carriers. This option is particularly welcoming as in the past, devices could not be re-enrolled into the DEP program once they were released (not unassigned) in the DEP portal.
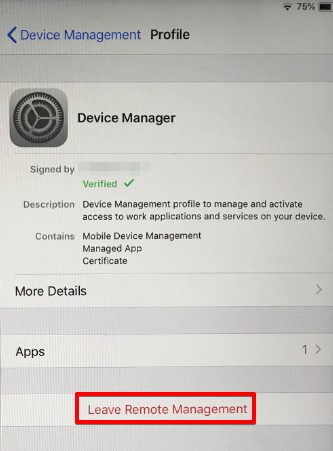
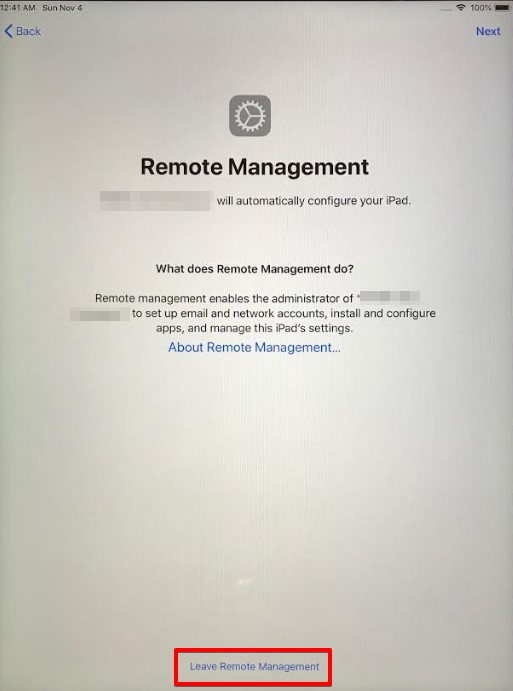
* Notice that this device will still show as Enrolled within the VMware Workspace ONE web console after the user chooses Leave Remote Management within the device. This is because the device wouldn’t have the opportunity to send a status update back to the web console during the removal process.
What do we need to get started?
- macOS with Apple Configurator 2.5 or later and iTunes 12.3 or later installed (don’t you wish this is also available for Windows OS?)
- A non-DEP device with iOS 11 or later installed including iPhone, iPad, Apple TV, and even iPod touch.
- Devices running iOS 10 and below can still be supervised with Apple Configurator. However, such devices cannot be added to Apple DEP with the same program. If such a device is ever wiped, the supervised profile will be deleted and thus it must be added back with Apple Configurator again!
- Be sure Find My iPhone is turned off from this device as well.
- Internet connectivity is required so that the device can be added to your DEP account during the process. You can follow one of the three options below:
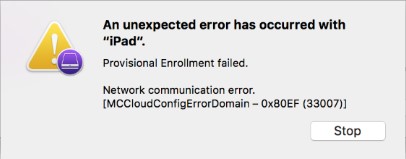
- Execute the setup assistant on the device only up until WiFi is configured and connected and no further than that. Otherwise, it will generate an error and force you to wipe the device before the device is added to Apple DEP (see screenshot below.)
- Alternatively, use Internet Sharing feature on macOS to share Internet to the device over USB connection (see screenshots below.)
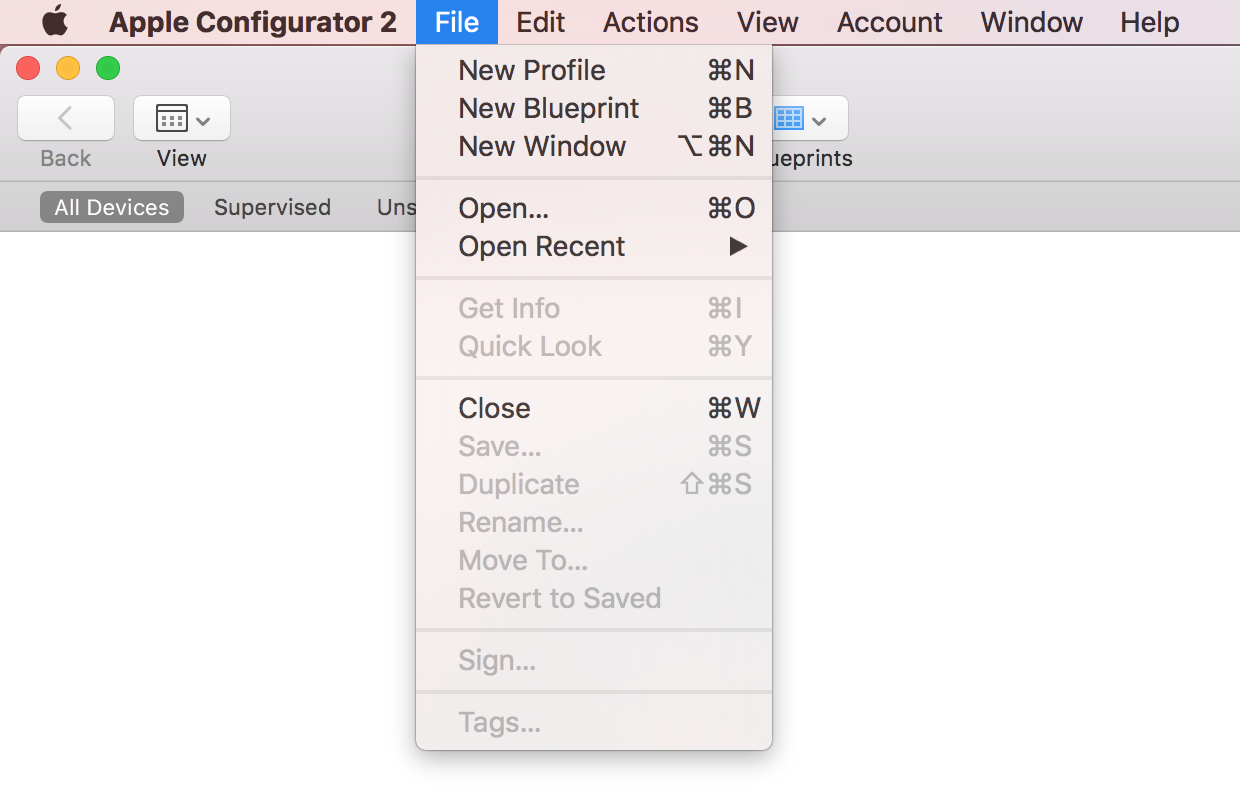
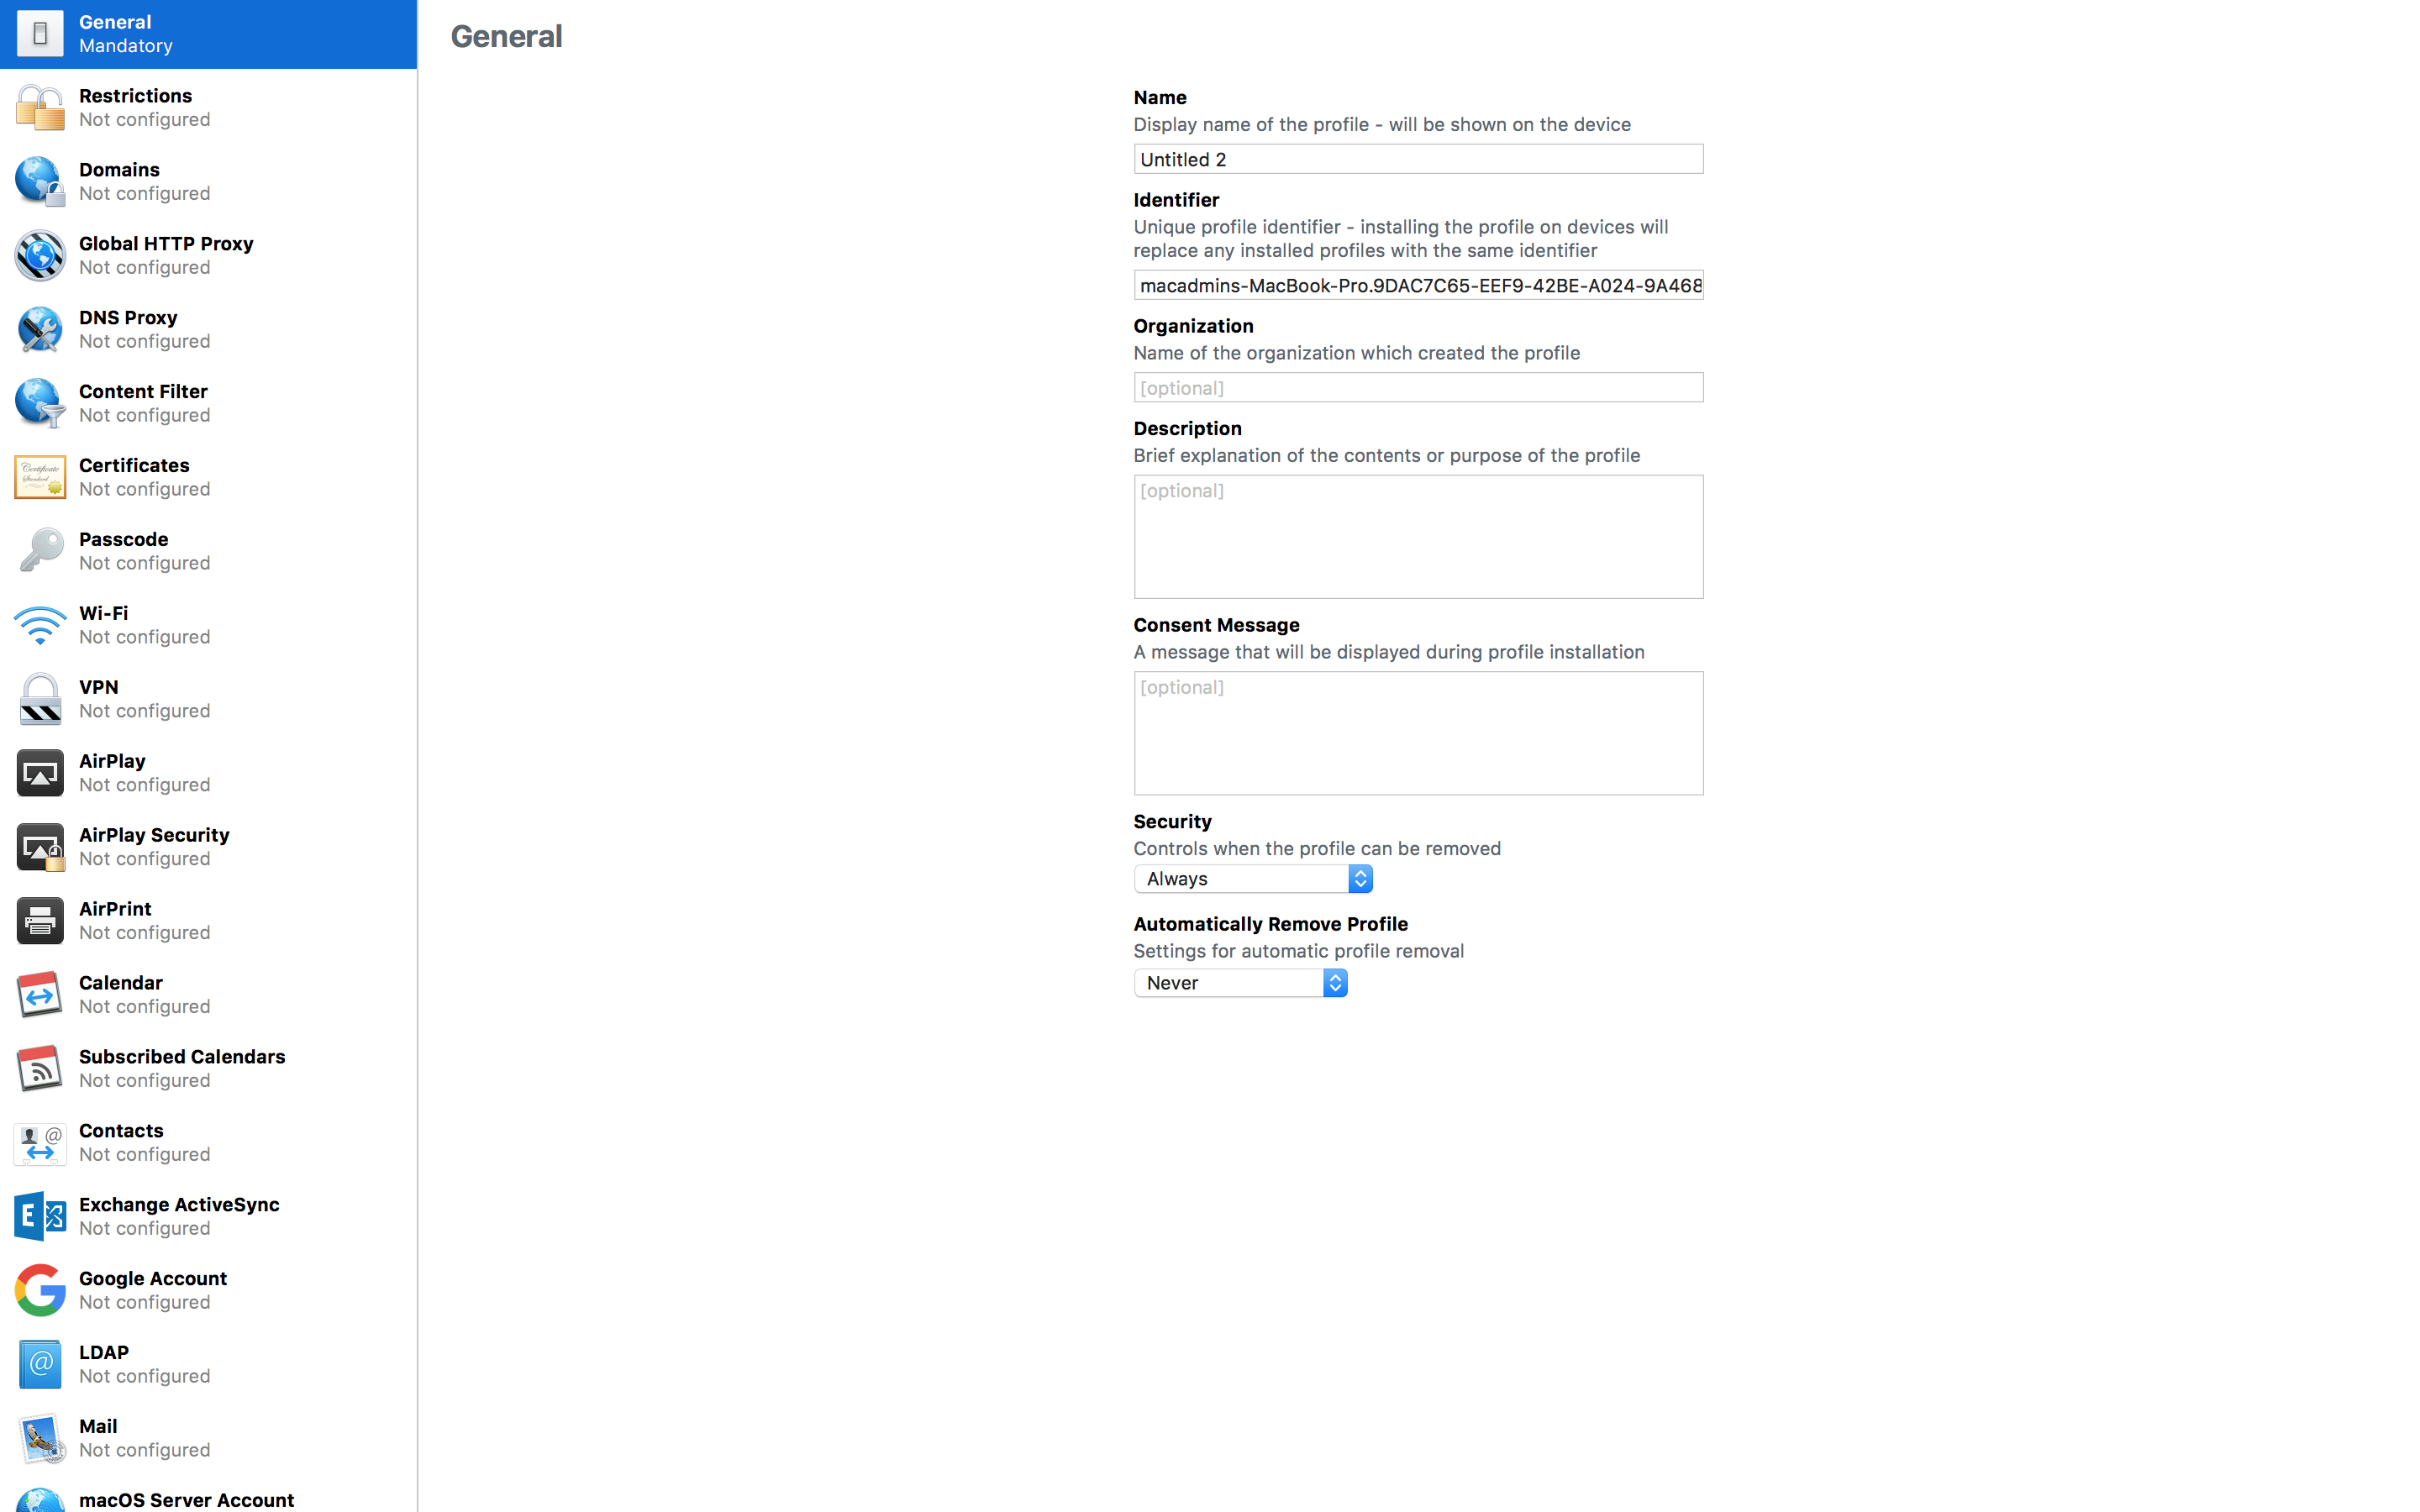
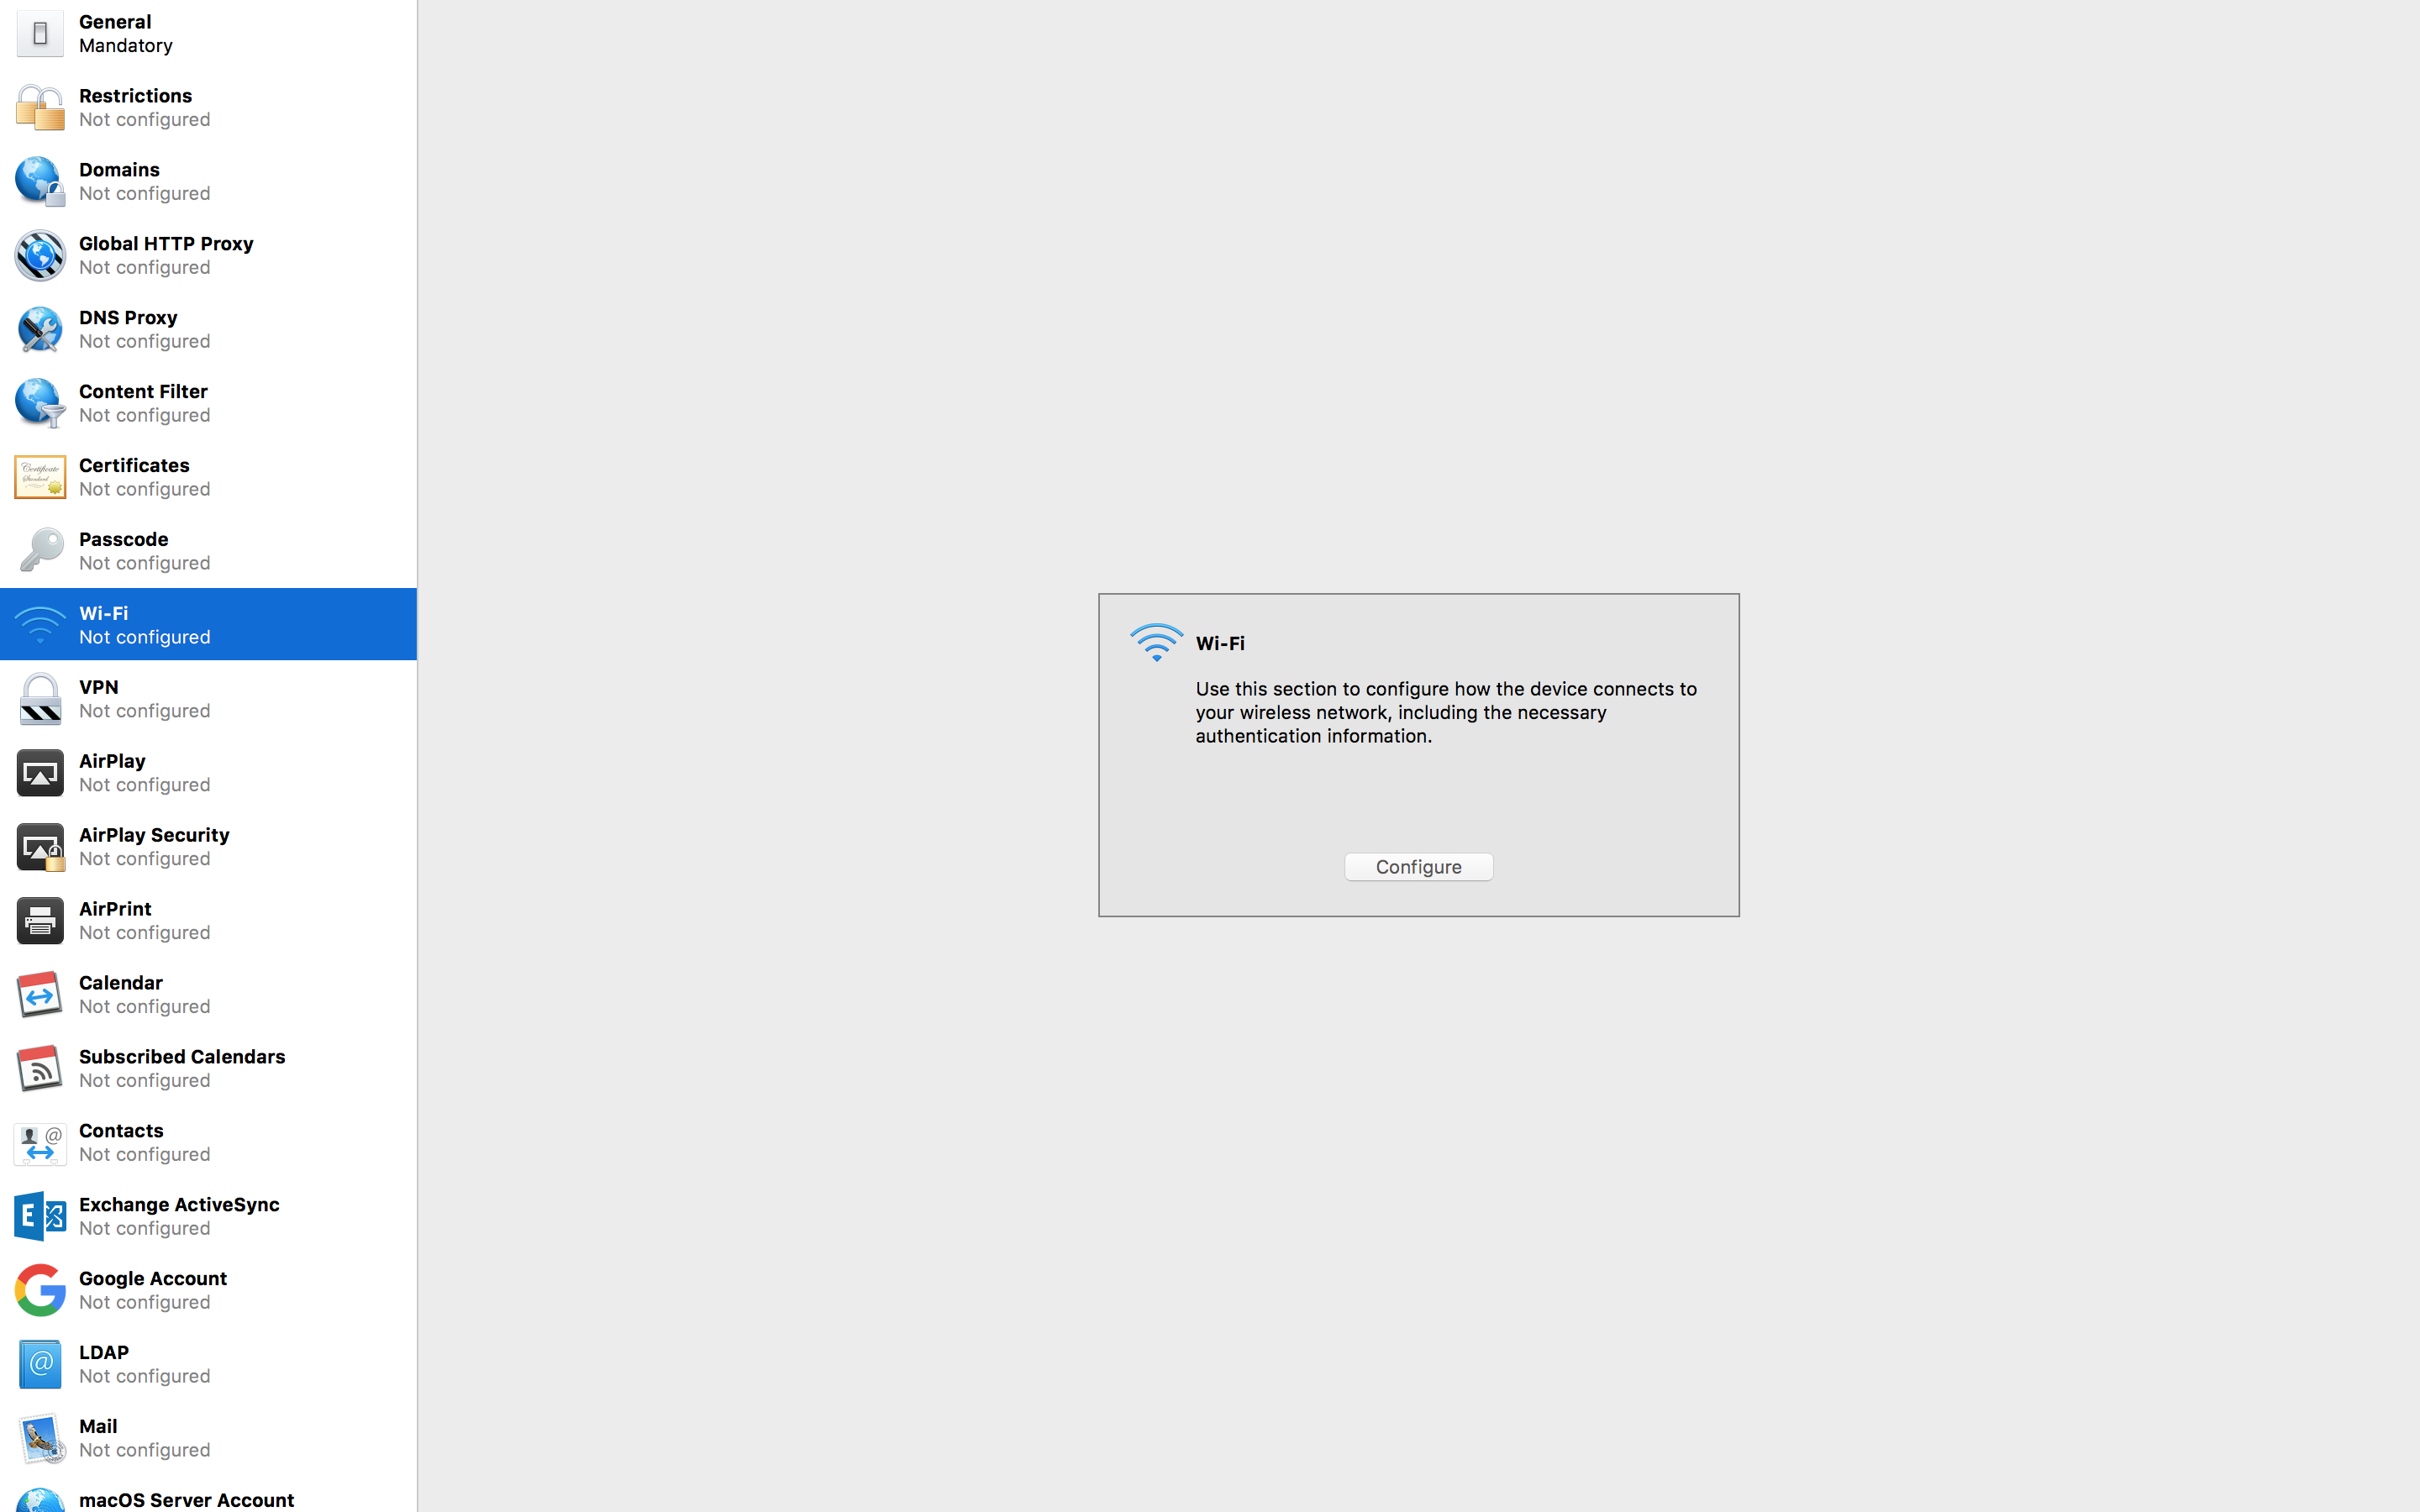
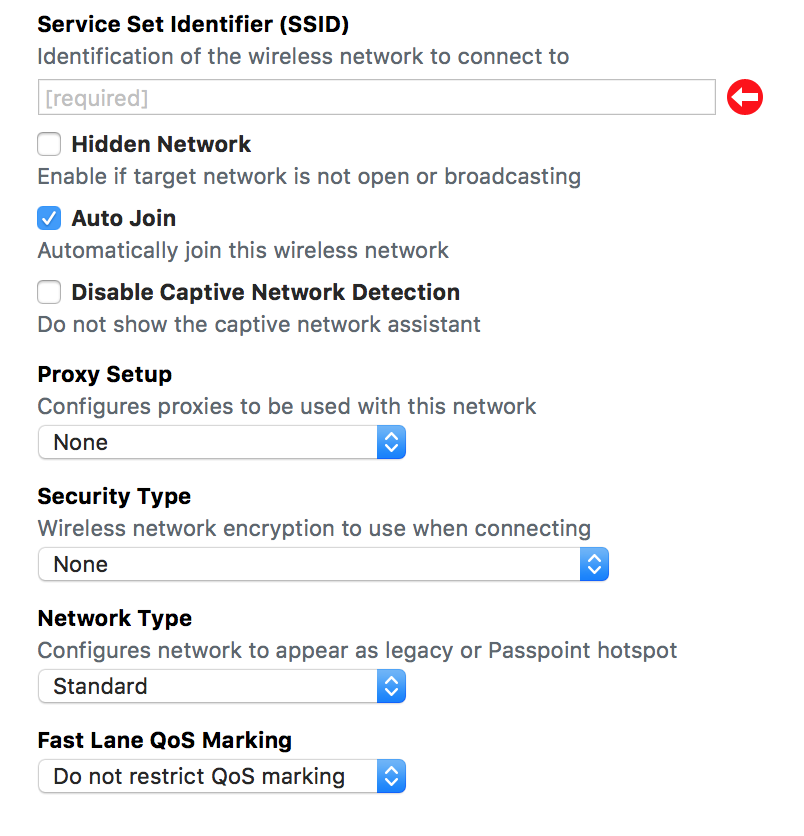
- You can also configure a Wi-Fi profile within Apple Configurator and attach it to a blueprint (more on what a blueprint is later) by going to File -> New Profile -> Wi-Fi -> Configure.
- USB cable (maybe support for Bluetooth will be coming soon?)

You will get the error below if the iOS device does not have an Internet connection during the enrollment process. You may also get this error if the device was already supervised and assigned to an MDM server.
To set up Internet Sharing, choose Sharing after clicking System Preferences.

Here are the steps to configure a Wi-Fi profile.
What are the different approaches we can take?
- Prepare and add a device one at a time to our DEP account, OR,
- Create a blueprint that can be used repeatedly for adding one or more devices to our DEP account at the same time.
What are the steps for these approaches?
There are several “how-to” online guides, and so far neither one from VMware nor Apple impresses me as they are mostly text-based. Let’s see if I can do a better job with this post.
- Introduction to Workspace ONE UEM and Apple Configurator 2
- VMware AirWatch Integration with Apple Configurator 2 Guide
- Prepare devices manually – Apple
The post below from the community forum at VMware Workspace ONE actually has more useful info than any of the links above.
Grandfathering iOS devices into DEP using AC2
Before proceeding further, I recommend launching Apple Configurator and complete the steps below which will help streamline both the blueprint creation and/or a single device enrollment process. You also have the options to set up the same fields during the blueprint creation later on if you so choose.
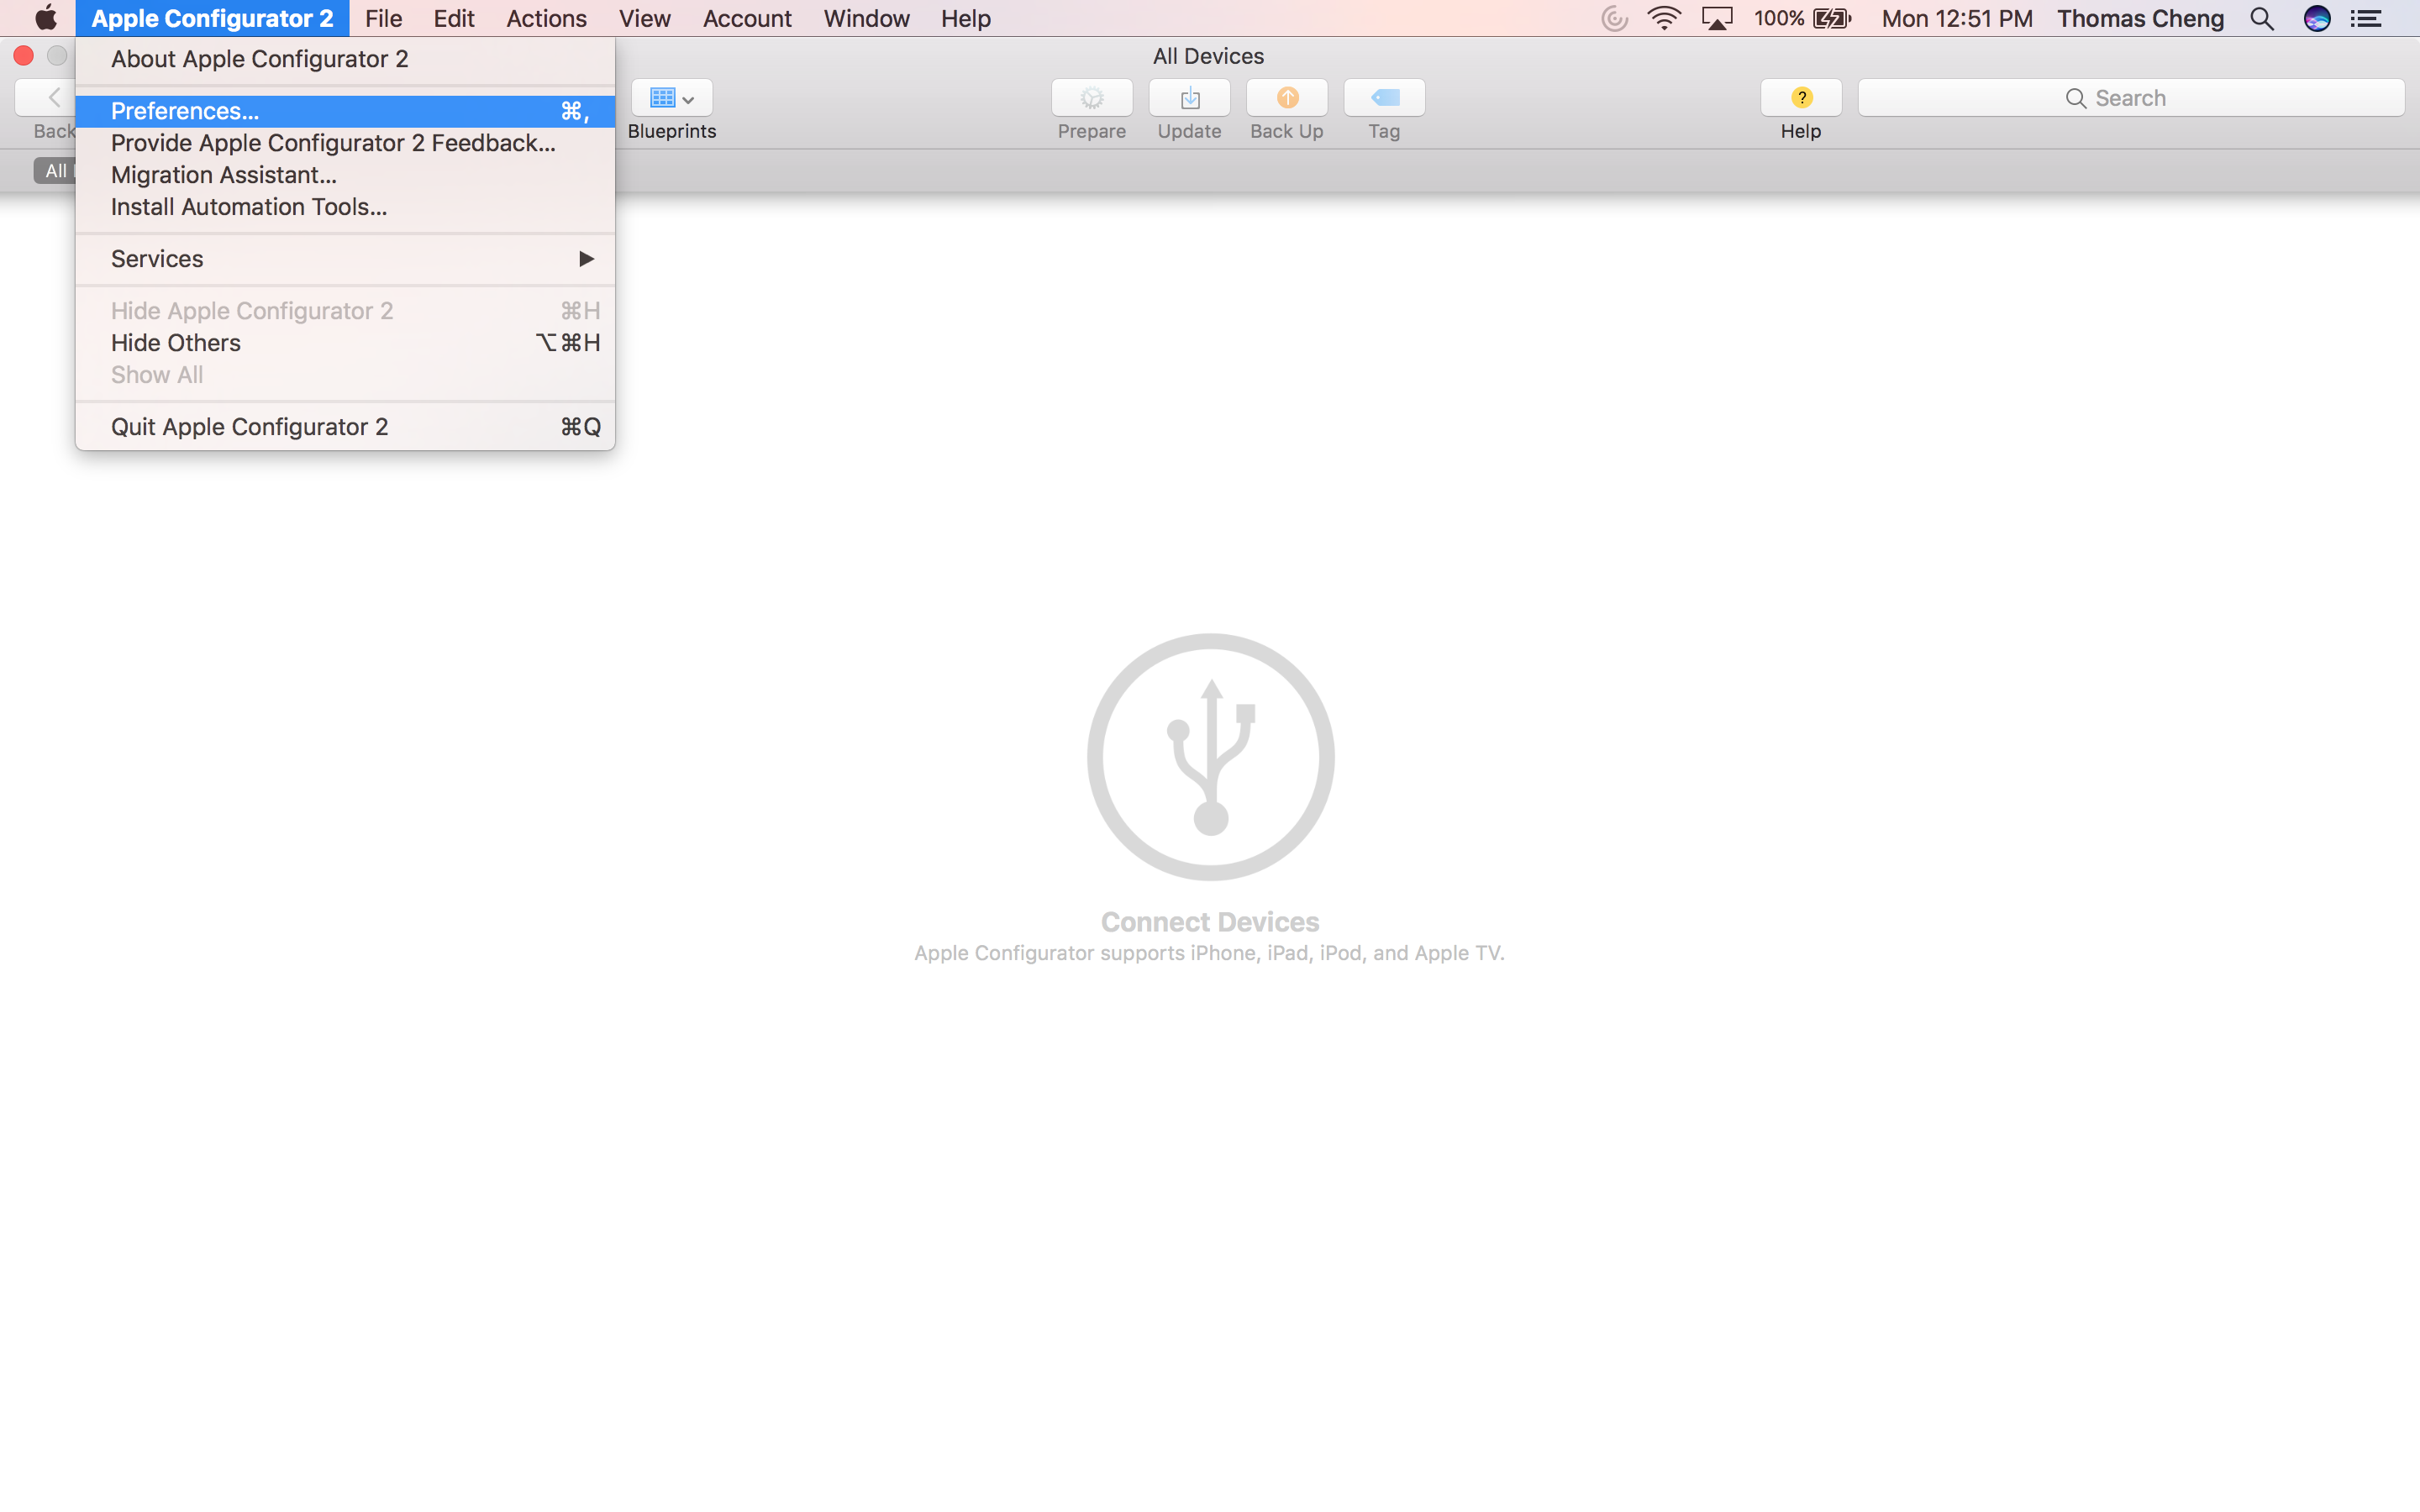
Click on Apple Configurator 2 -> Preferences
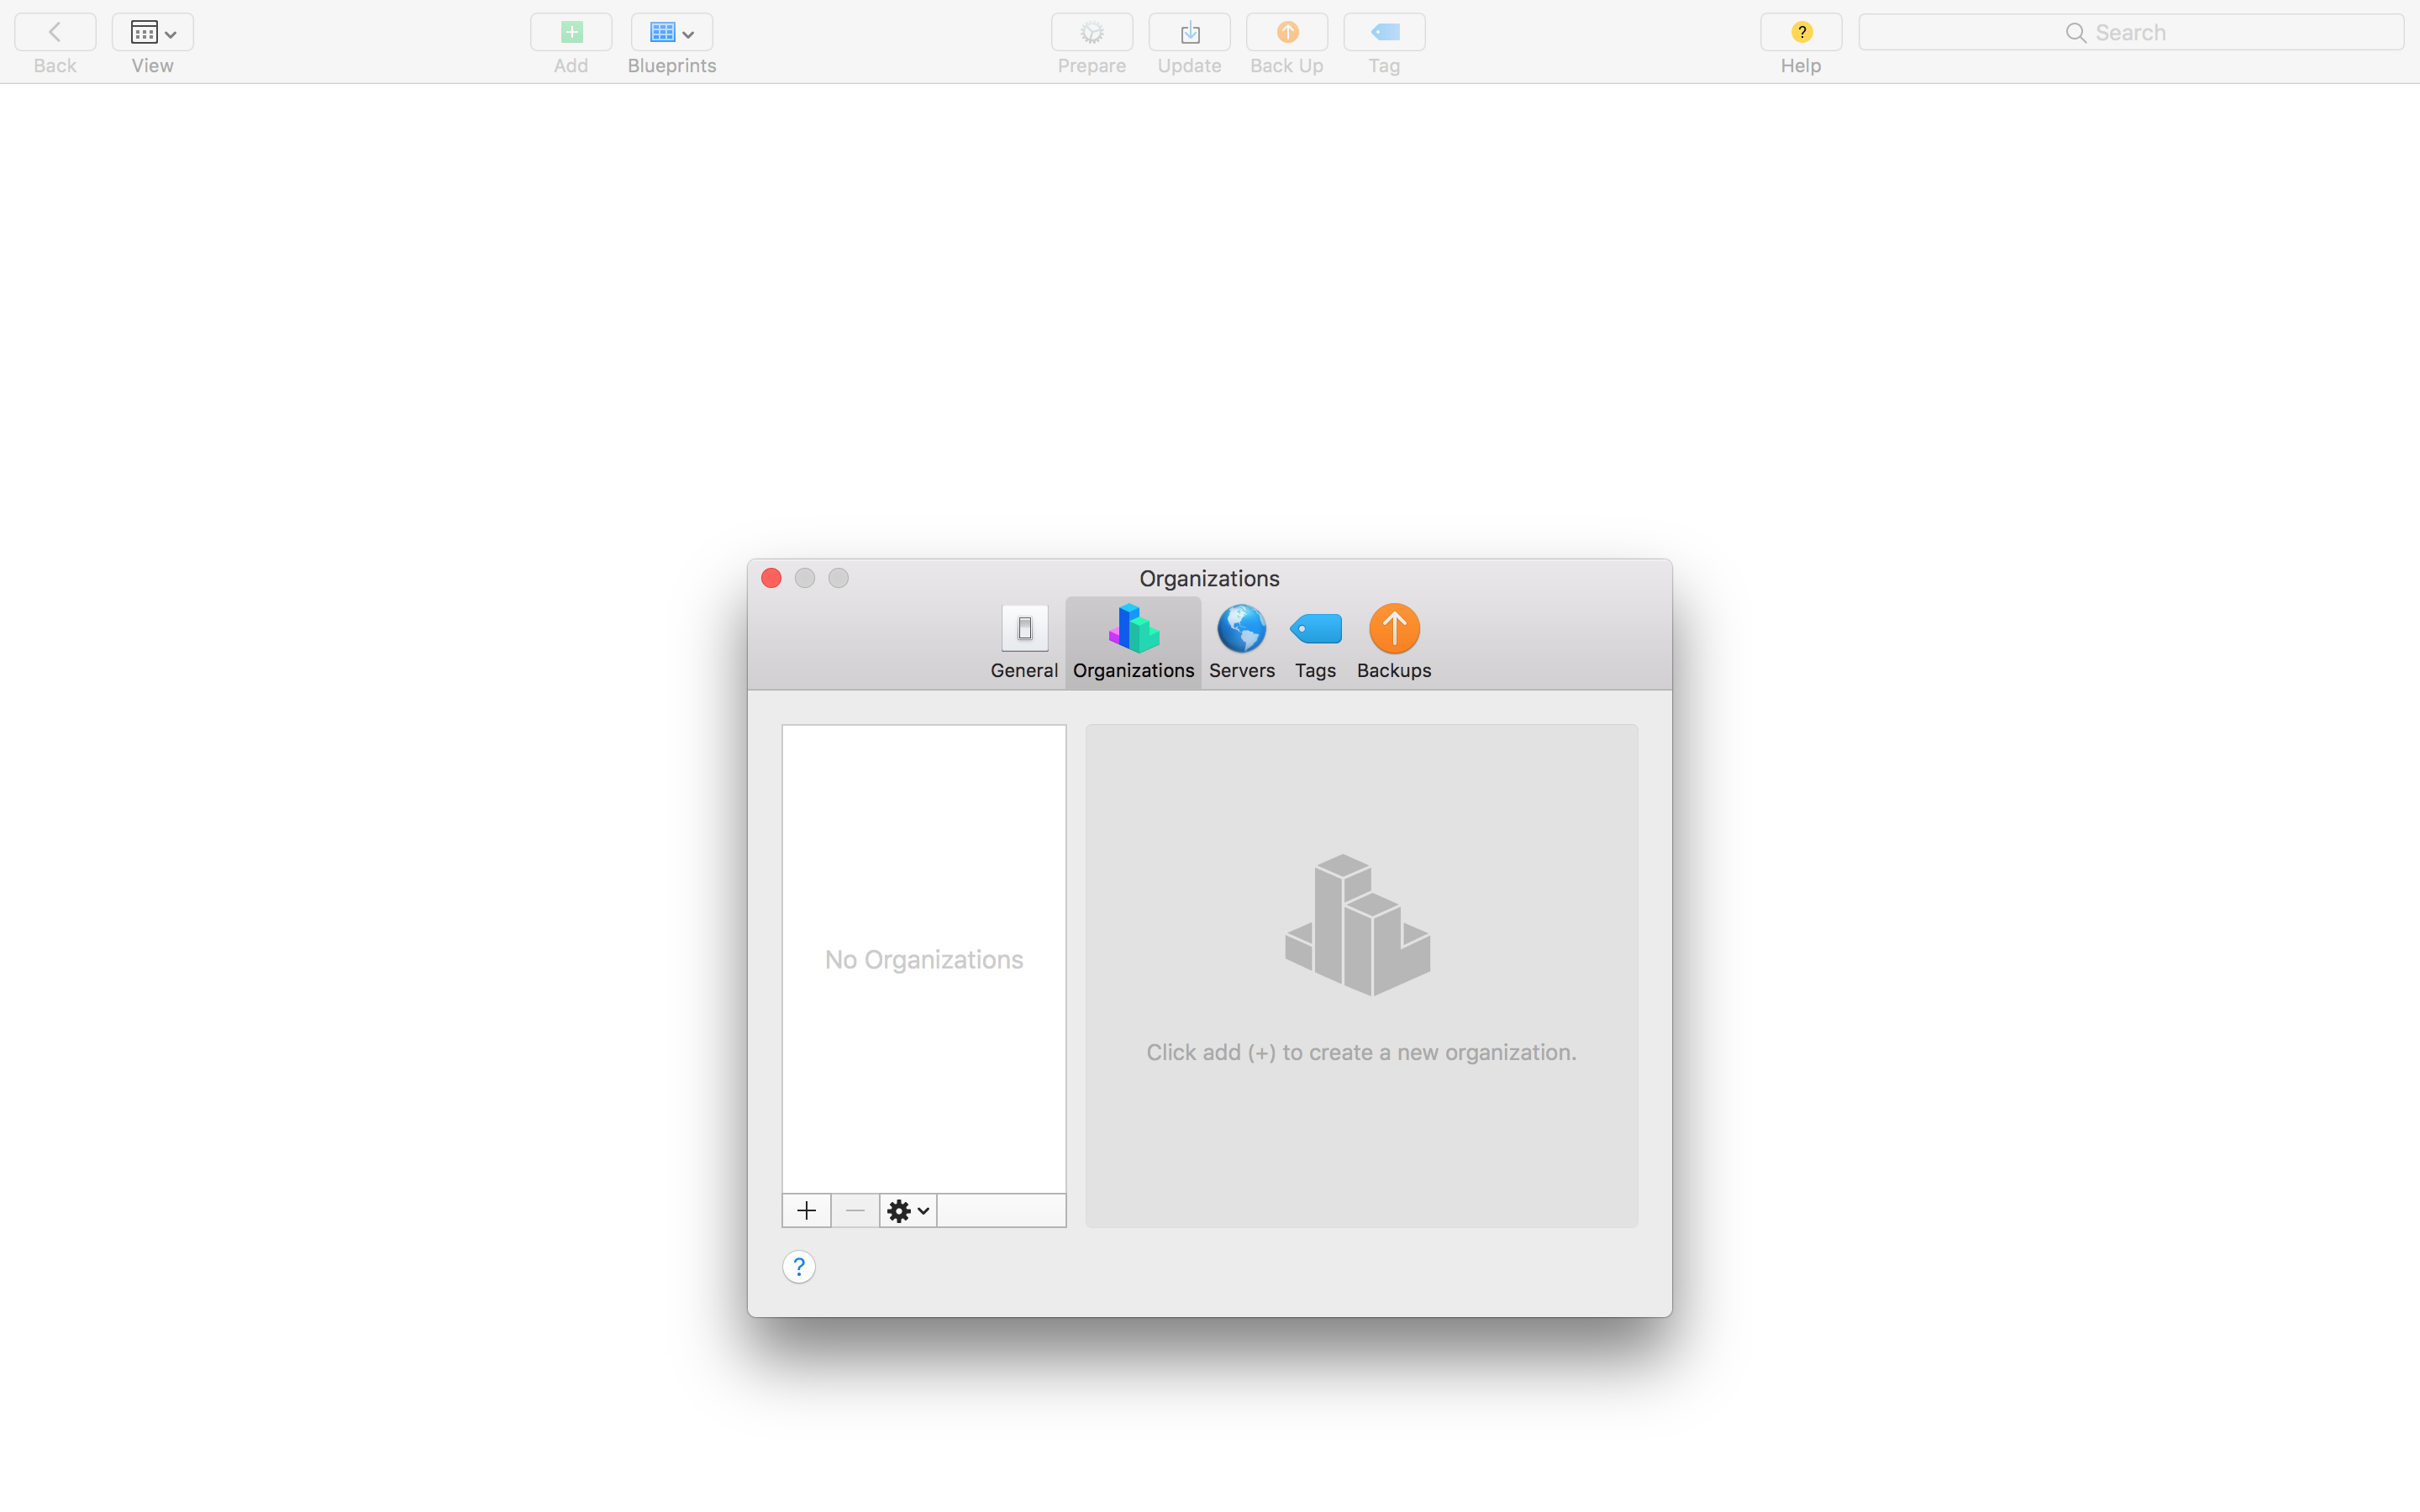
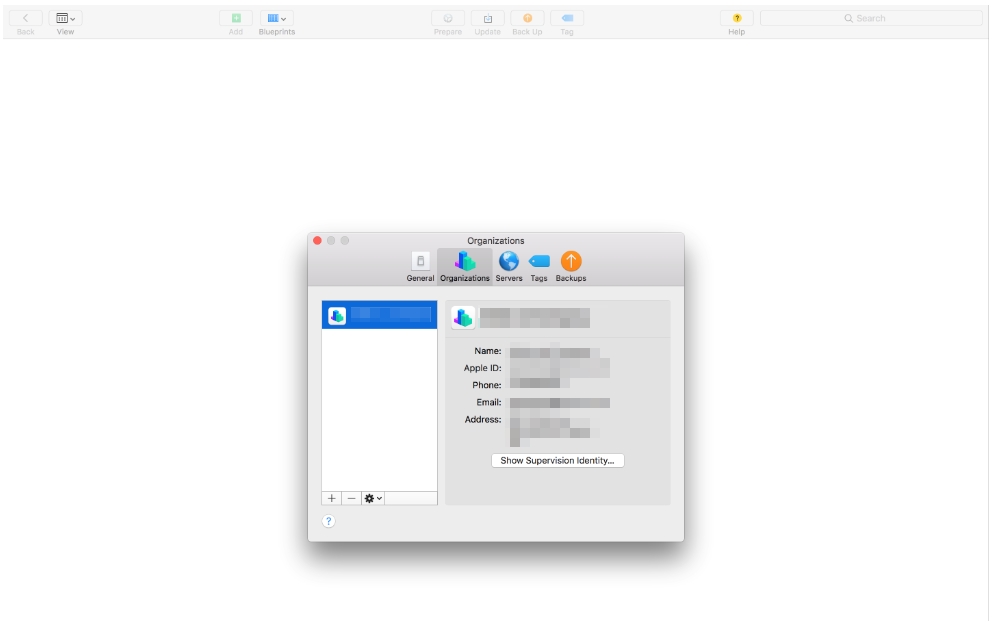
Under Organizations, click on the + sign and fill in the info accordingly.
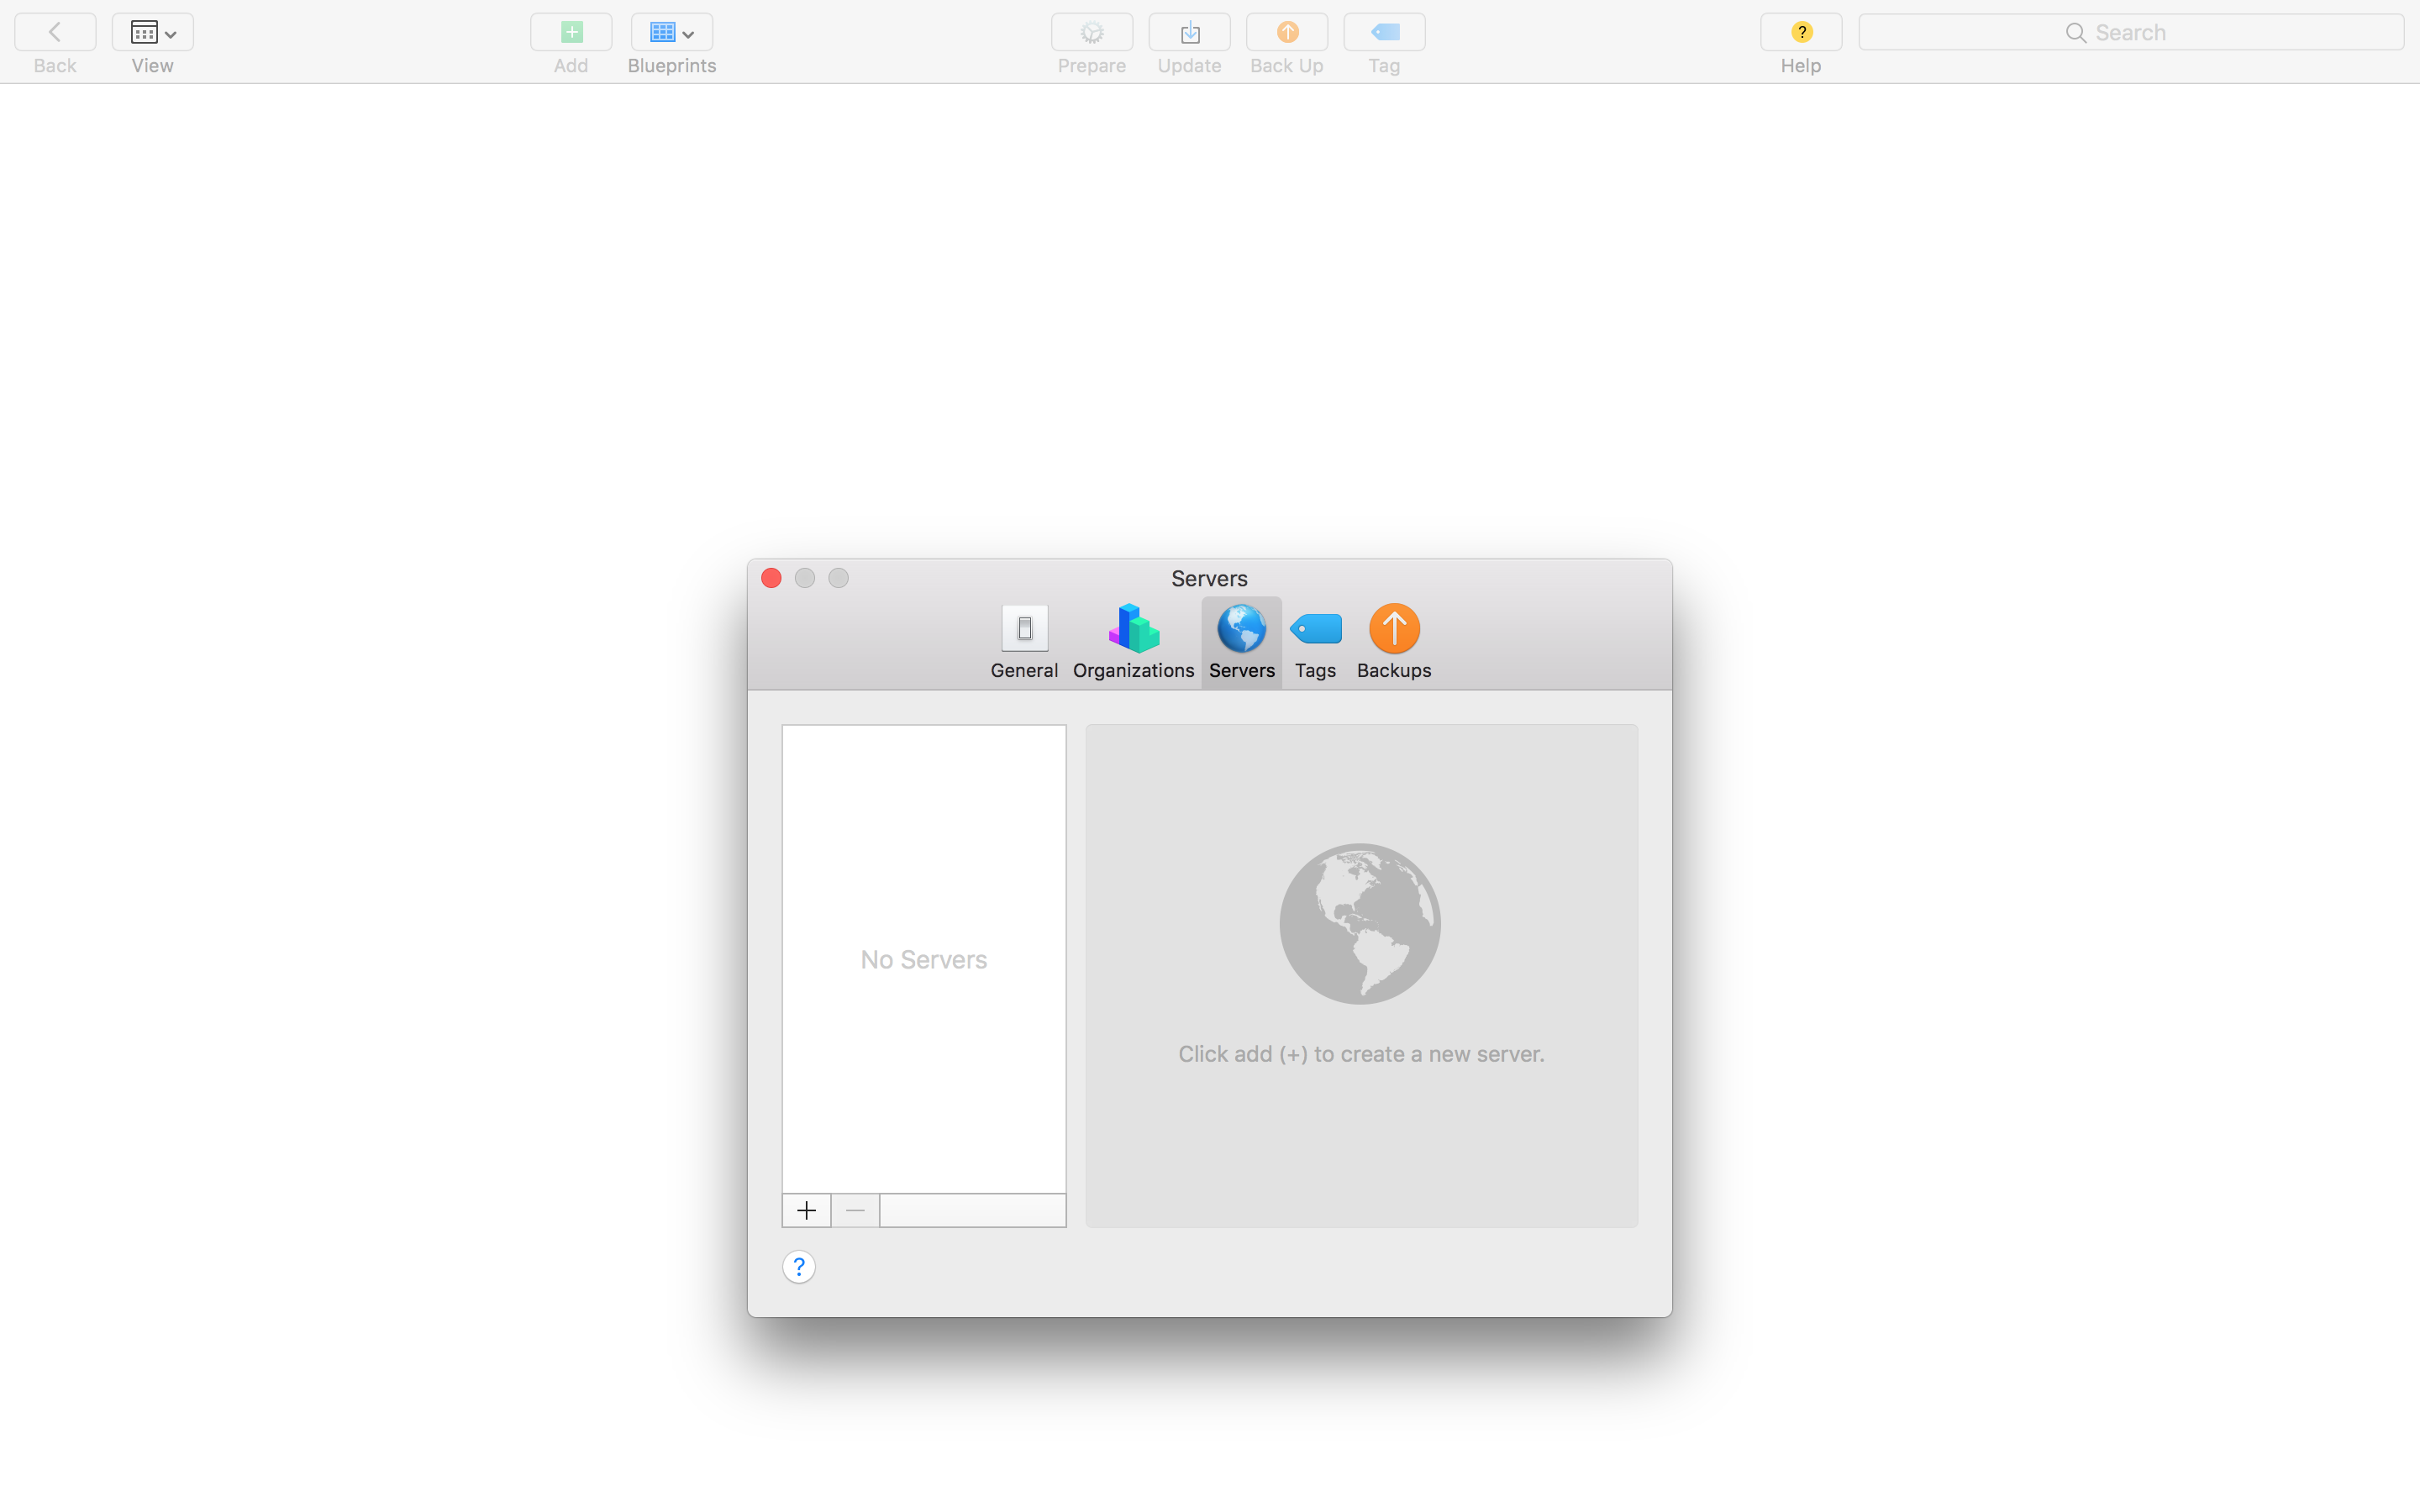
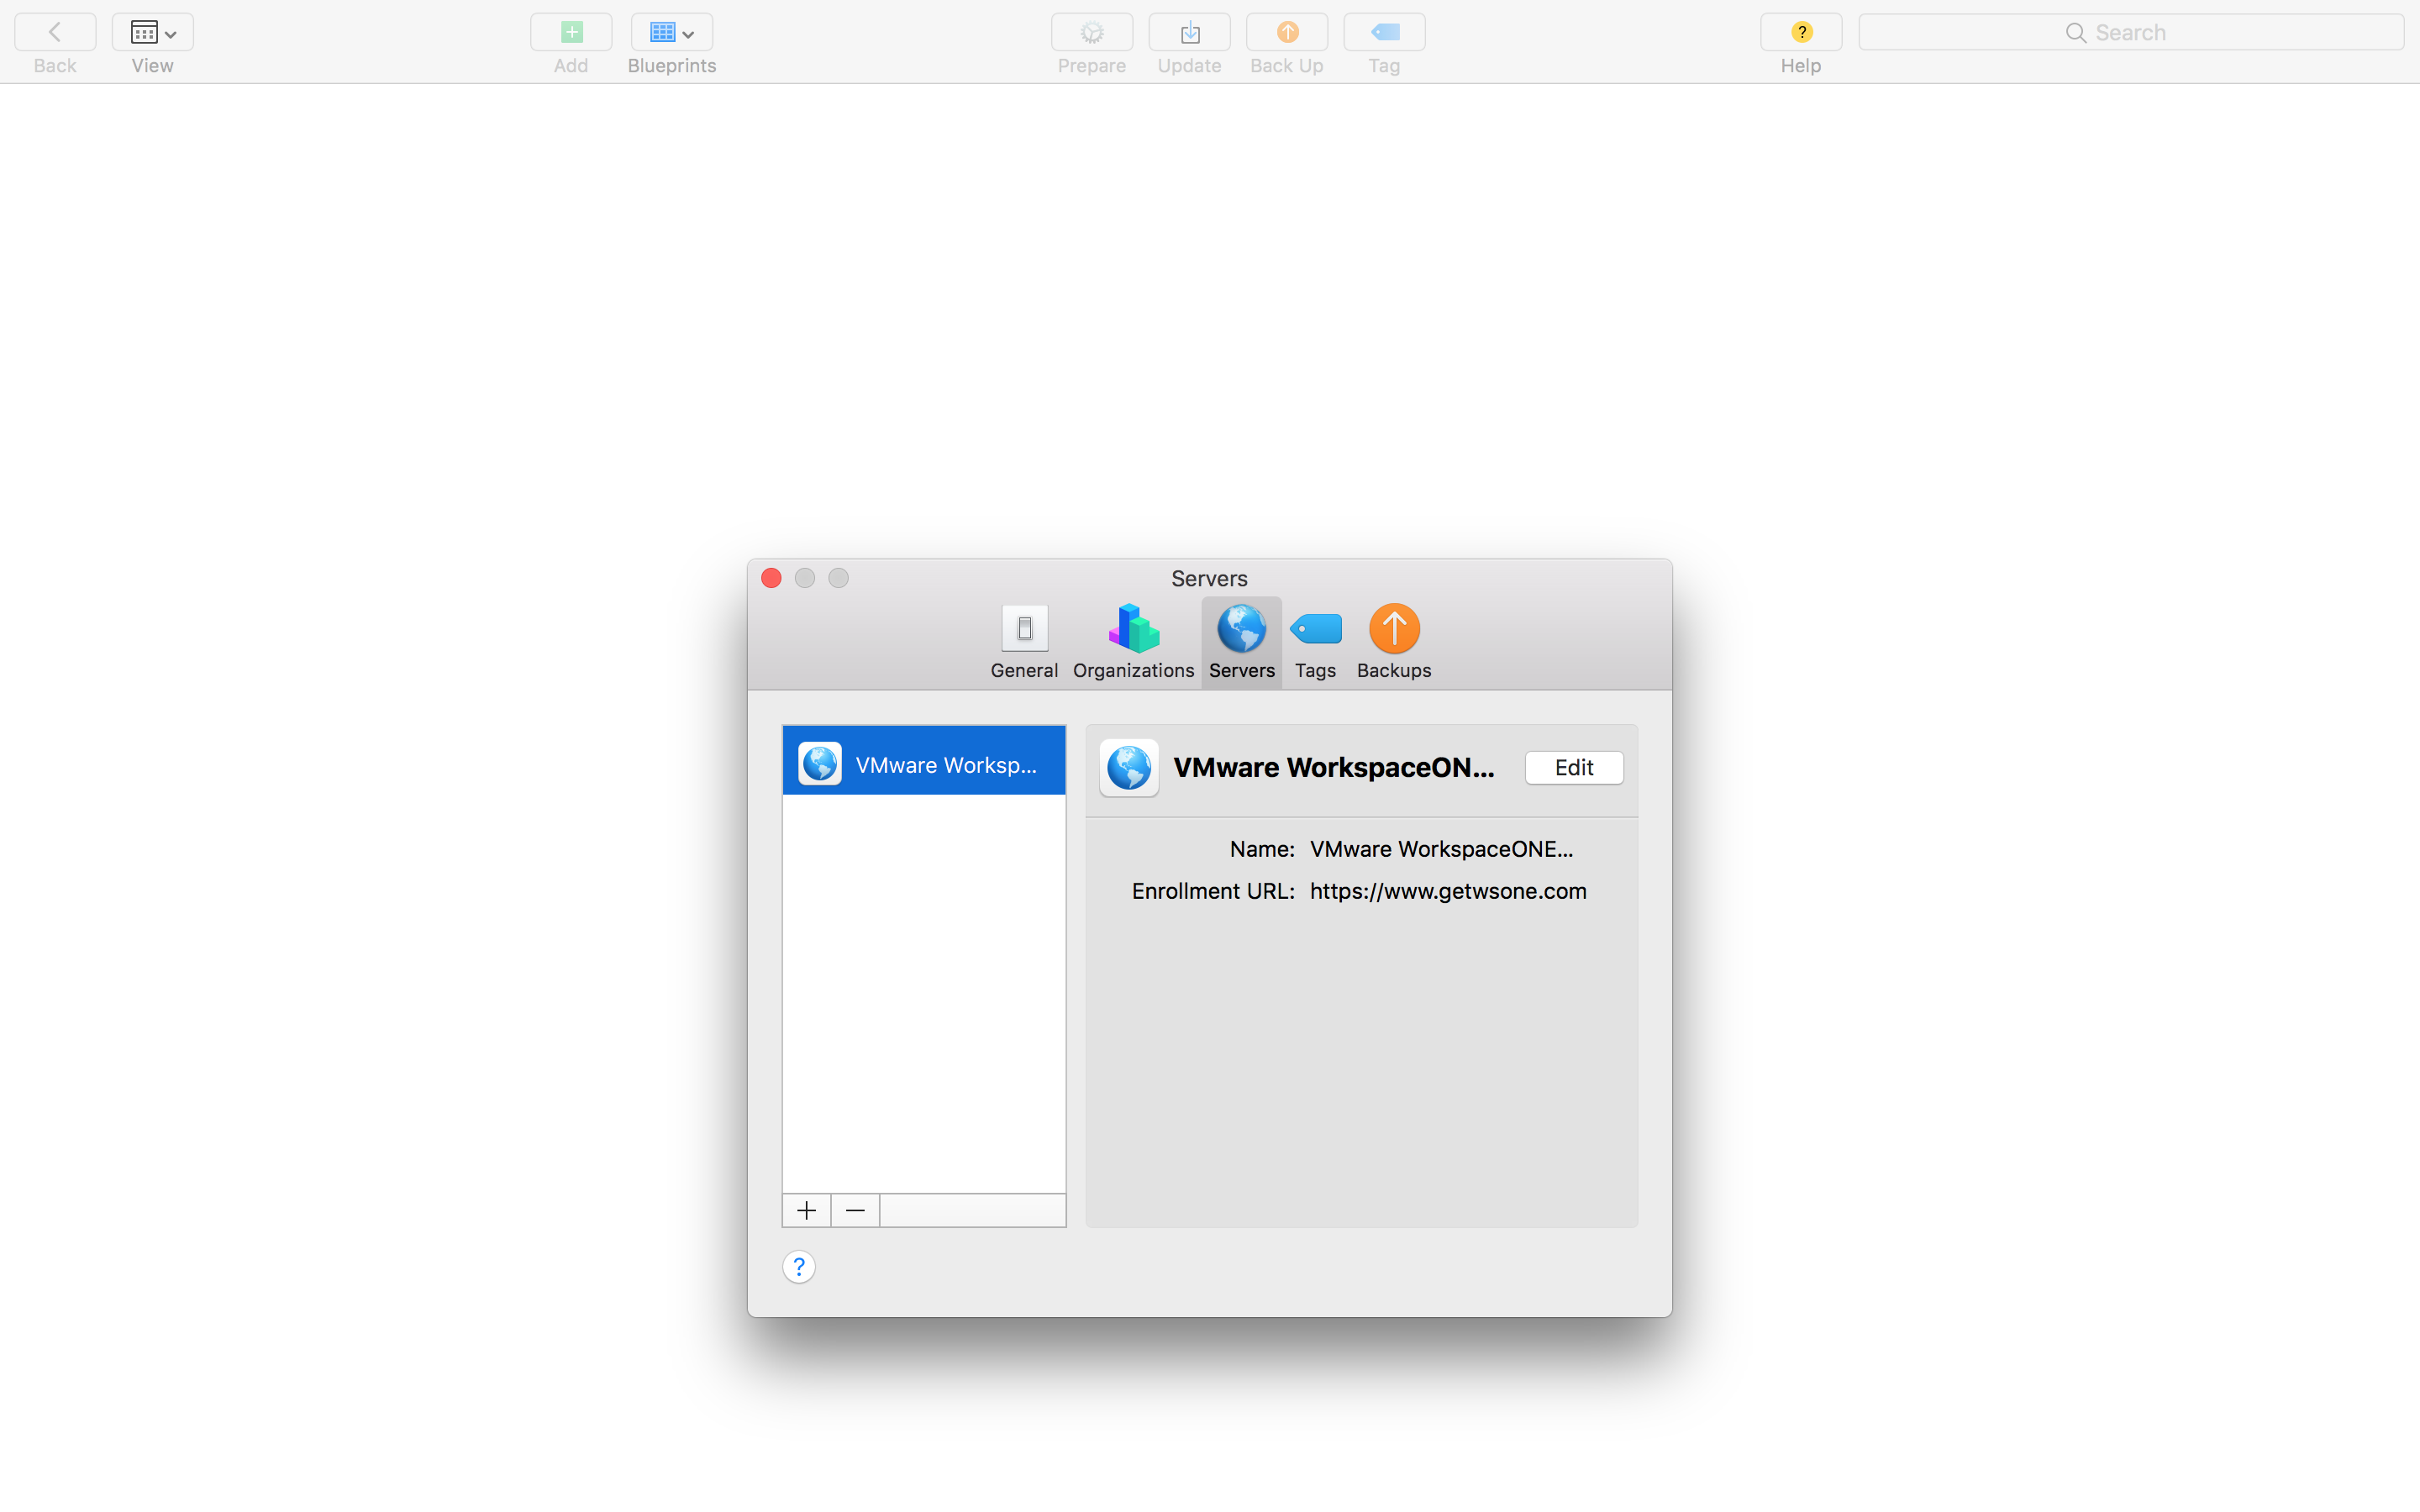
Under Servers, click on the + sign and fill in the info accordingly.


Suppose you prefer not to do any of the above and would like to create a blueprint for repeatable setup, follow step 1 through 5 detailed below. The steps to enroll without first creating a blueprint are very similar as well except you will need to connect the device throughout the process.
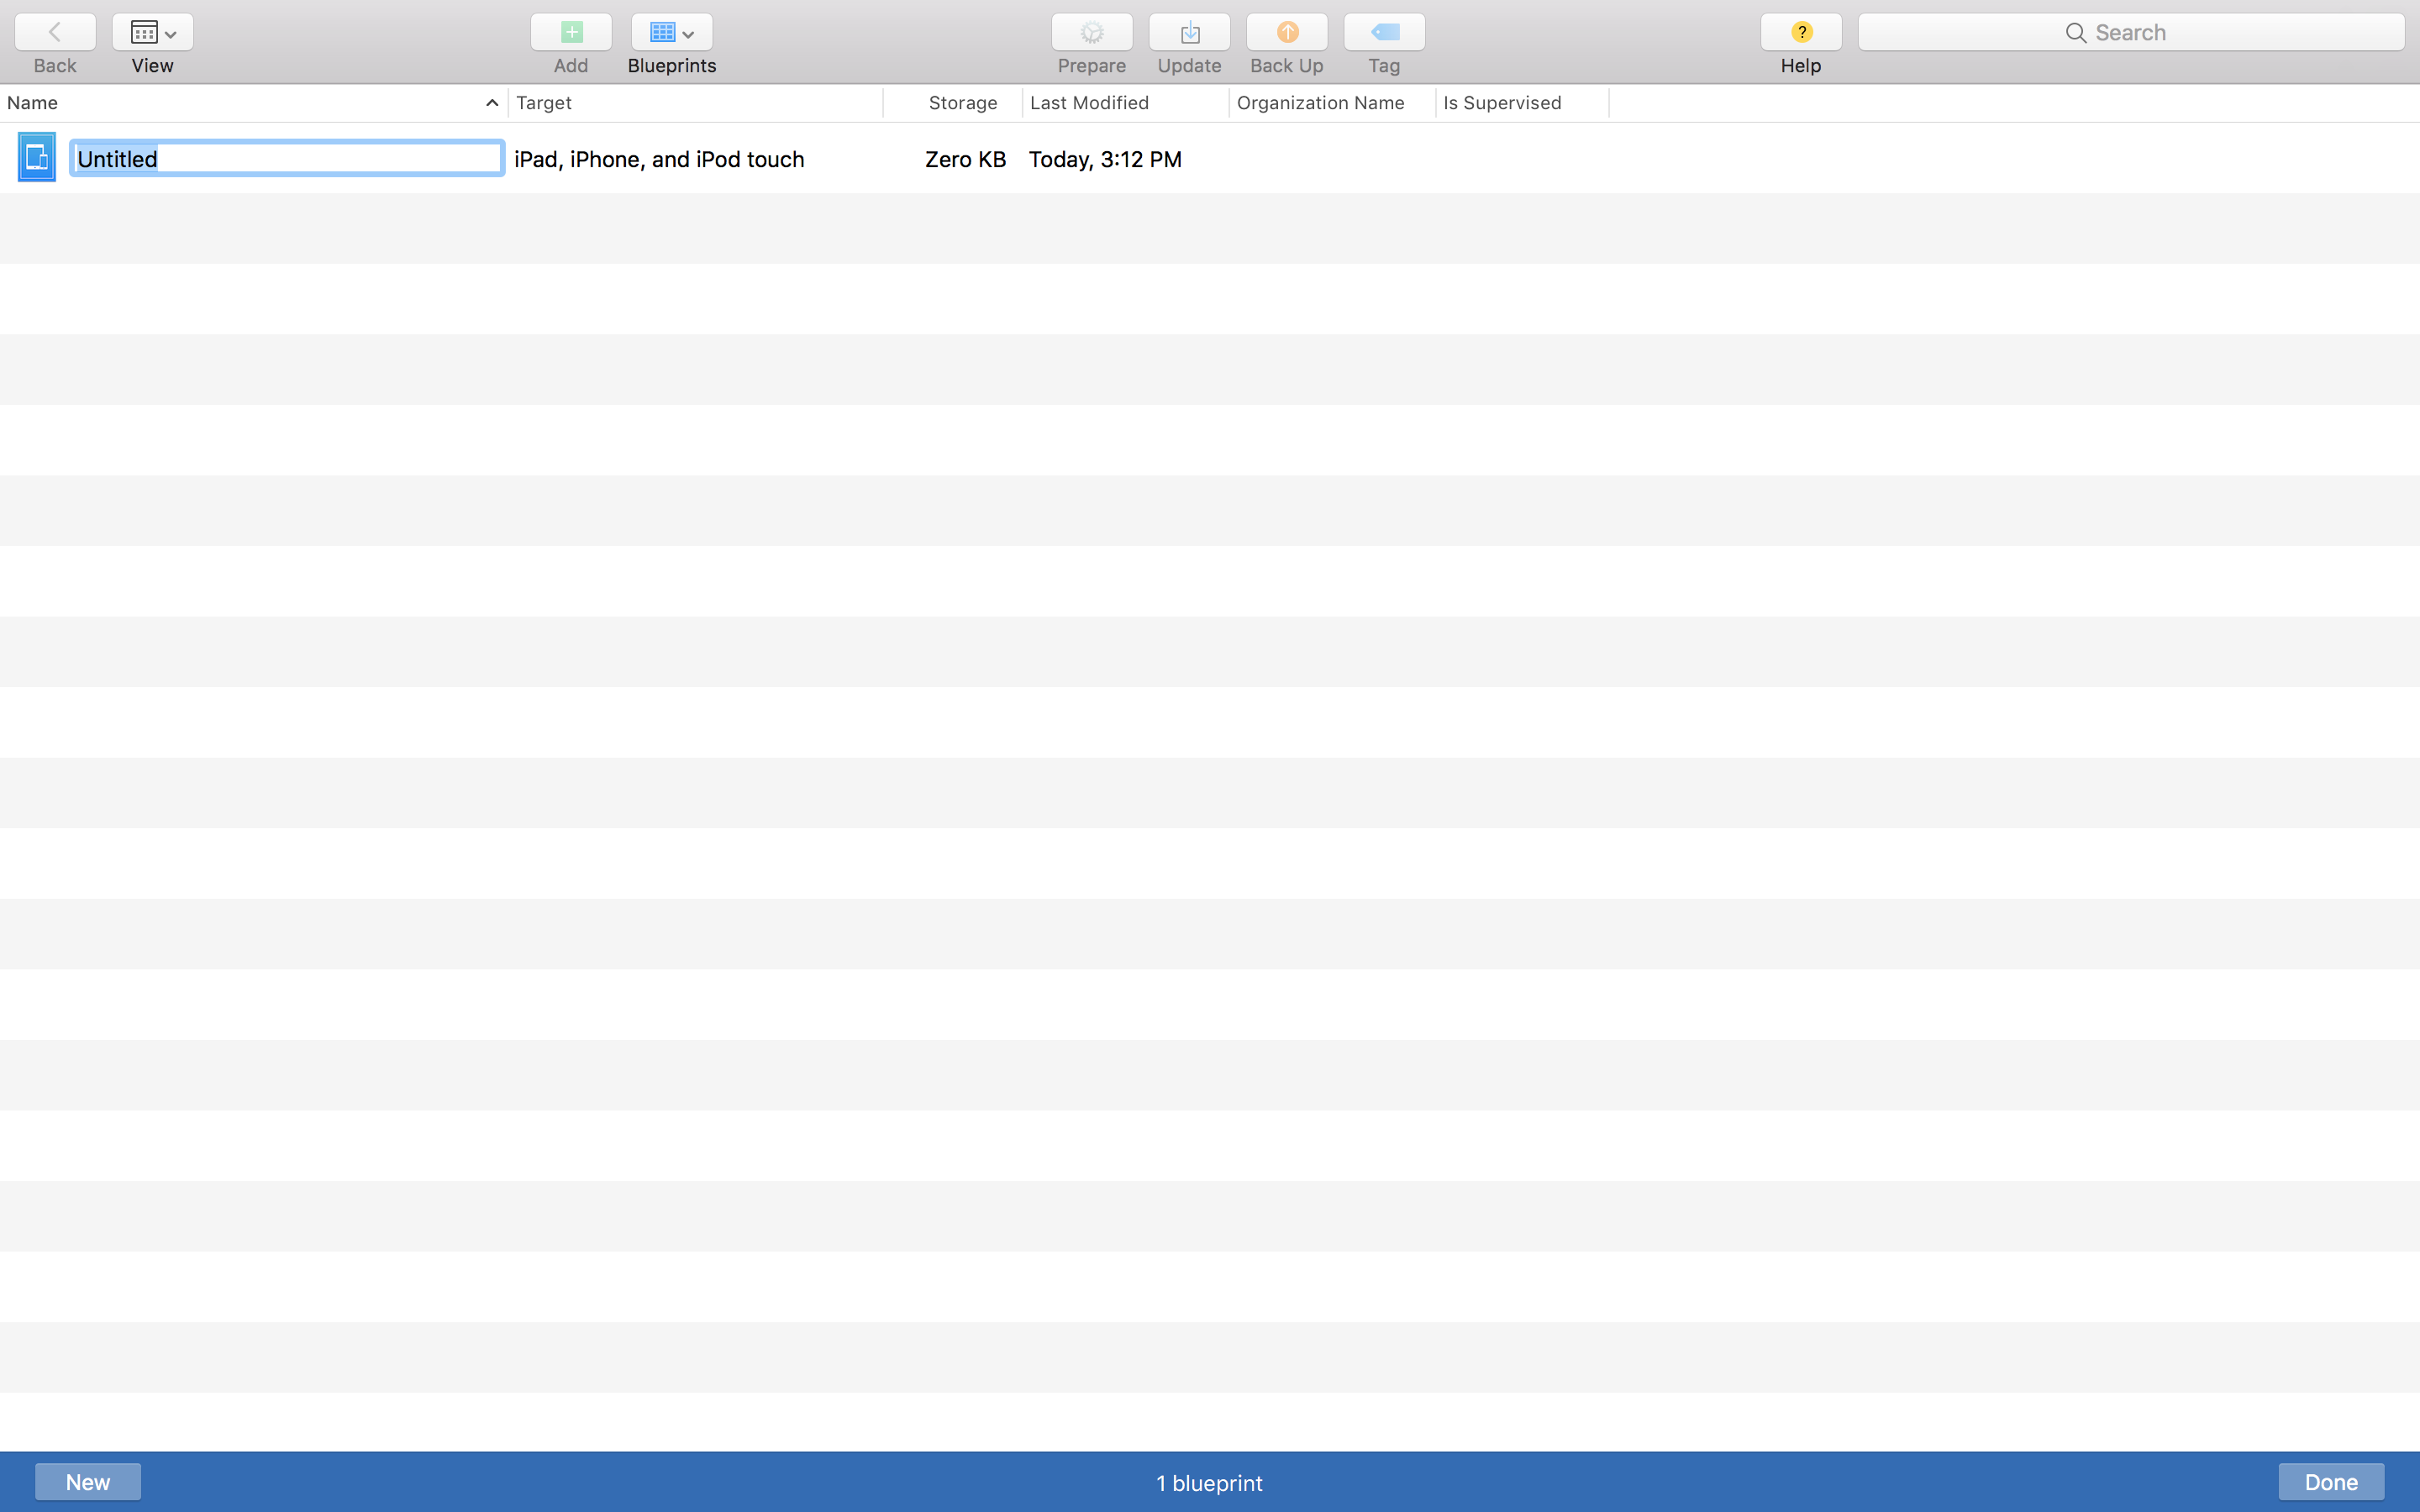
Step 1: Create a new blueprint
Launch Apple Configurator. Then, click on File -> New Blueprint.
Give it a name and then click Prepare on the top menu bar.
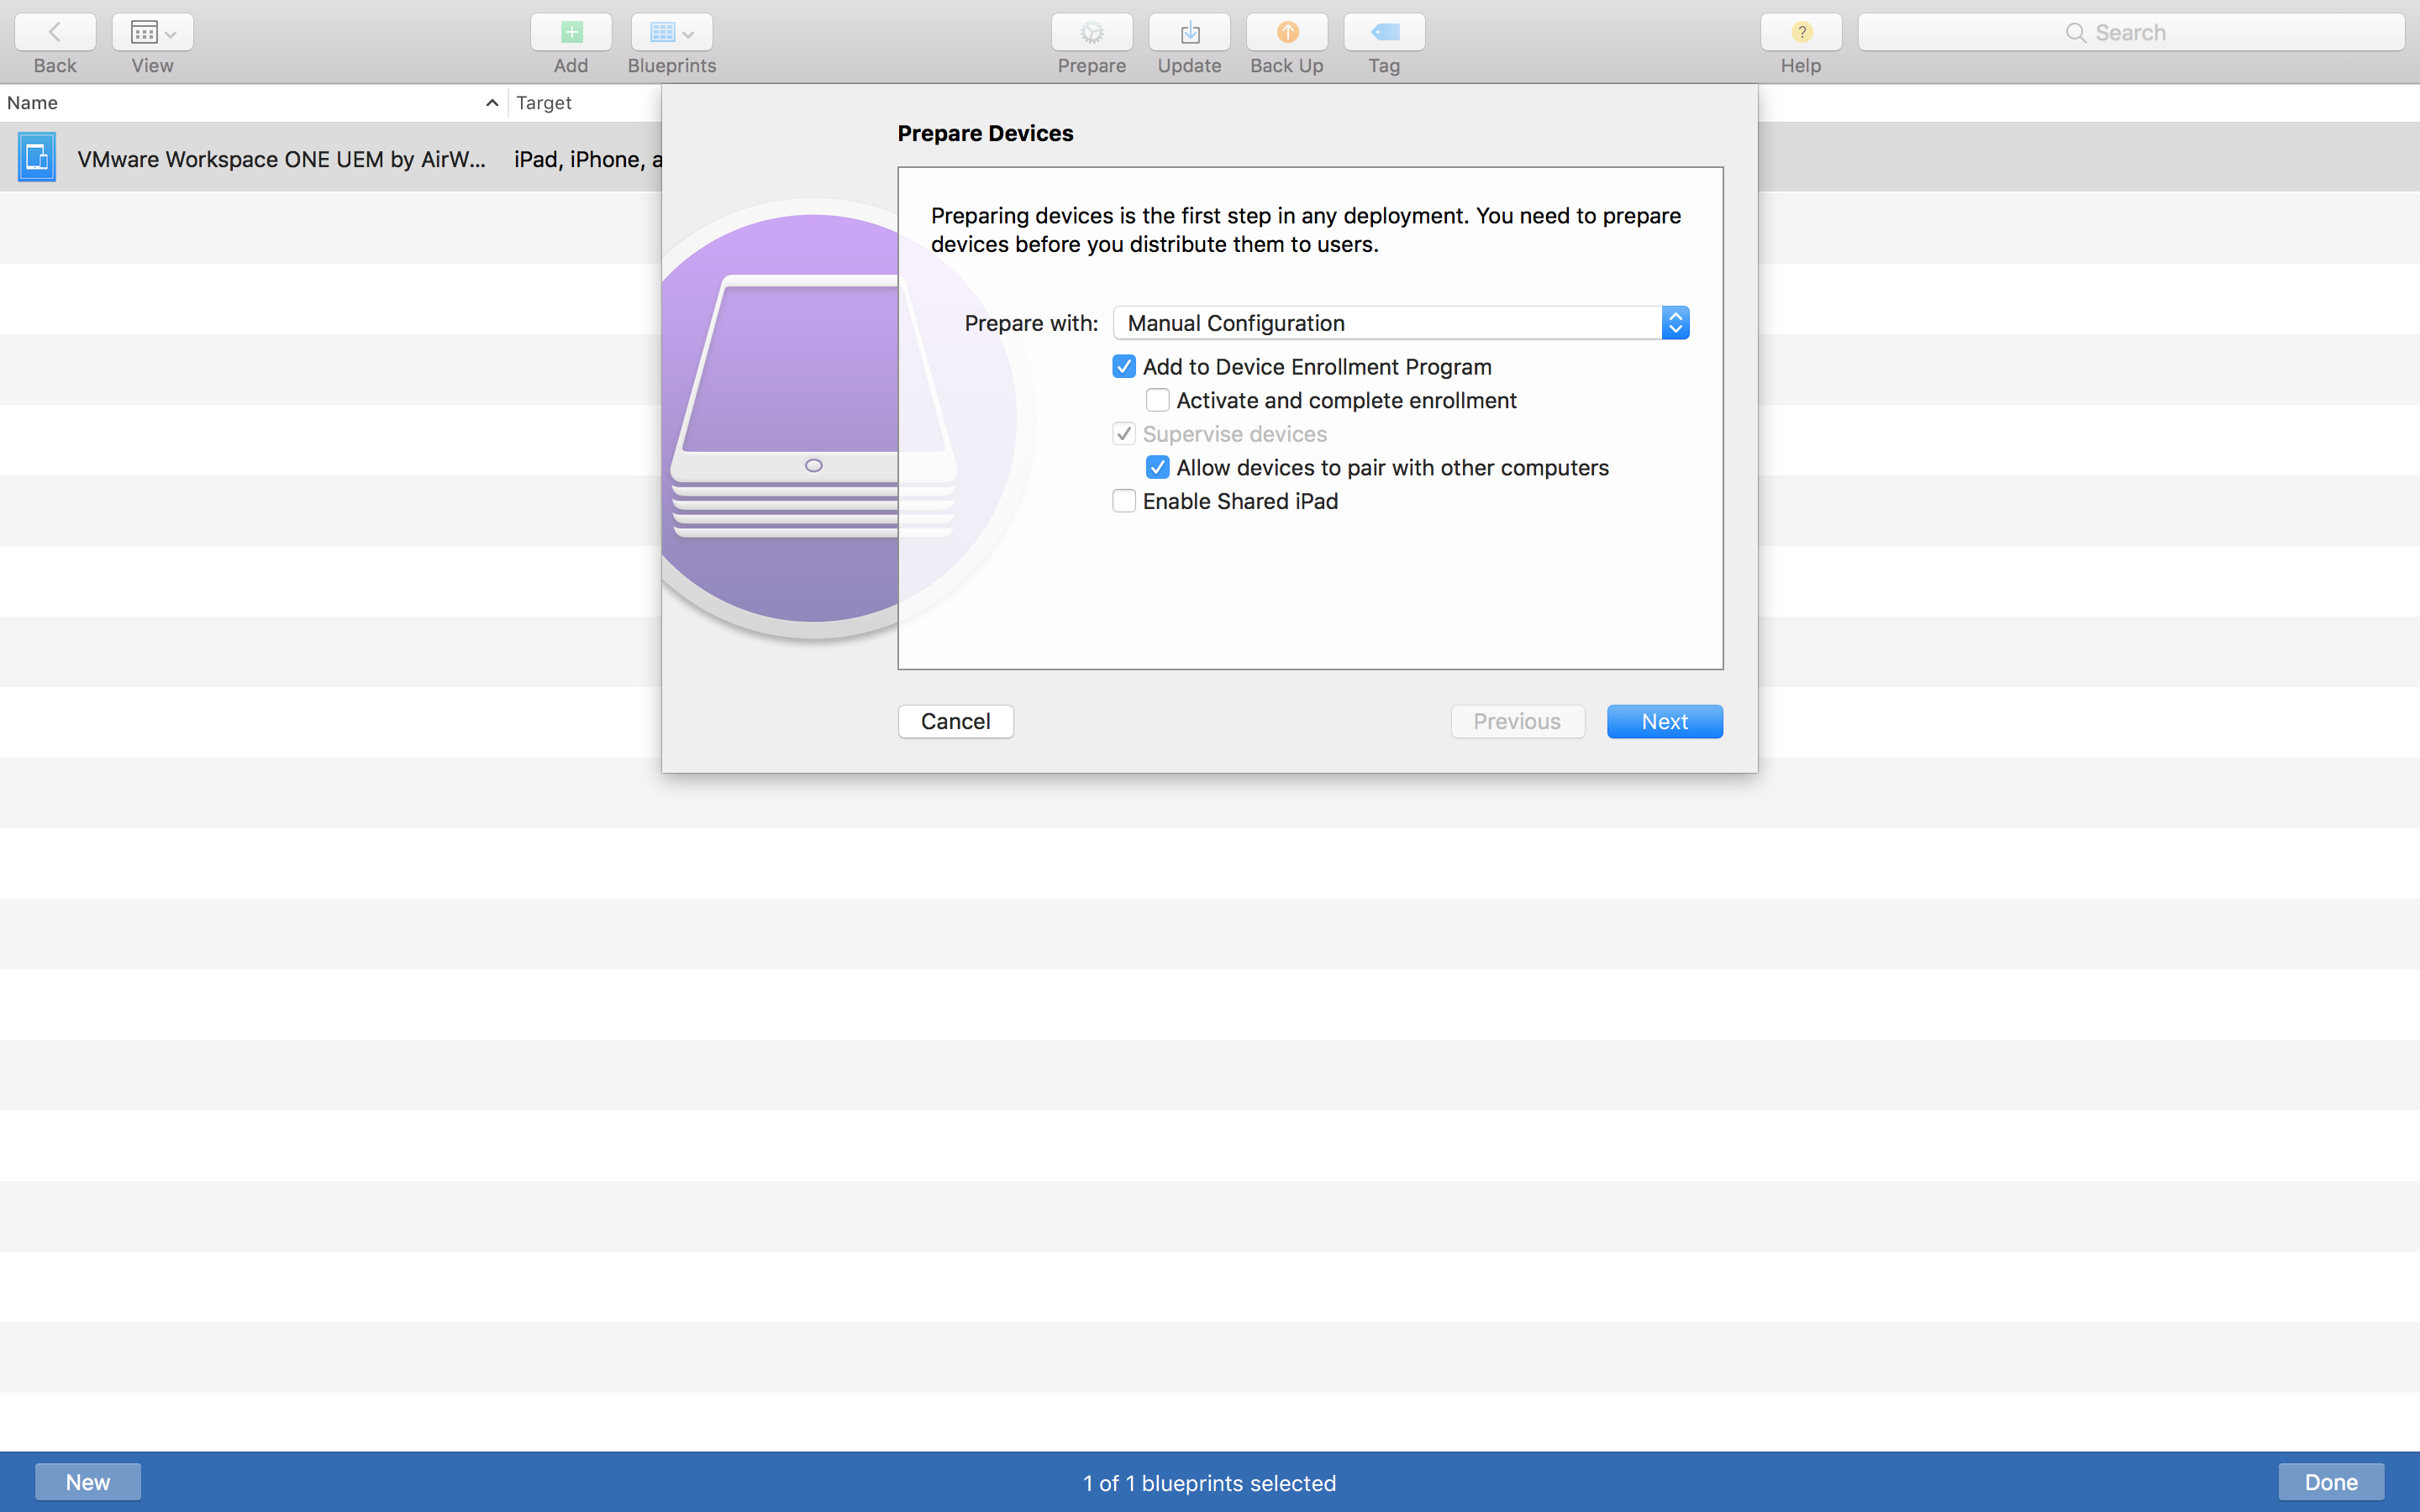
Prepare Devices
- Check Add to Device Enrollment Program
- Uncheck Activate and complete enrollment
- Check or uncheck Allow devices to pair with other computers
- Best to check and use a separate payload to lock down device pairing if you wish.
- Then, click Next.
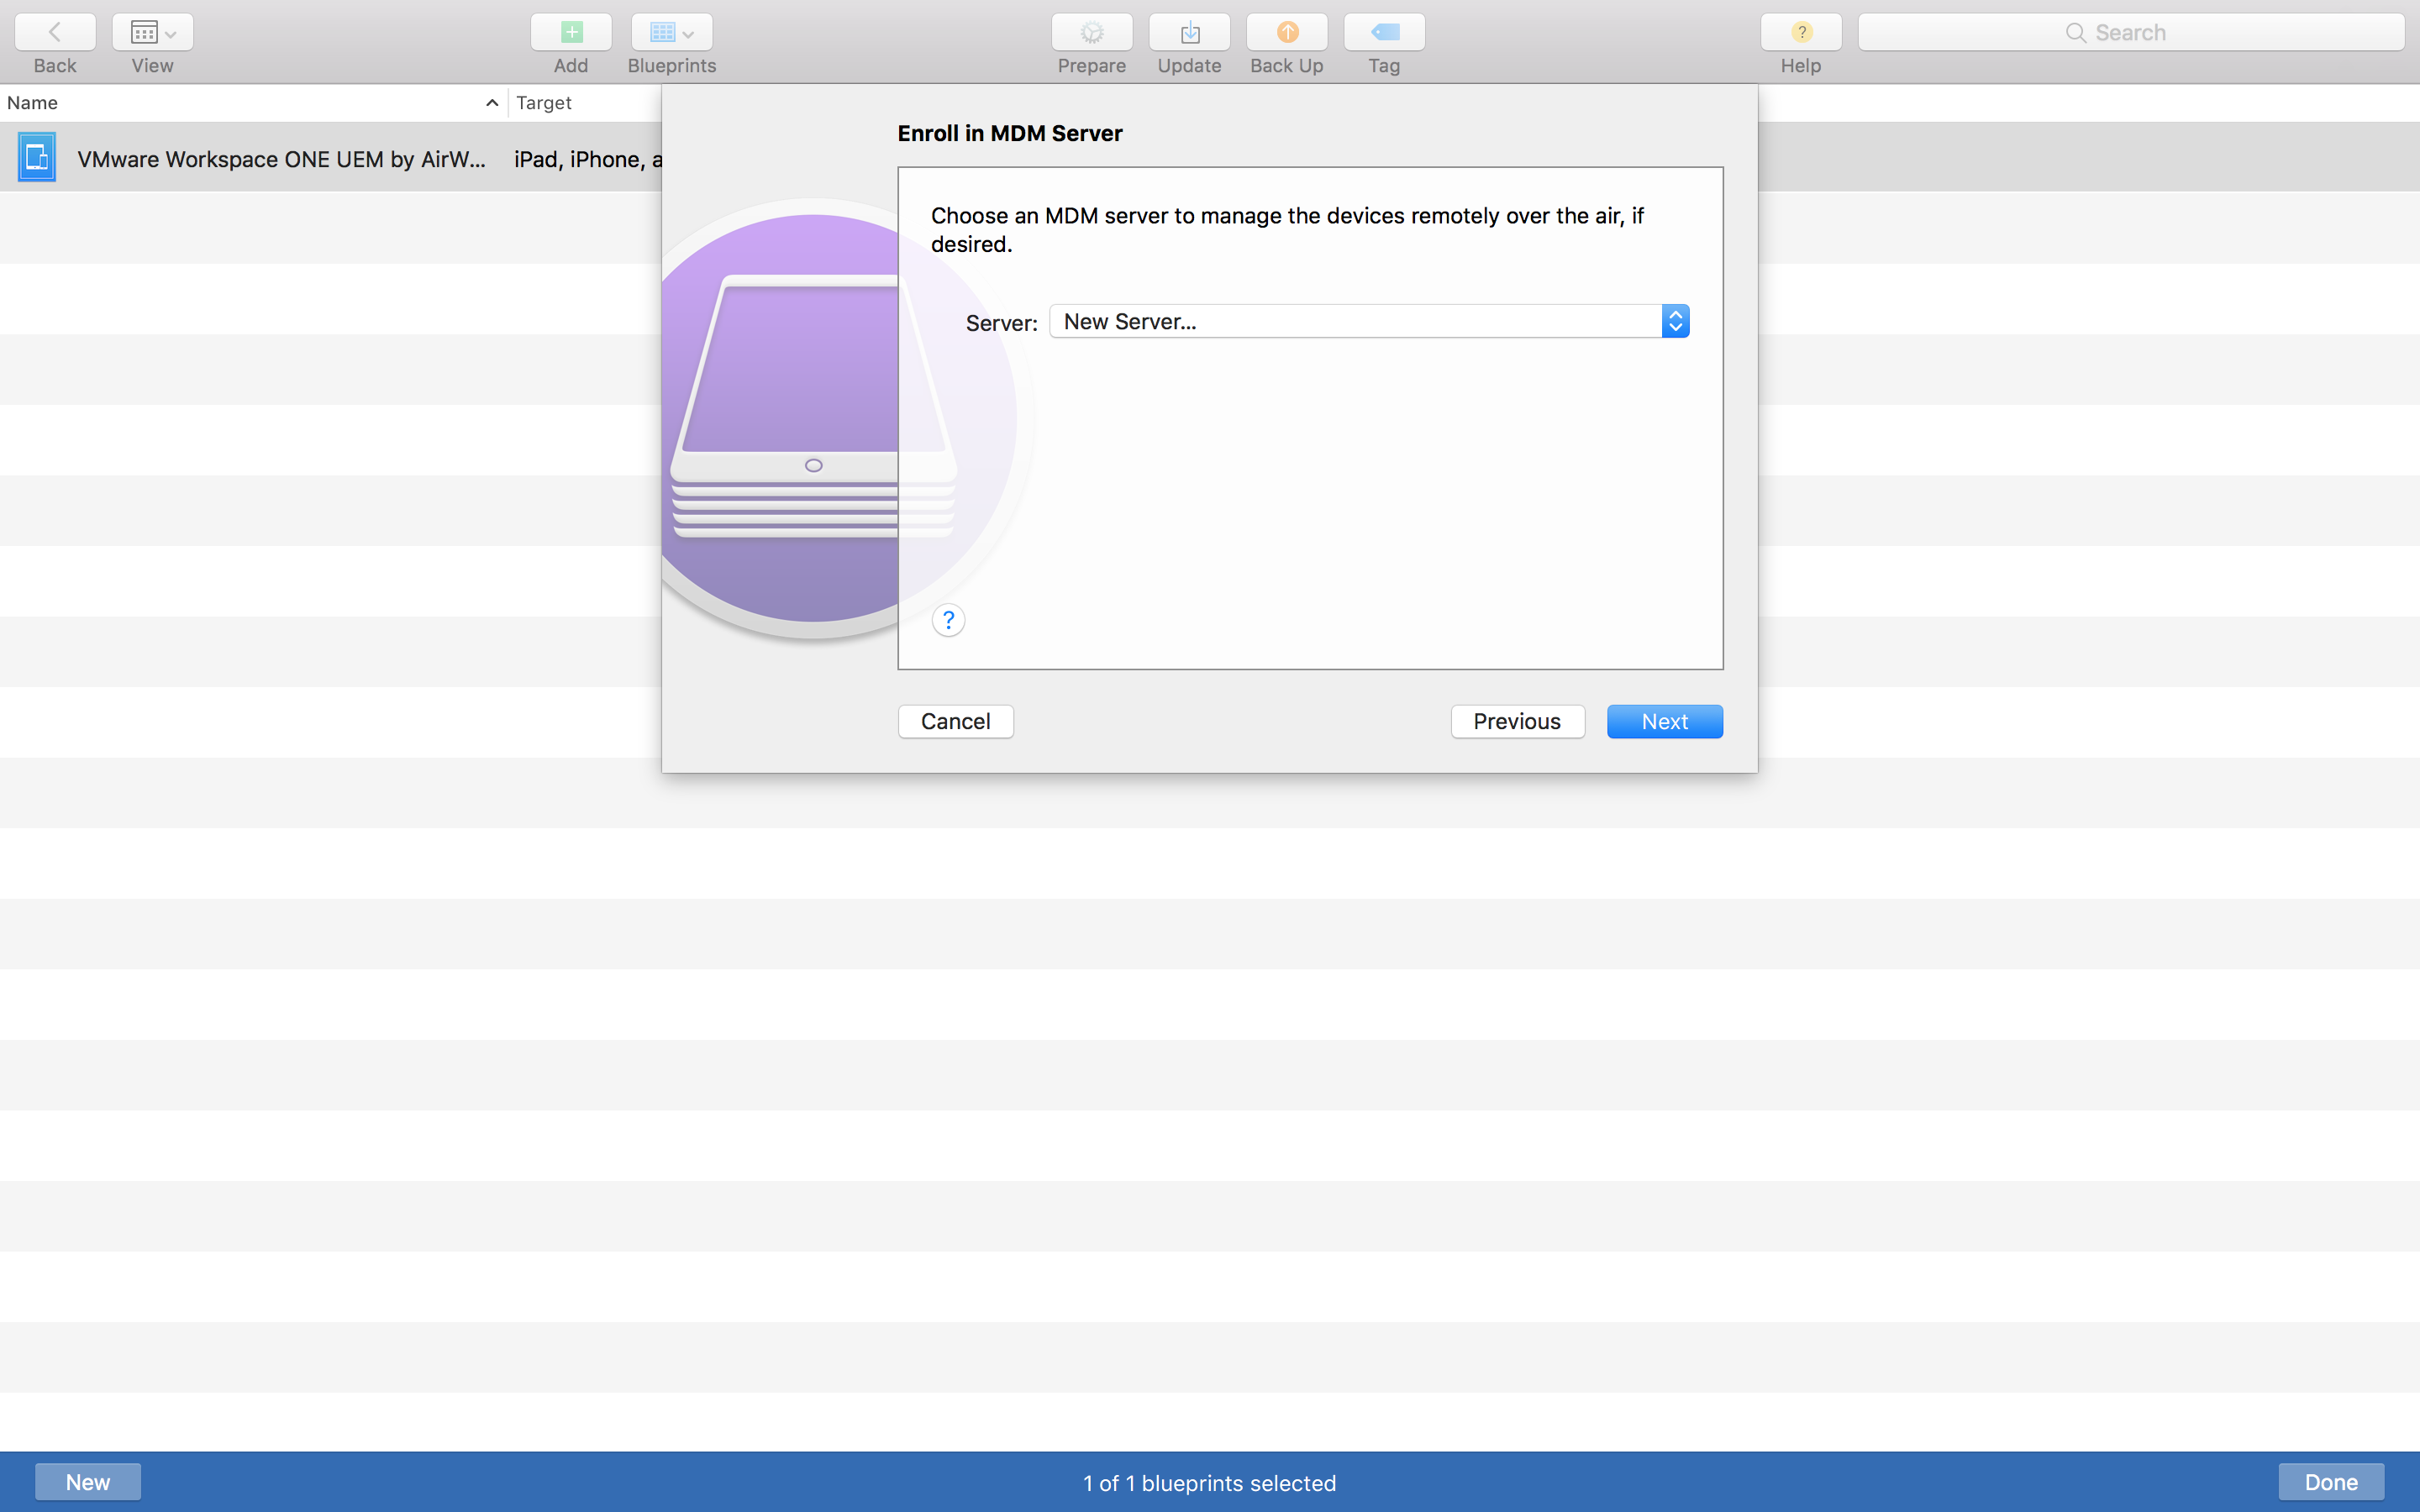
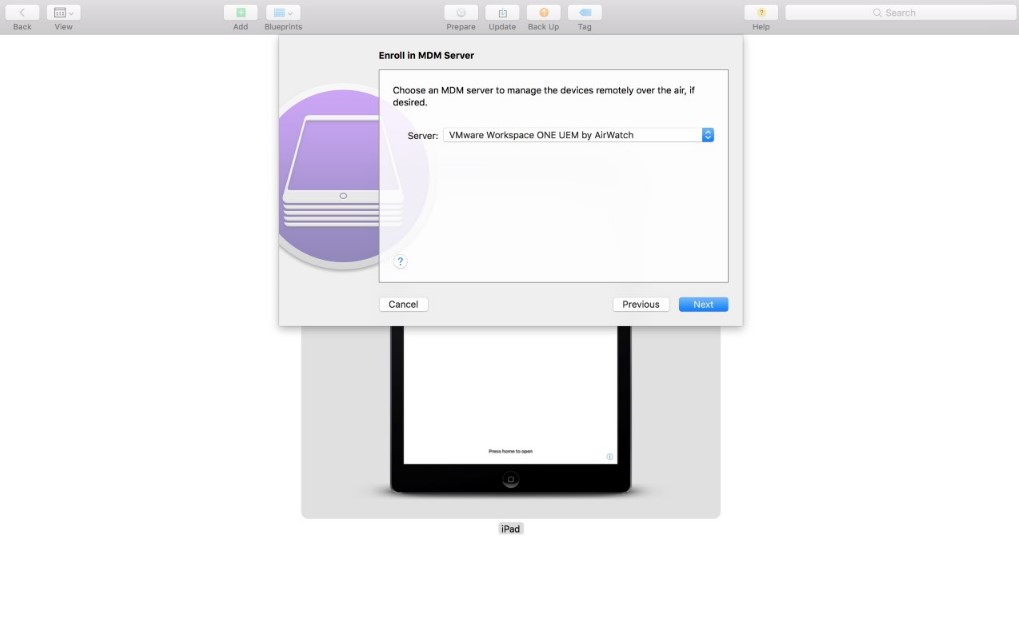
Enroll in MDM Server
If you already set up a server from the earlier steps, you can simply select the server from the list. You can also set up a new server if it applies to your setup by following the steps further below.
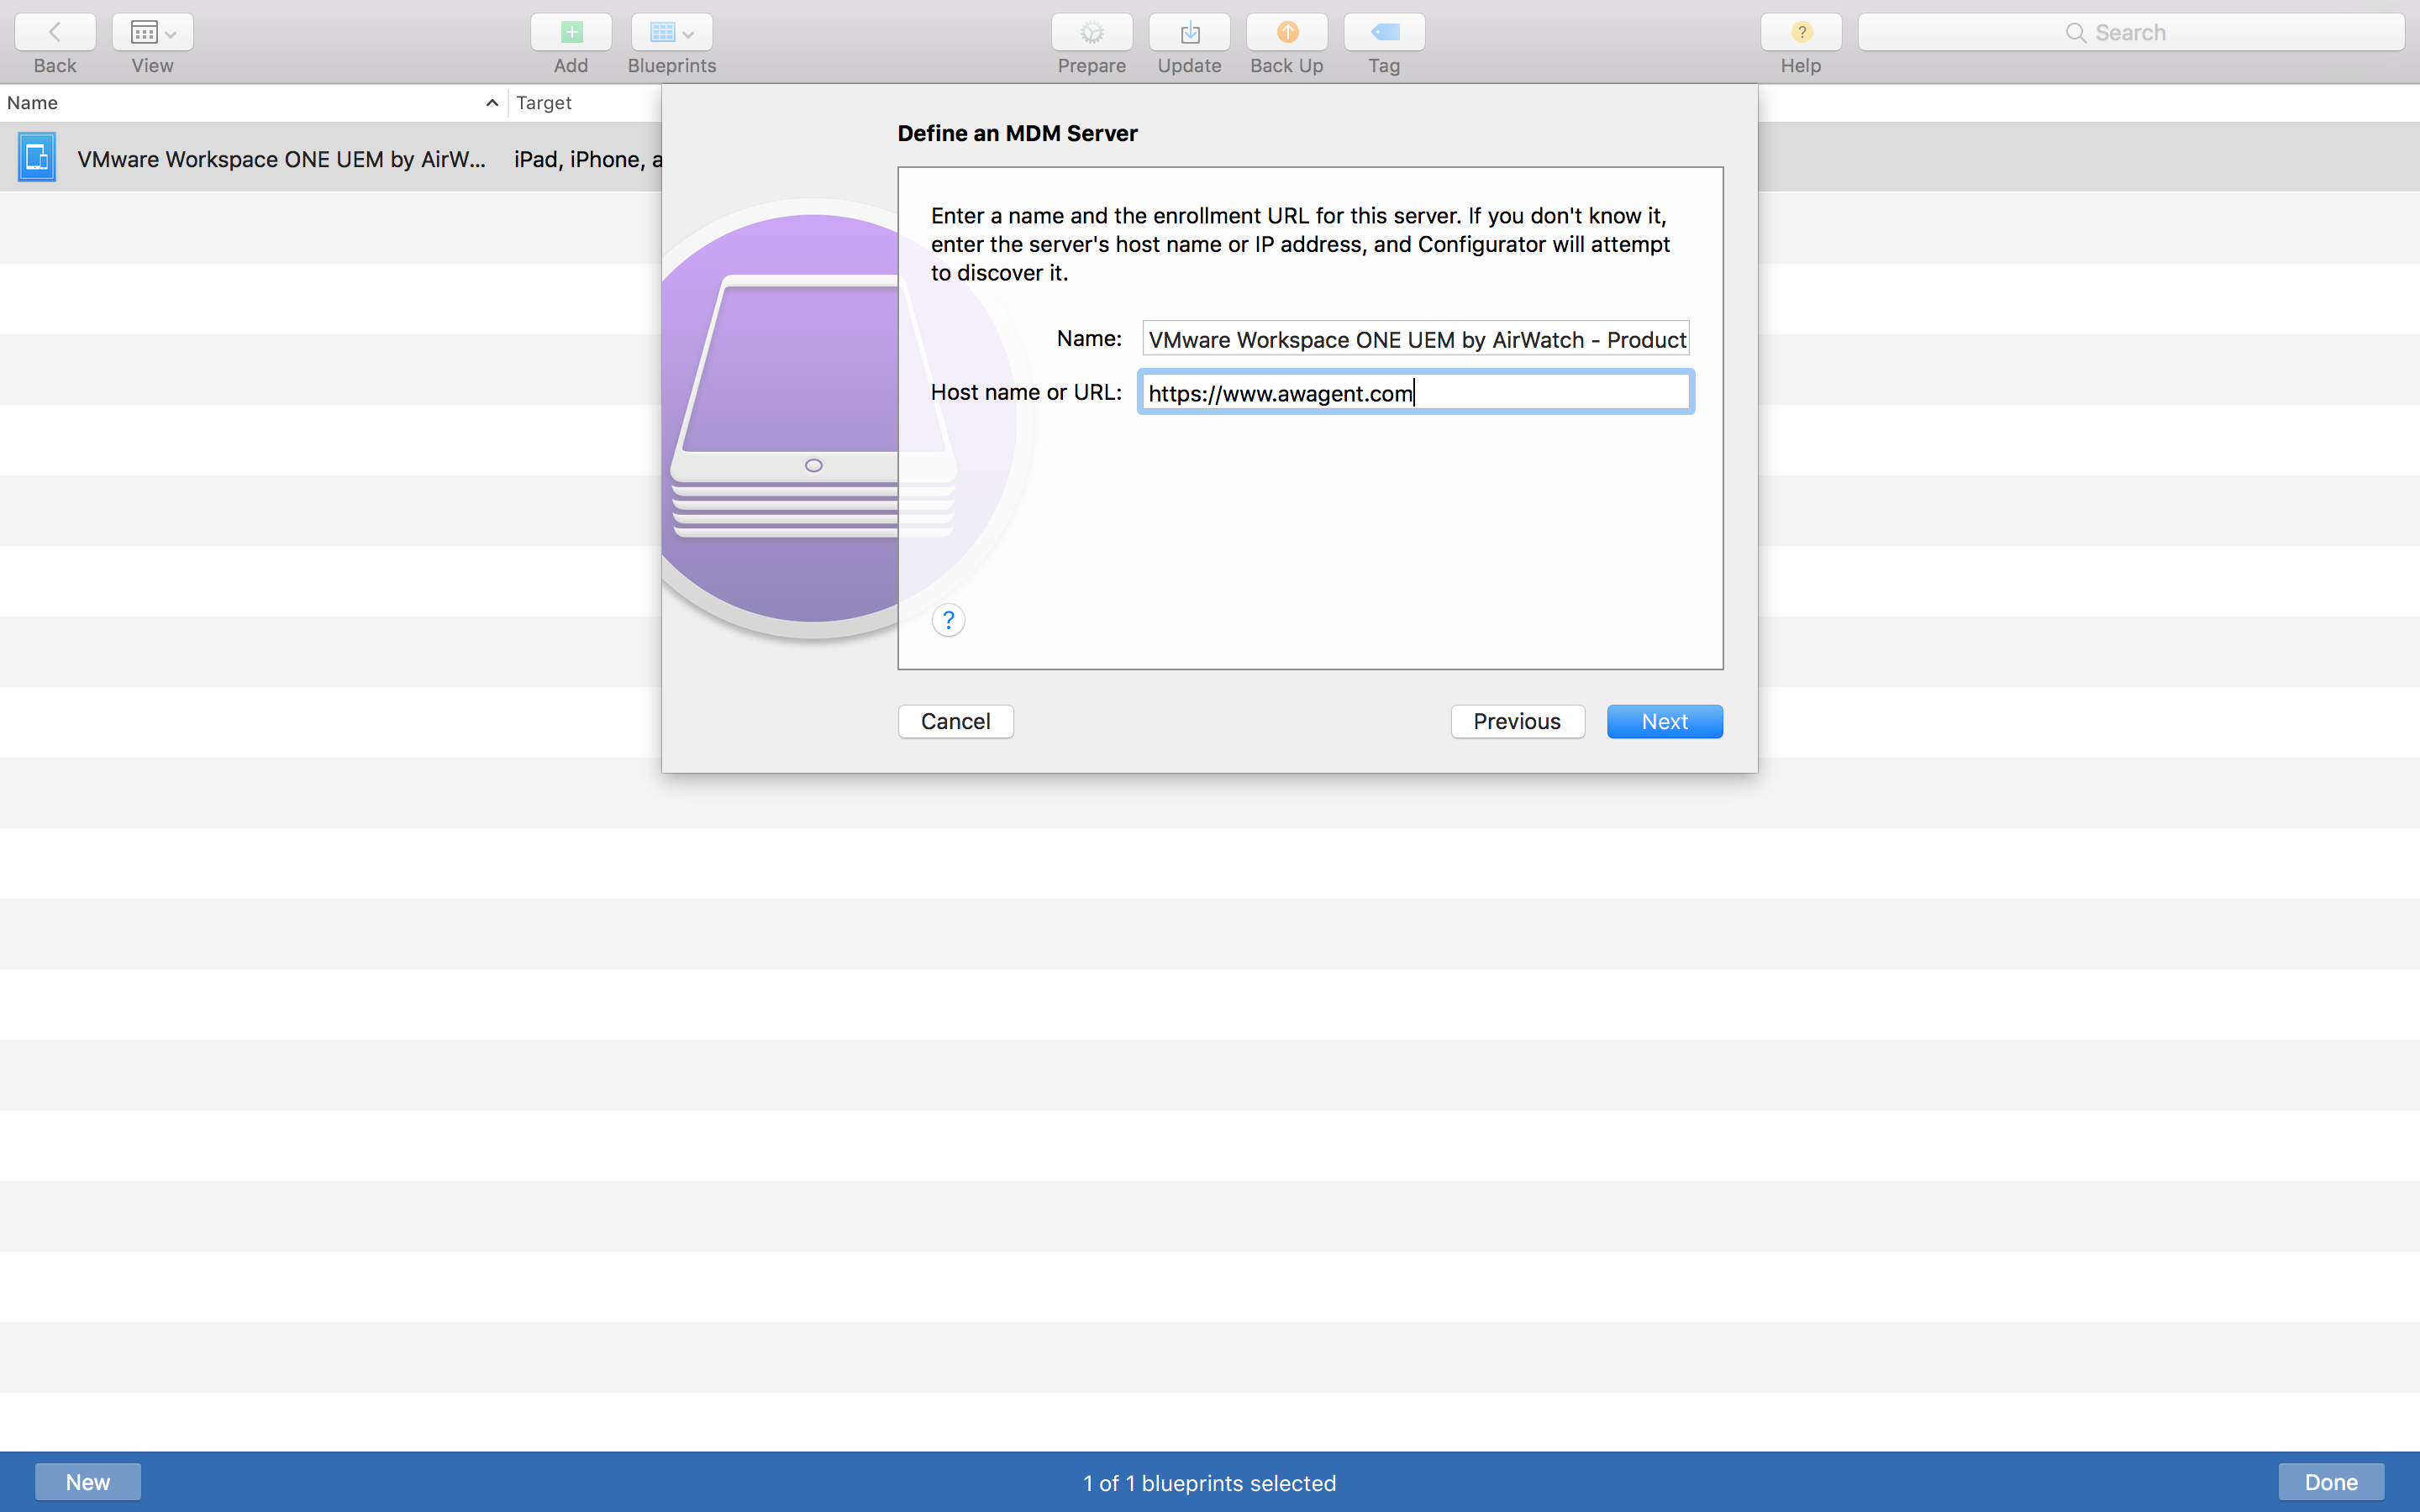
Define an MDM Server – Part 1
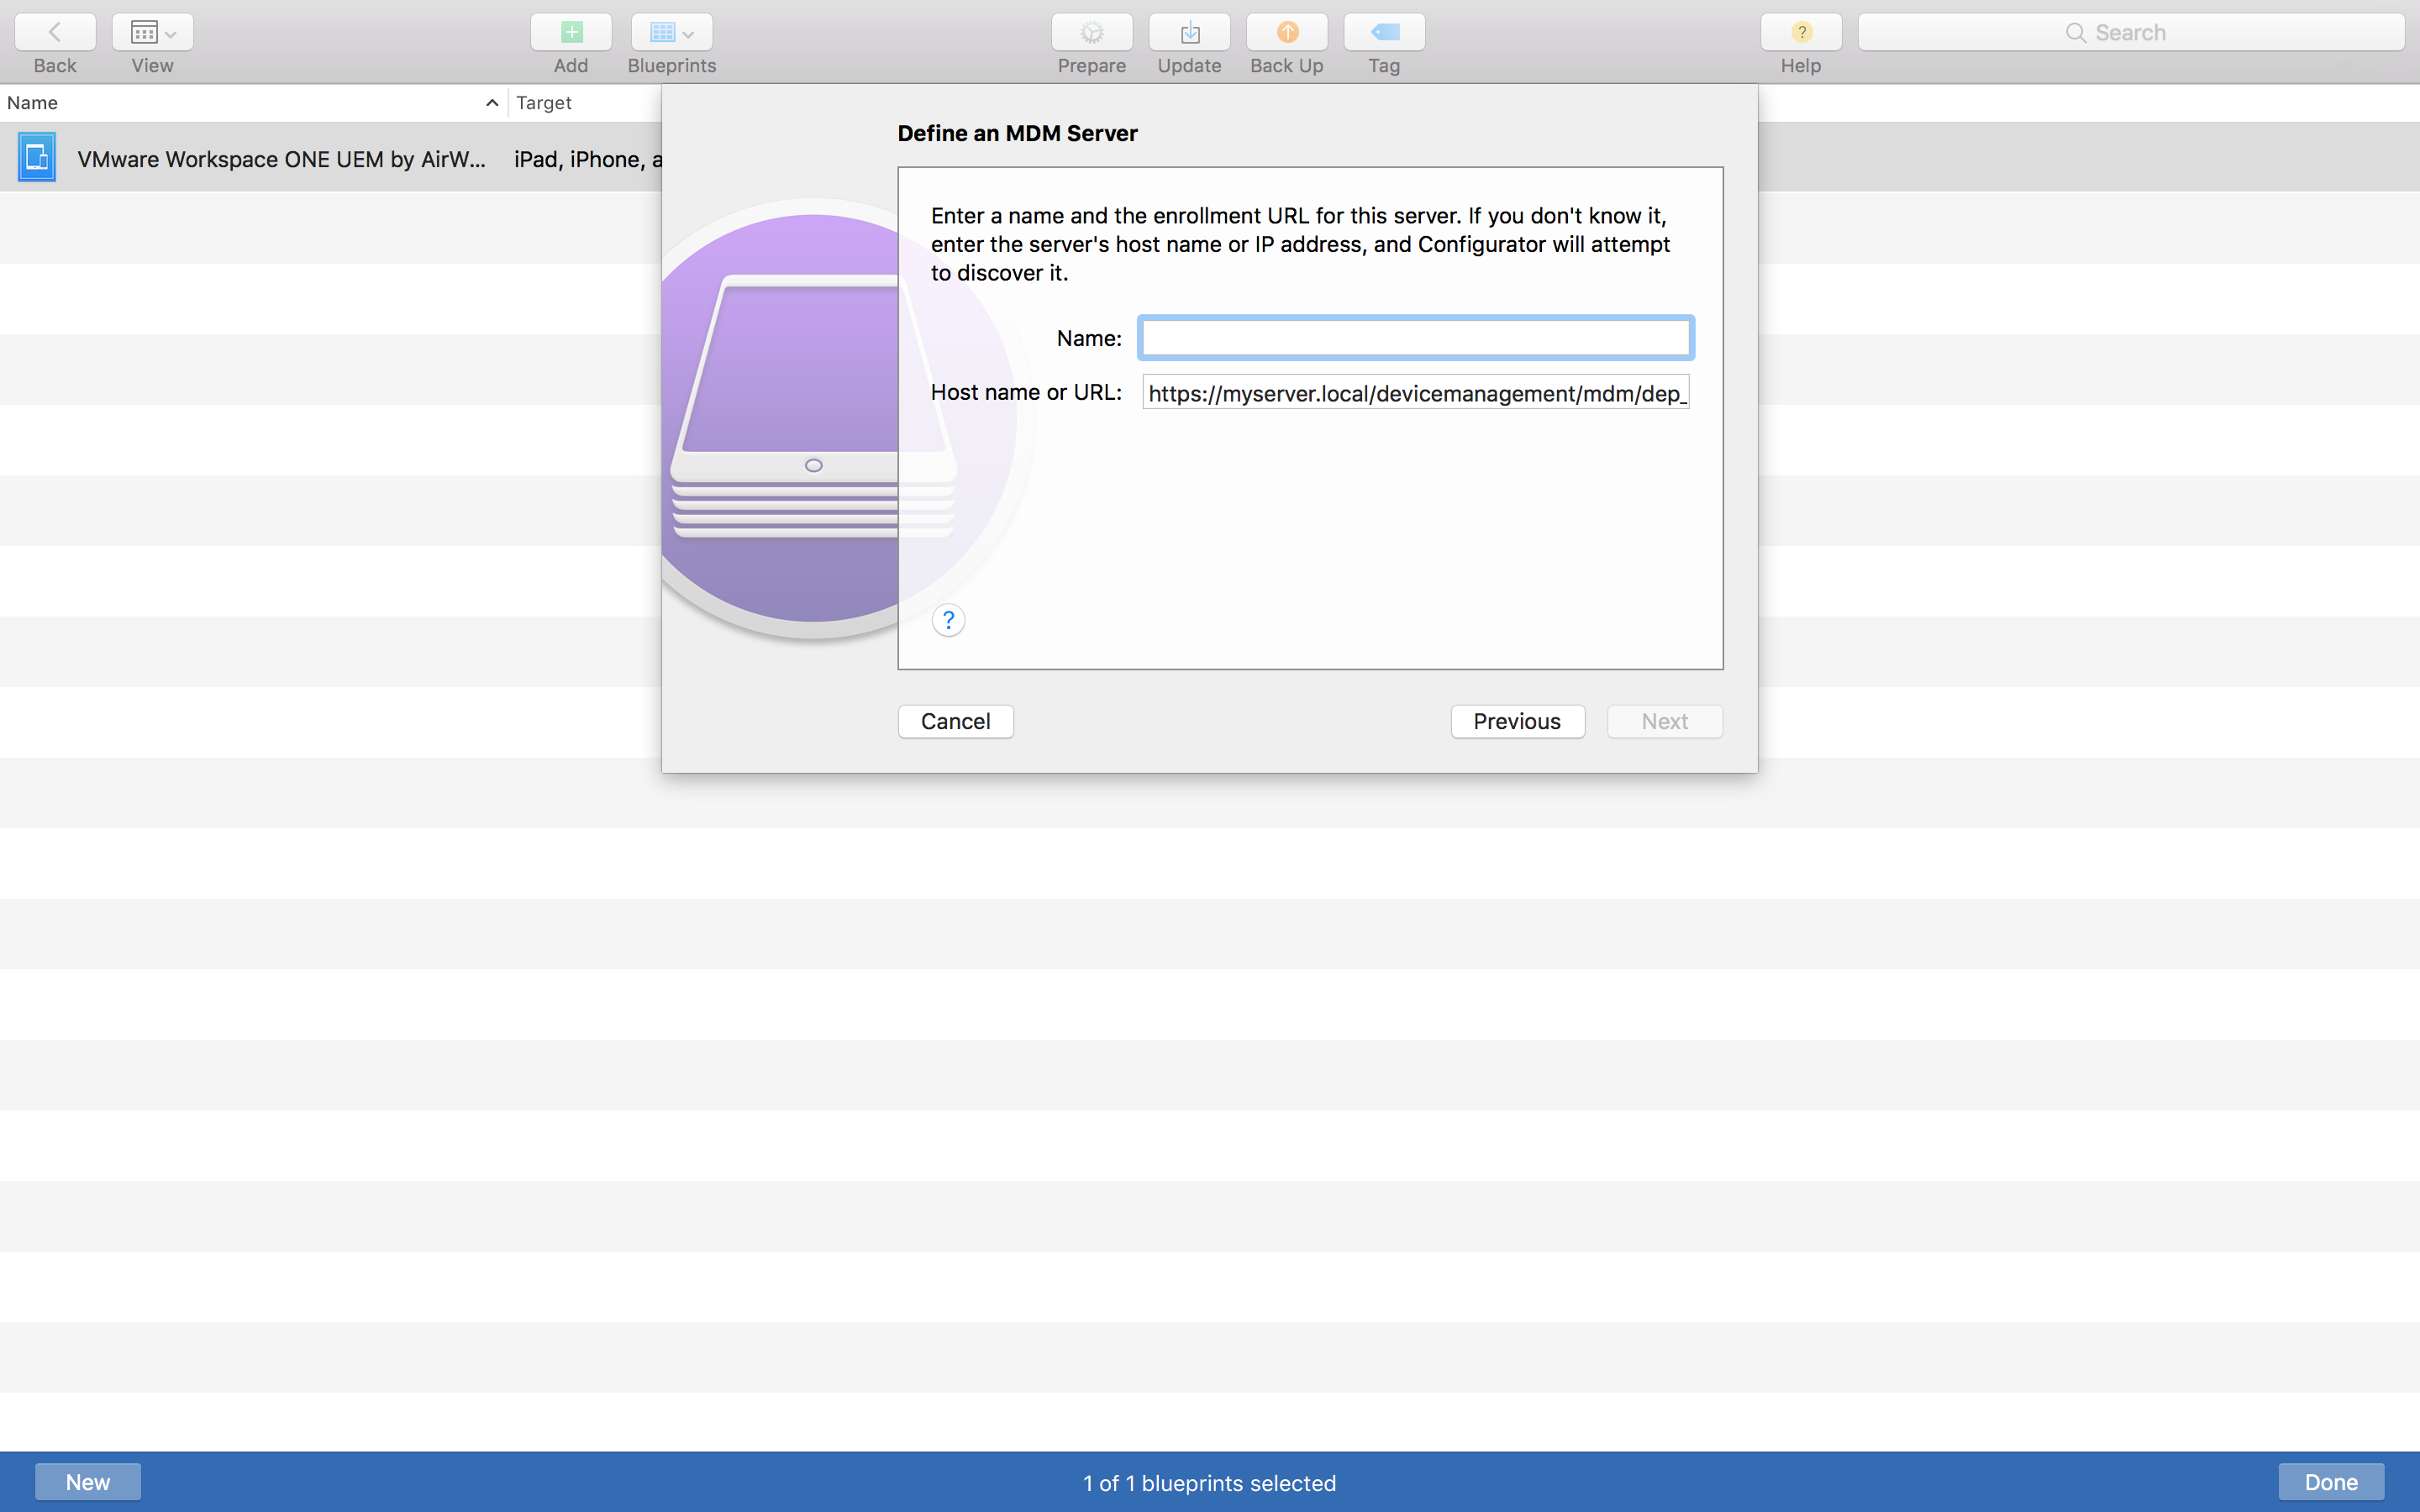
Update from 04/07/19: My statement below might not be true based on this link from Jamf. However, my steps are still valid if your sole purpose is to add your device into Apple DEP and assign to your MDM server (or not) later.
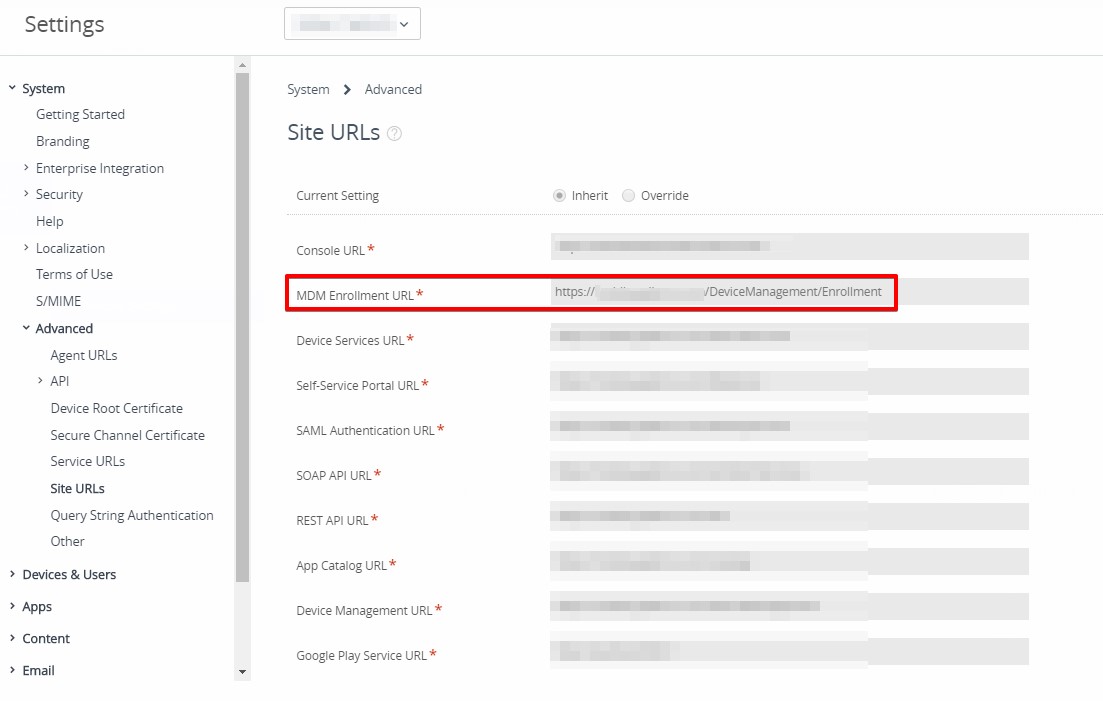
From the default URL that’s already pre-filled, you may think to put in the URL specified within your Workspace ONE console (i.e. https://Your_URL/DeviceManagement/Enrollment). However, this will NOT work!

Instead for the sole purpose of adding the non-DEP device into Apple DEP, use either https://www.awagent.com or better yet https://www.GetWSONE.com per this announcement.
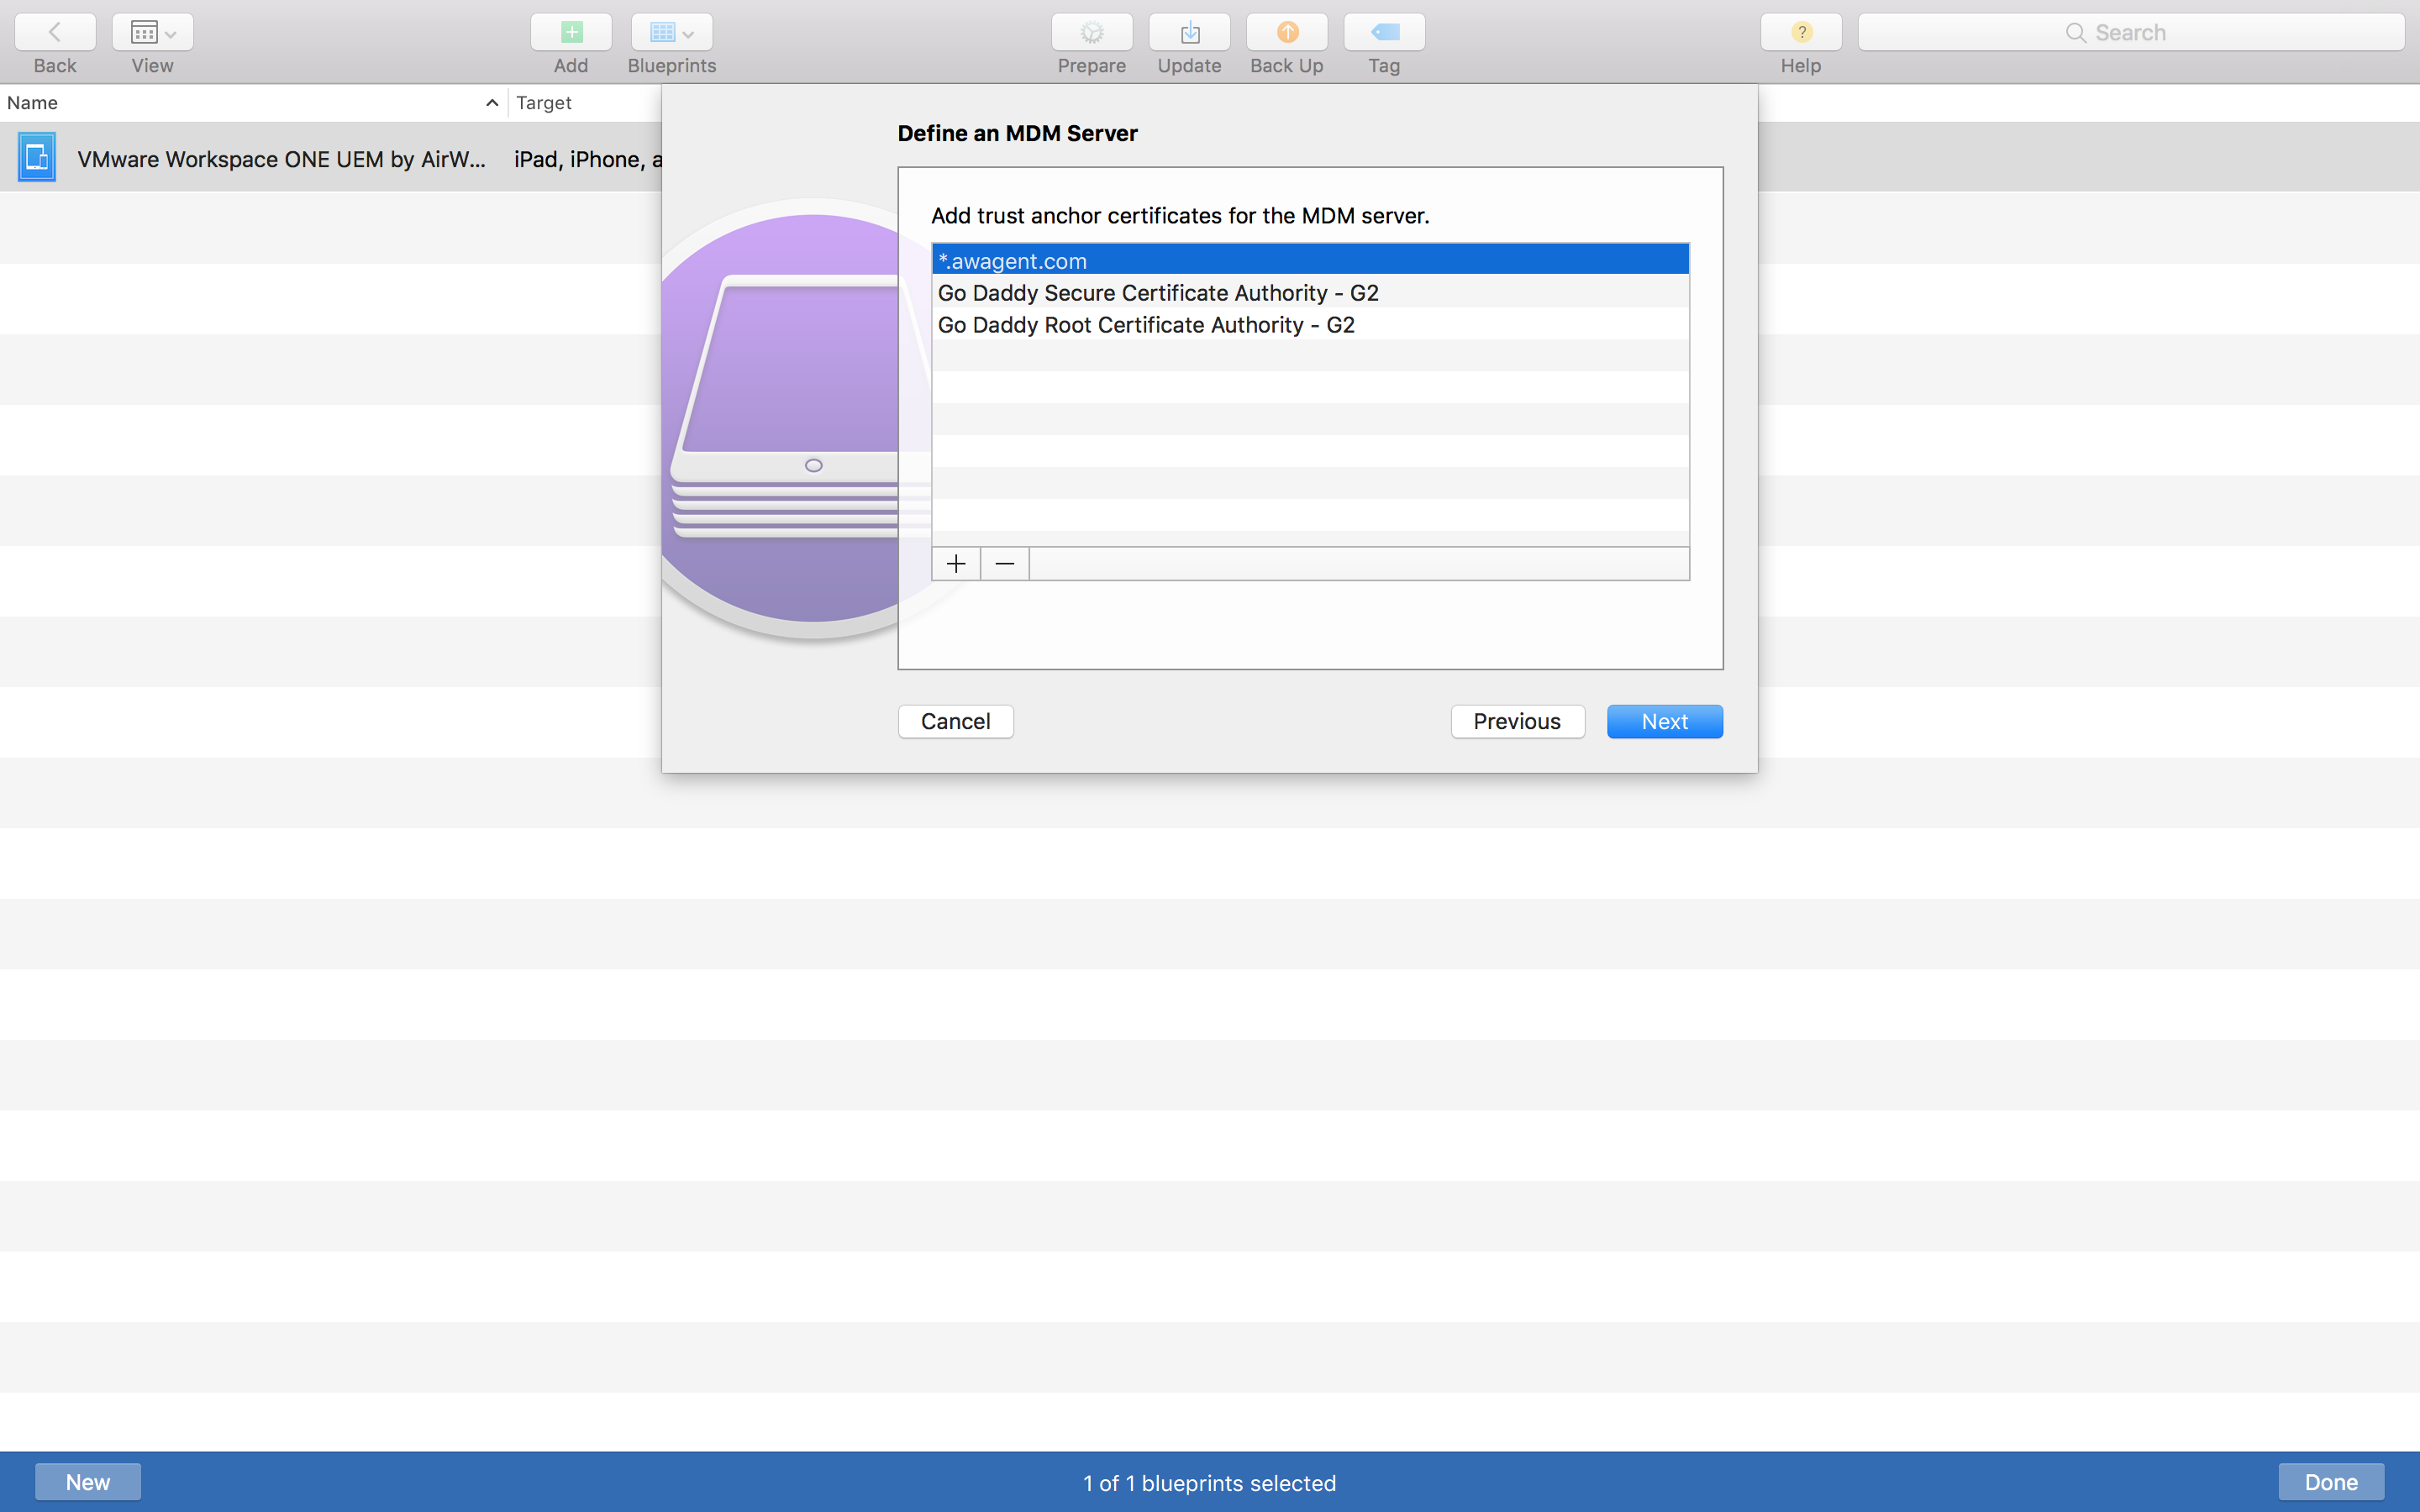
Define an MDM Server – Part 2
Select *awagent.com if you choose http://www.awagent.com, or incapsula.com if you choose http://www.getwsone.com for the trust anchor certificates and click Next.
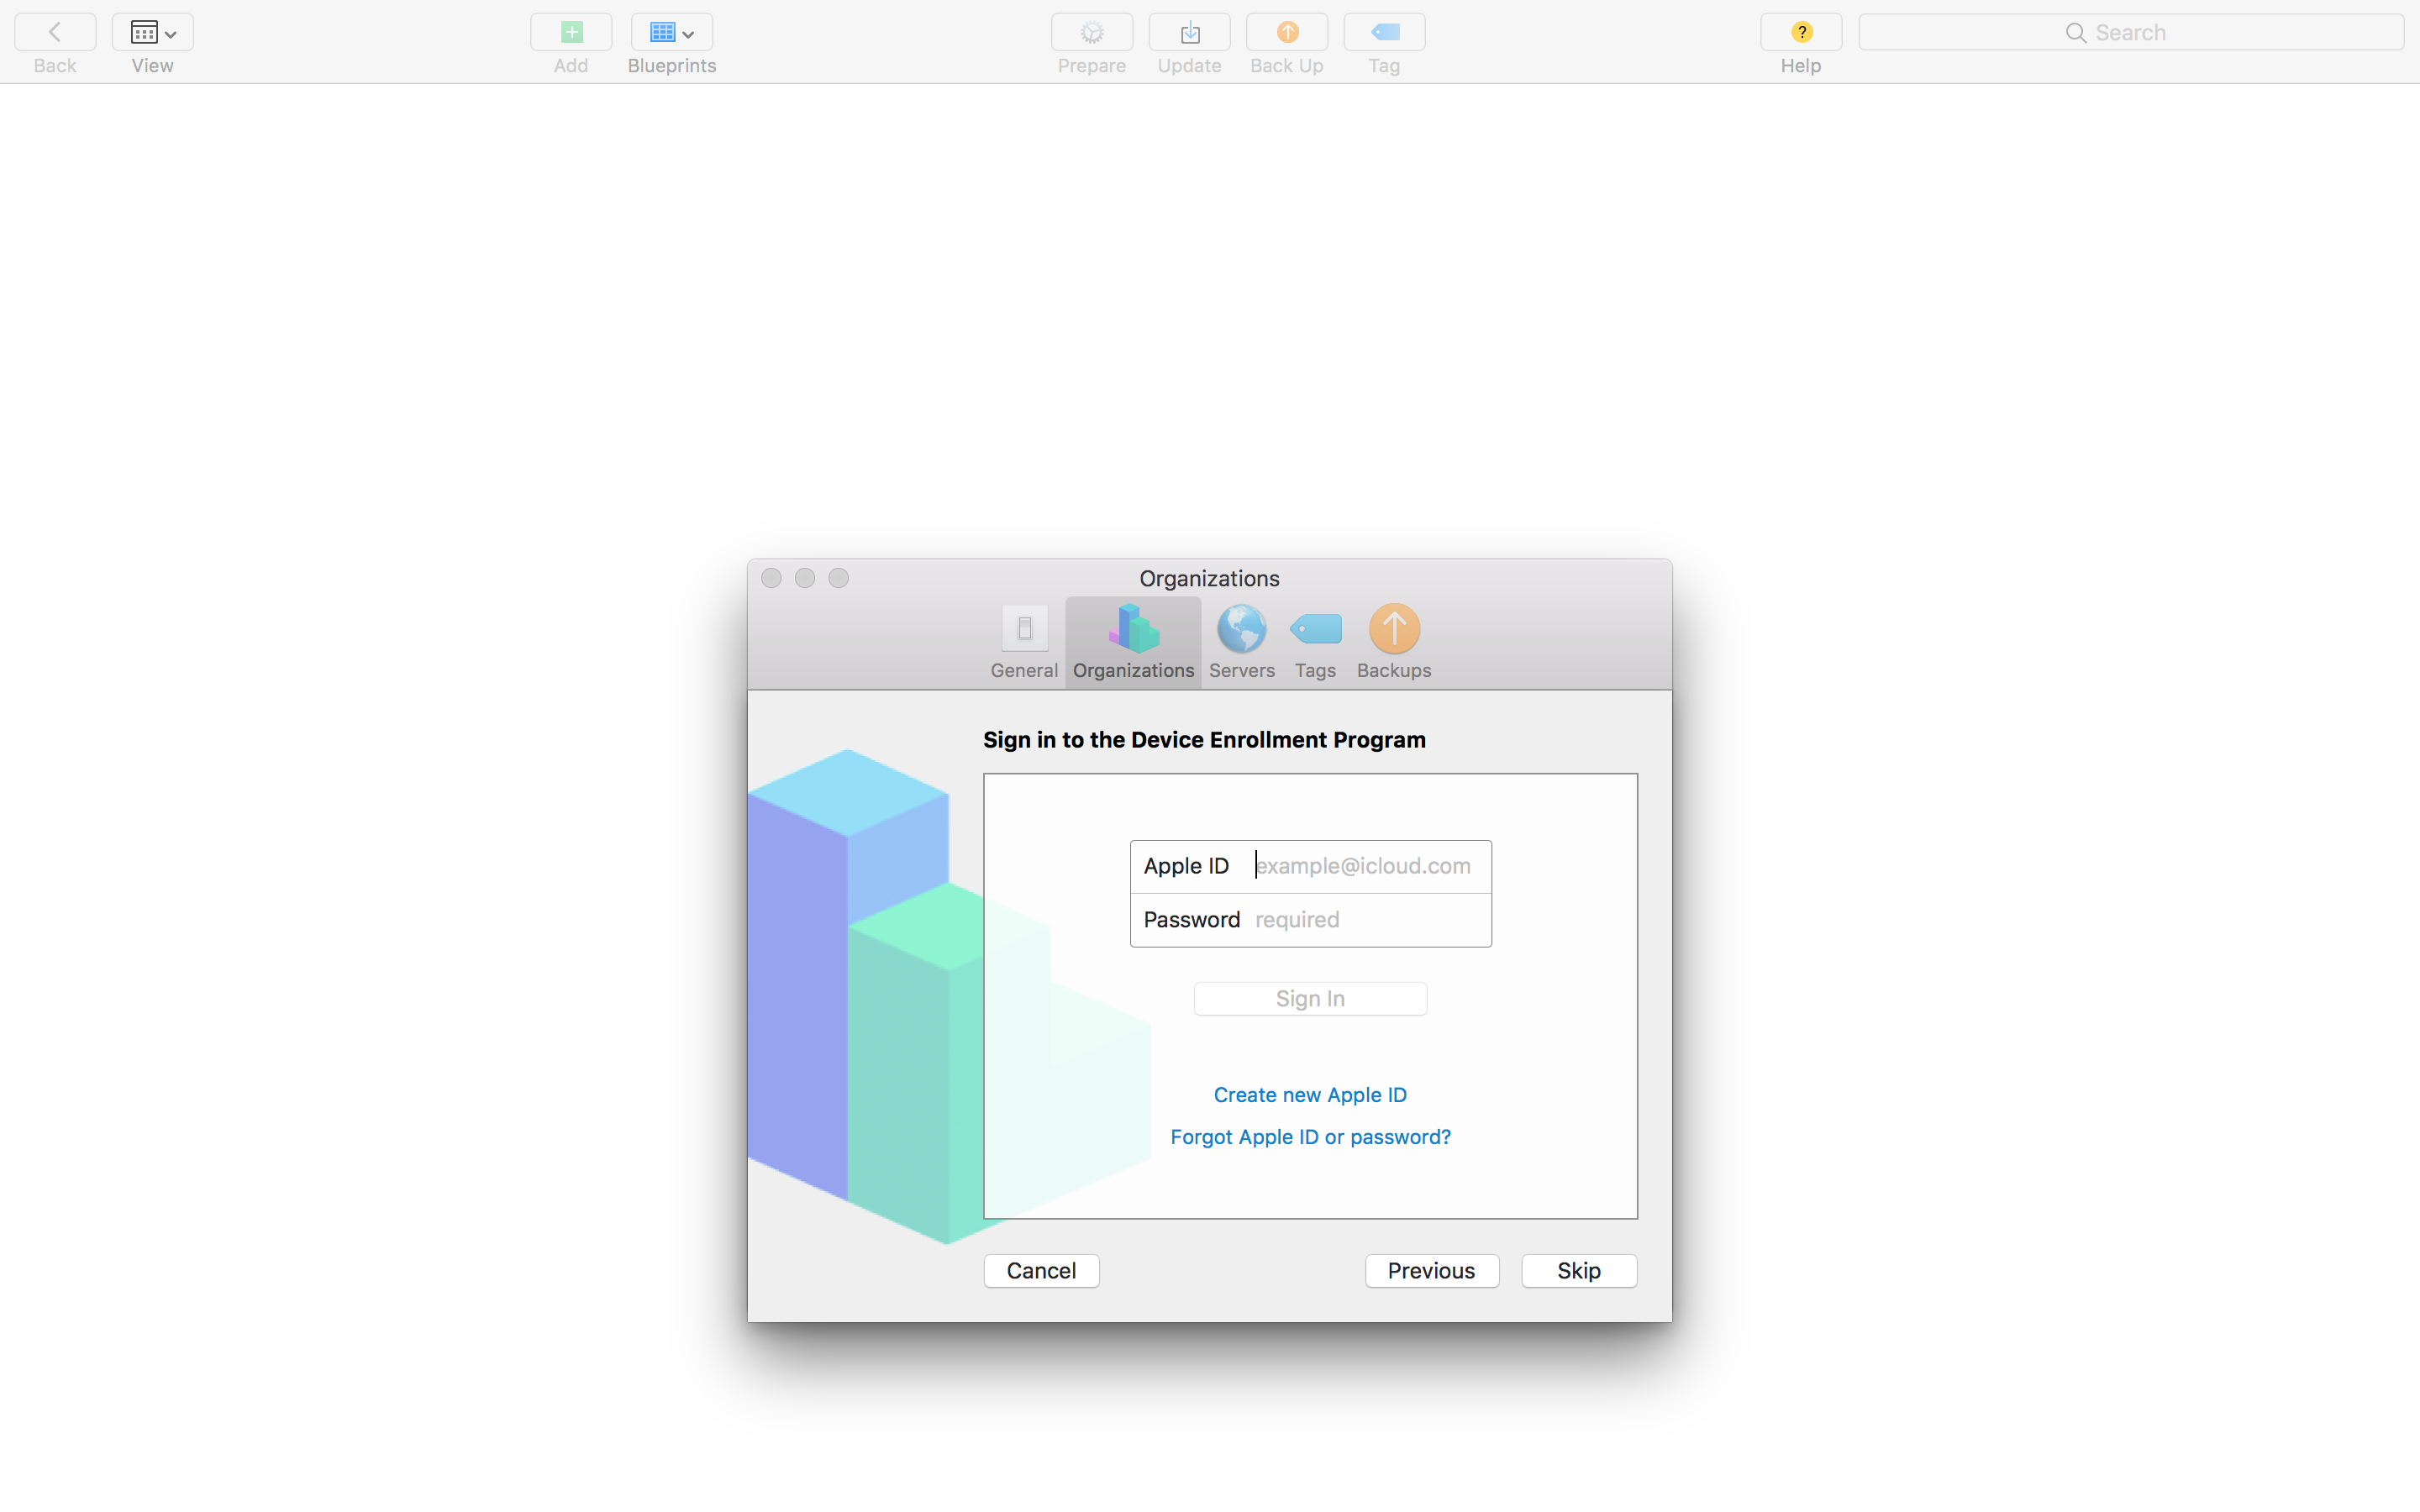
Sign in to the Device Enrollment Program
Sign in with your Apple ID used to sign into Apple Deployment Program or Apple Business Manager website.

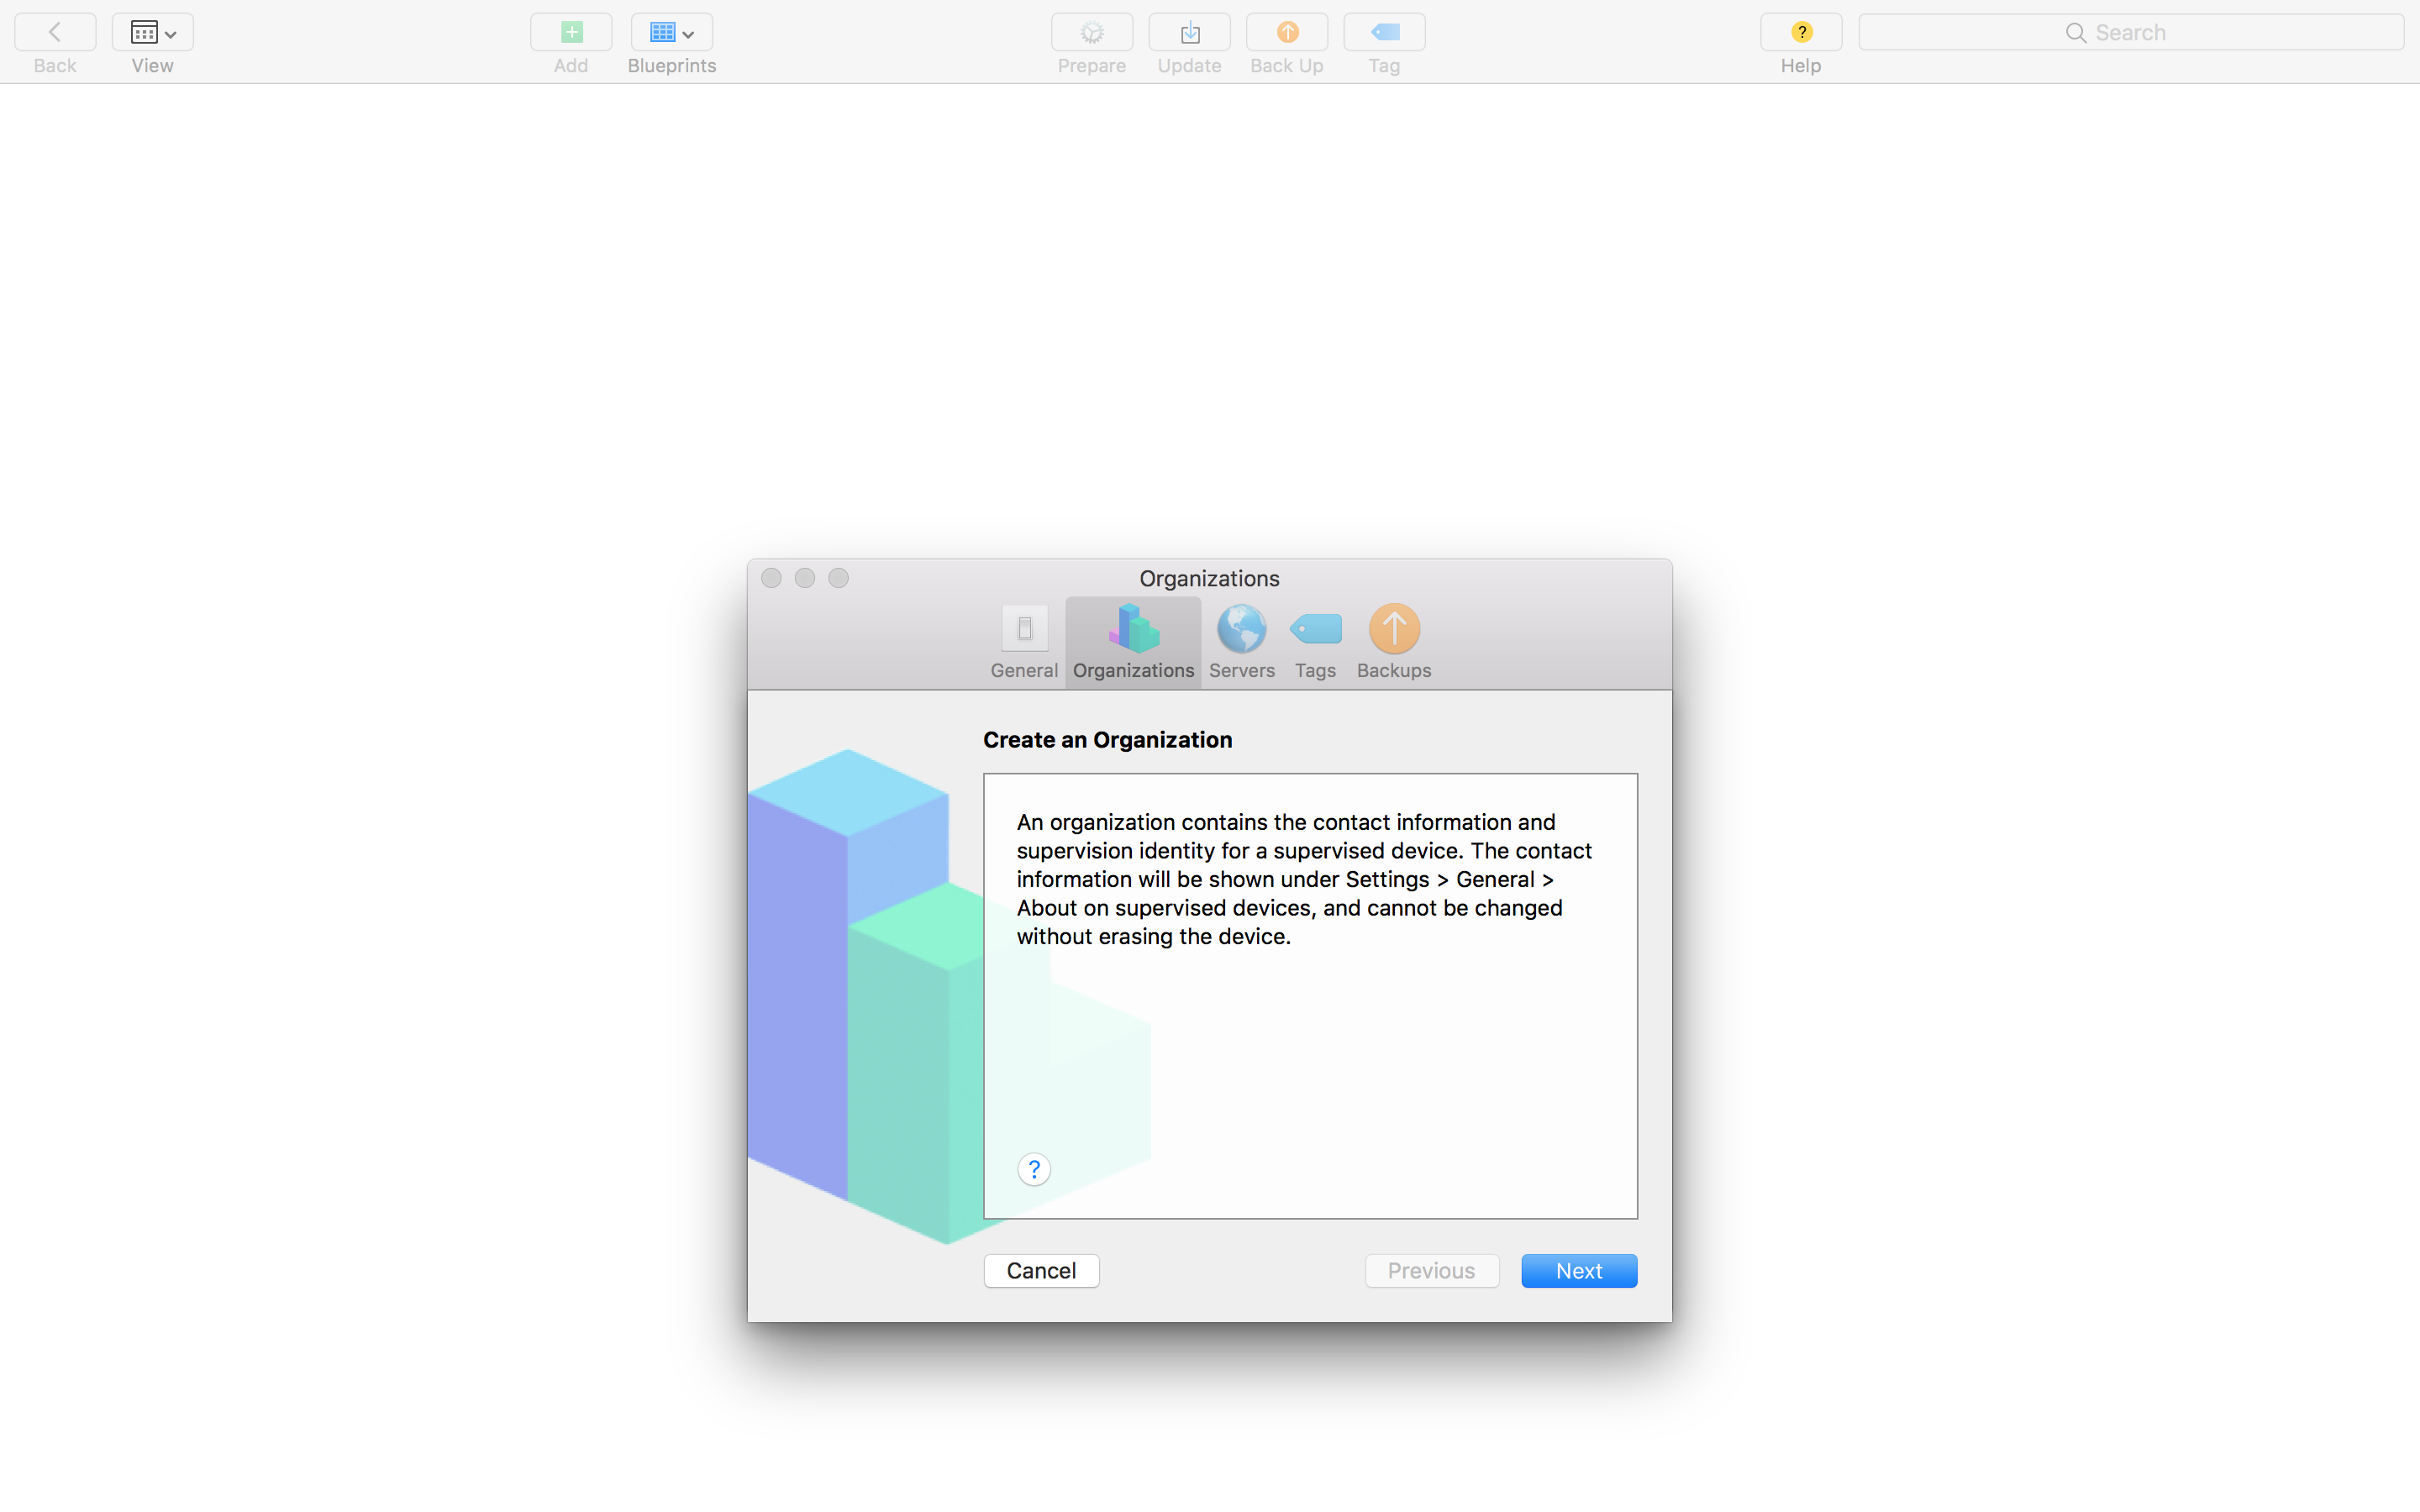
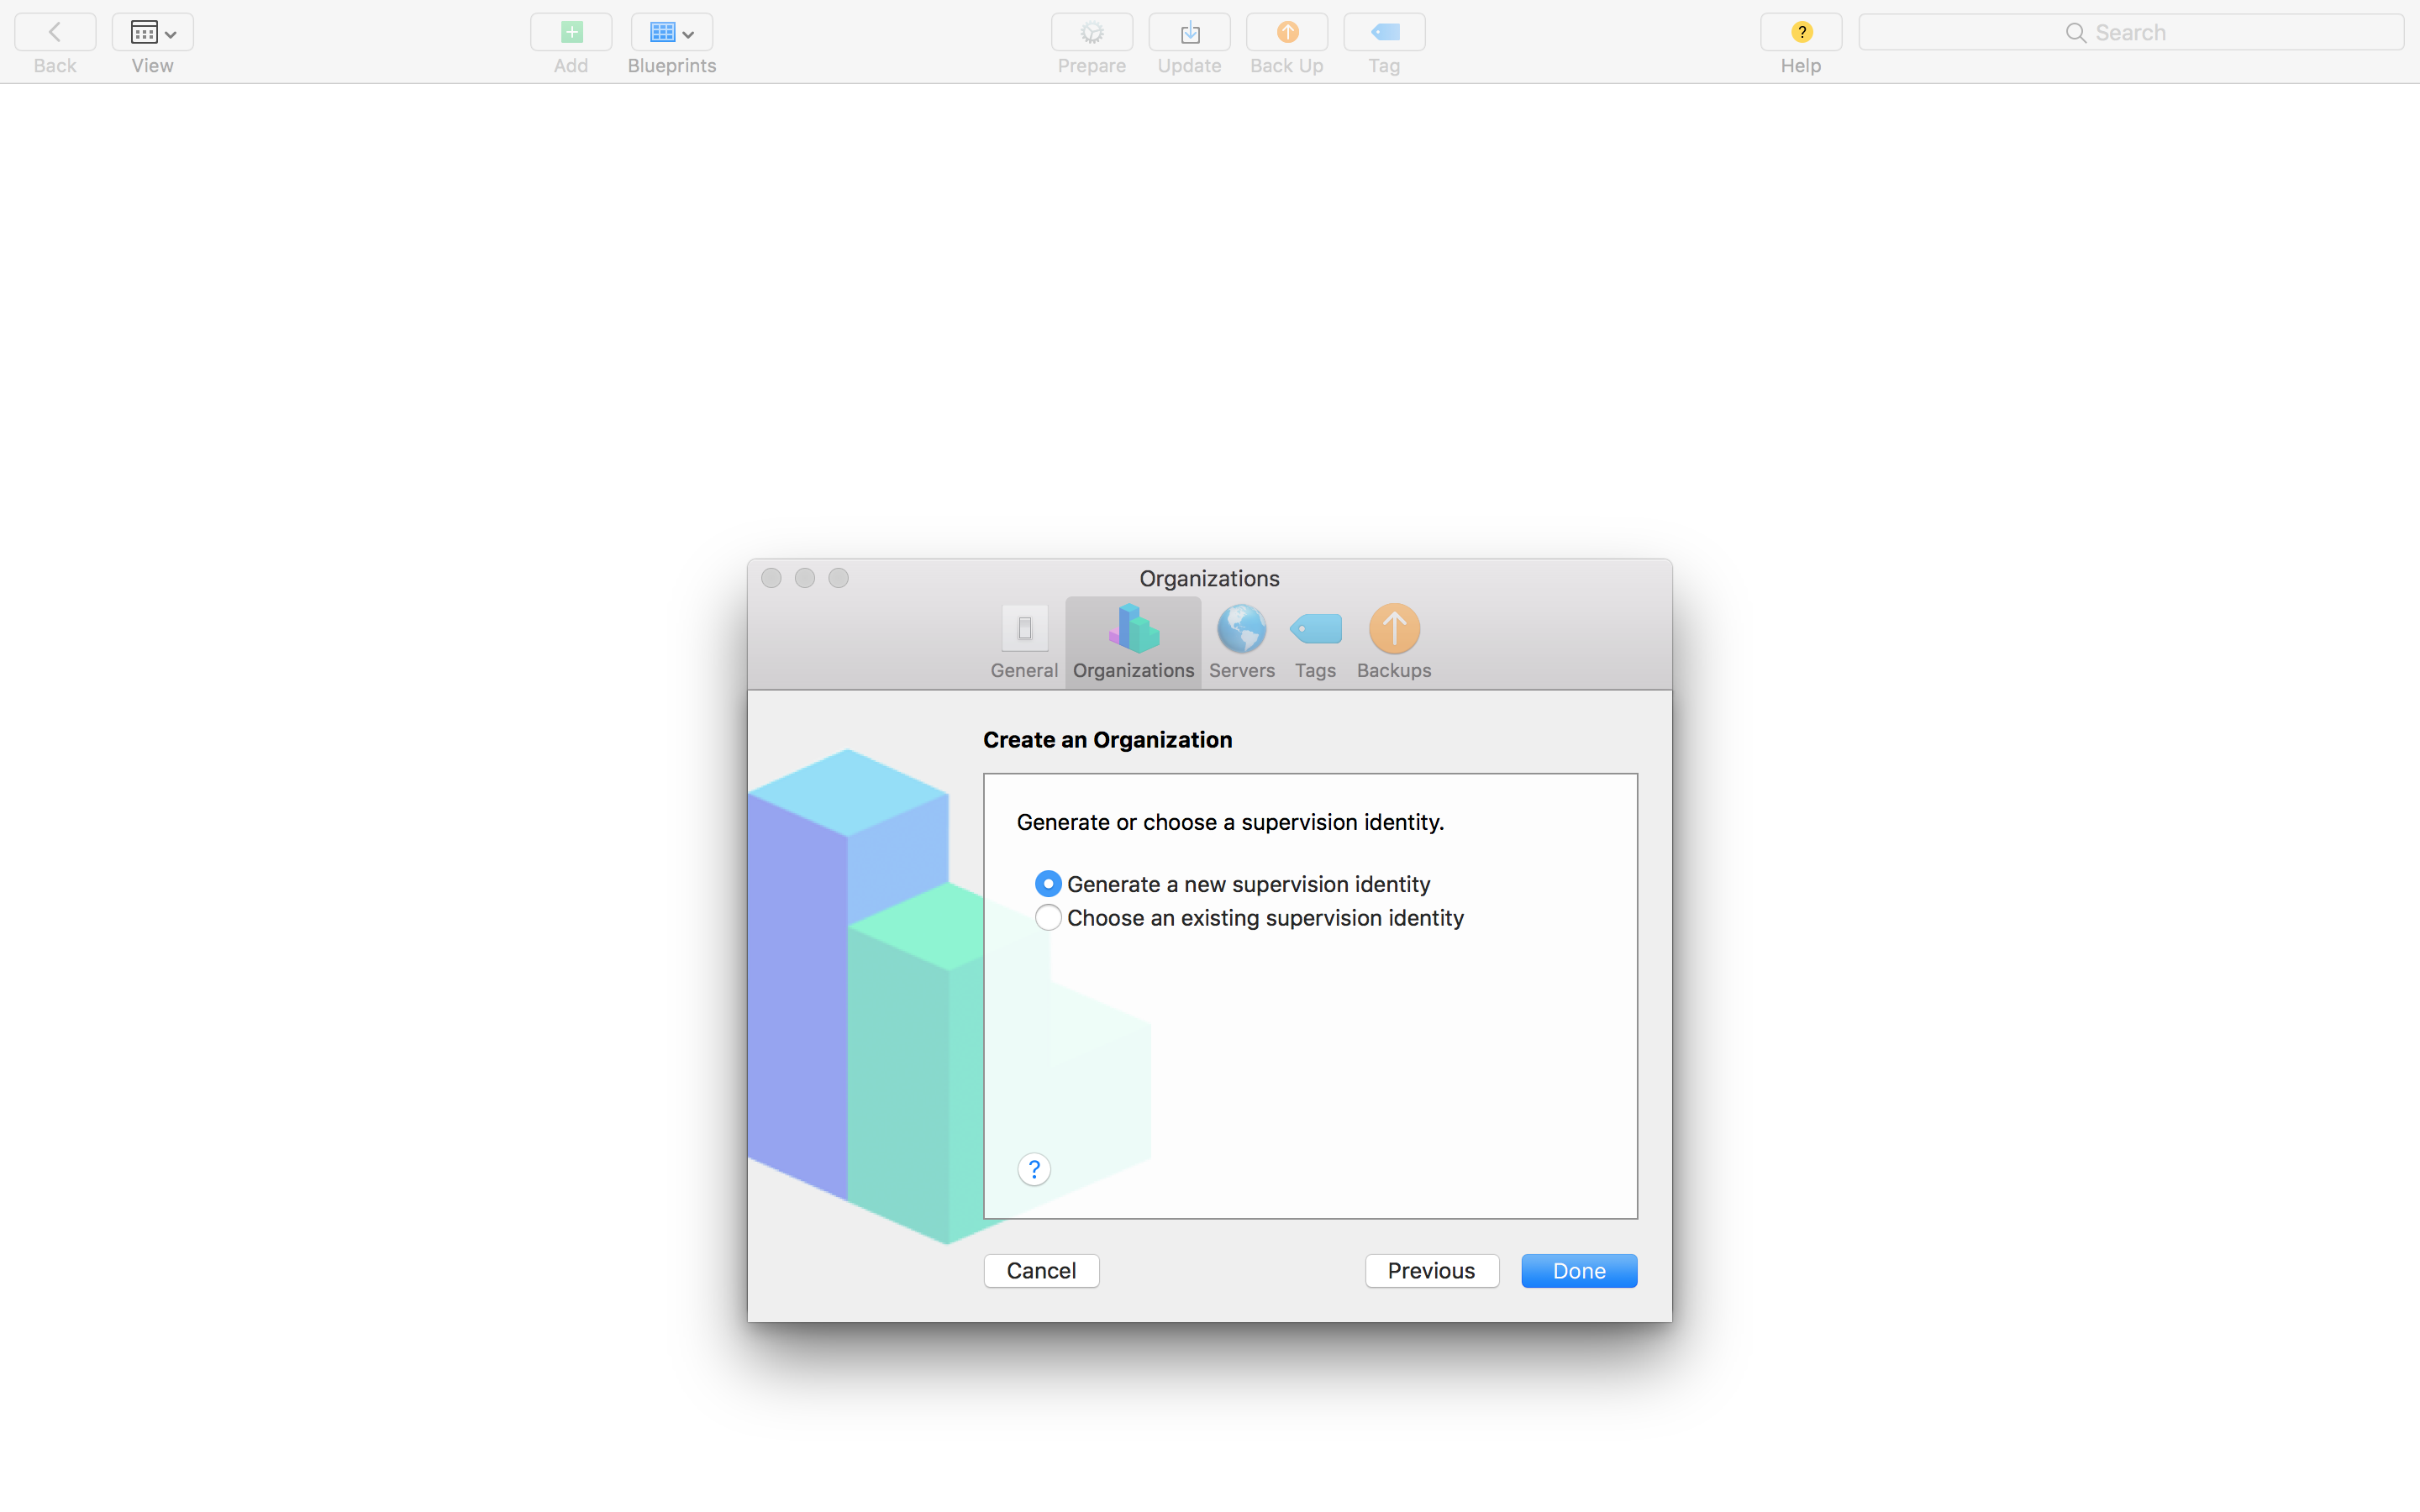
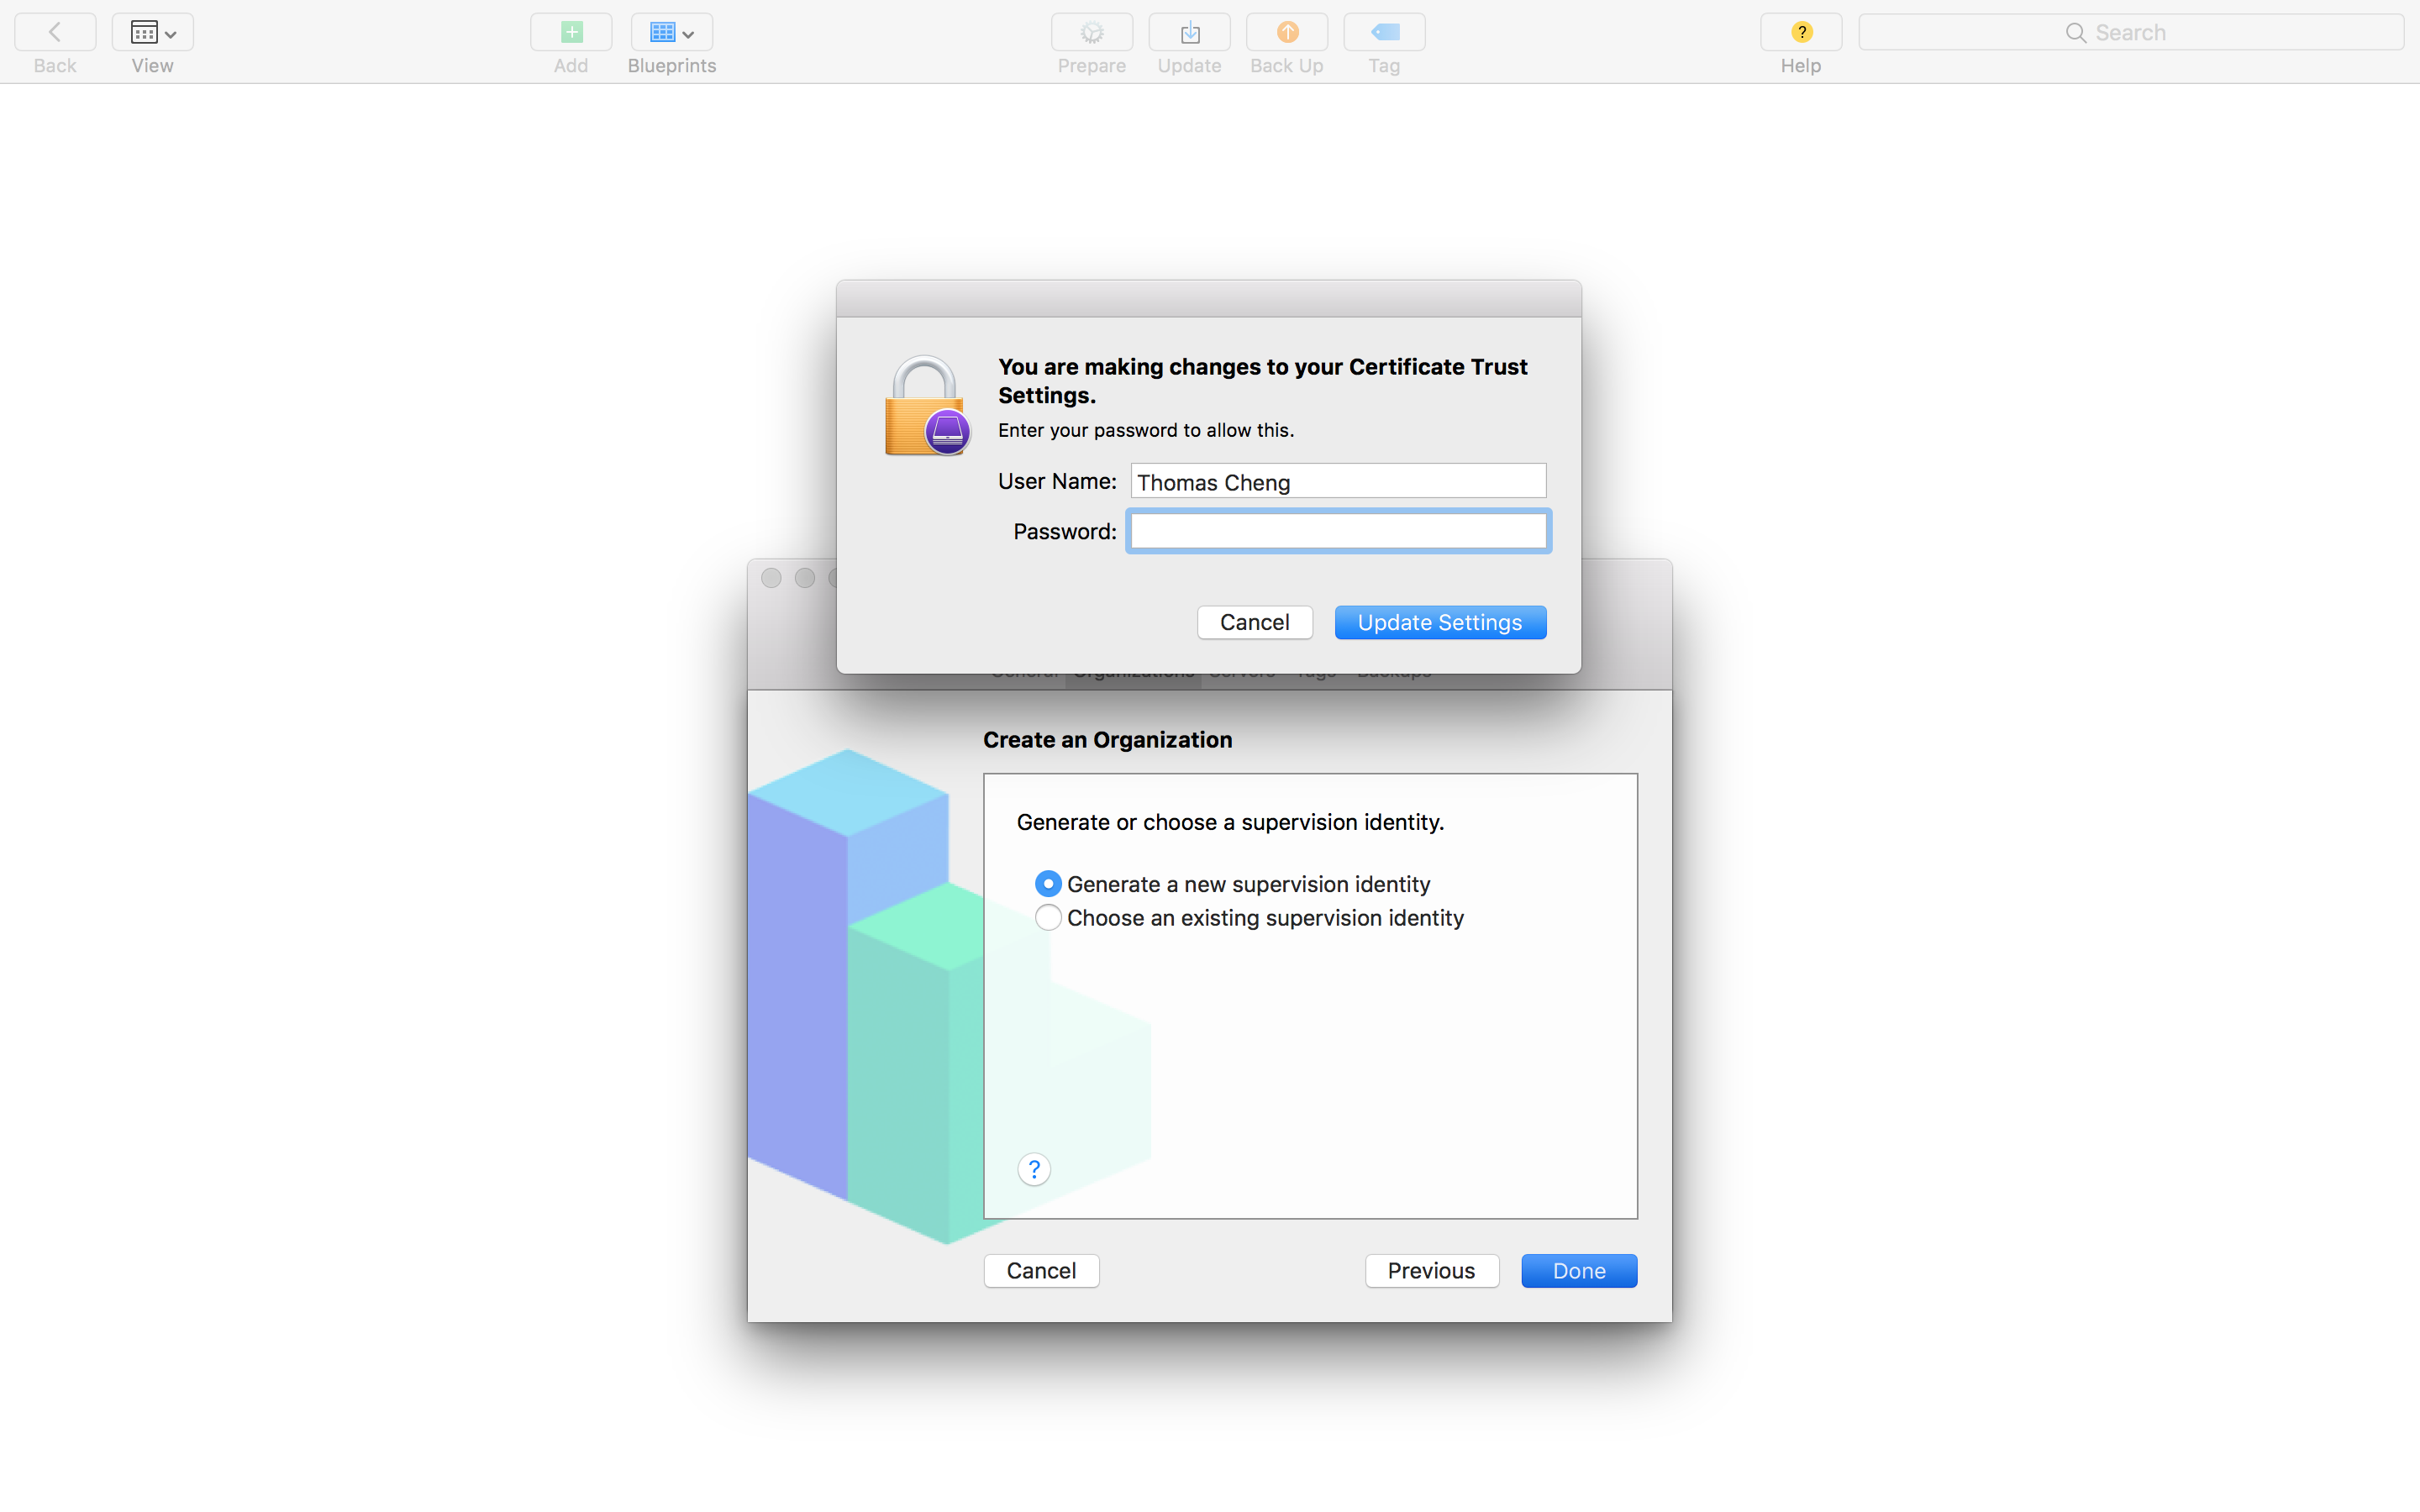
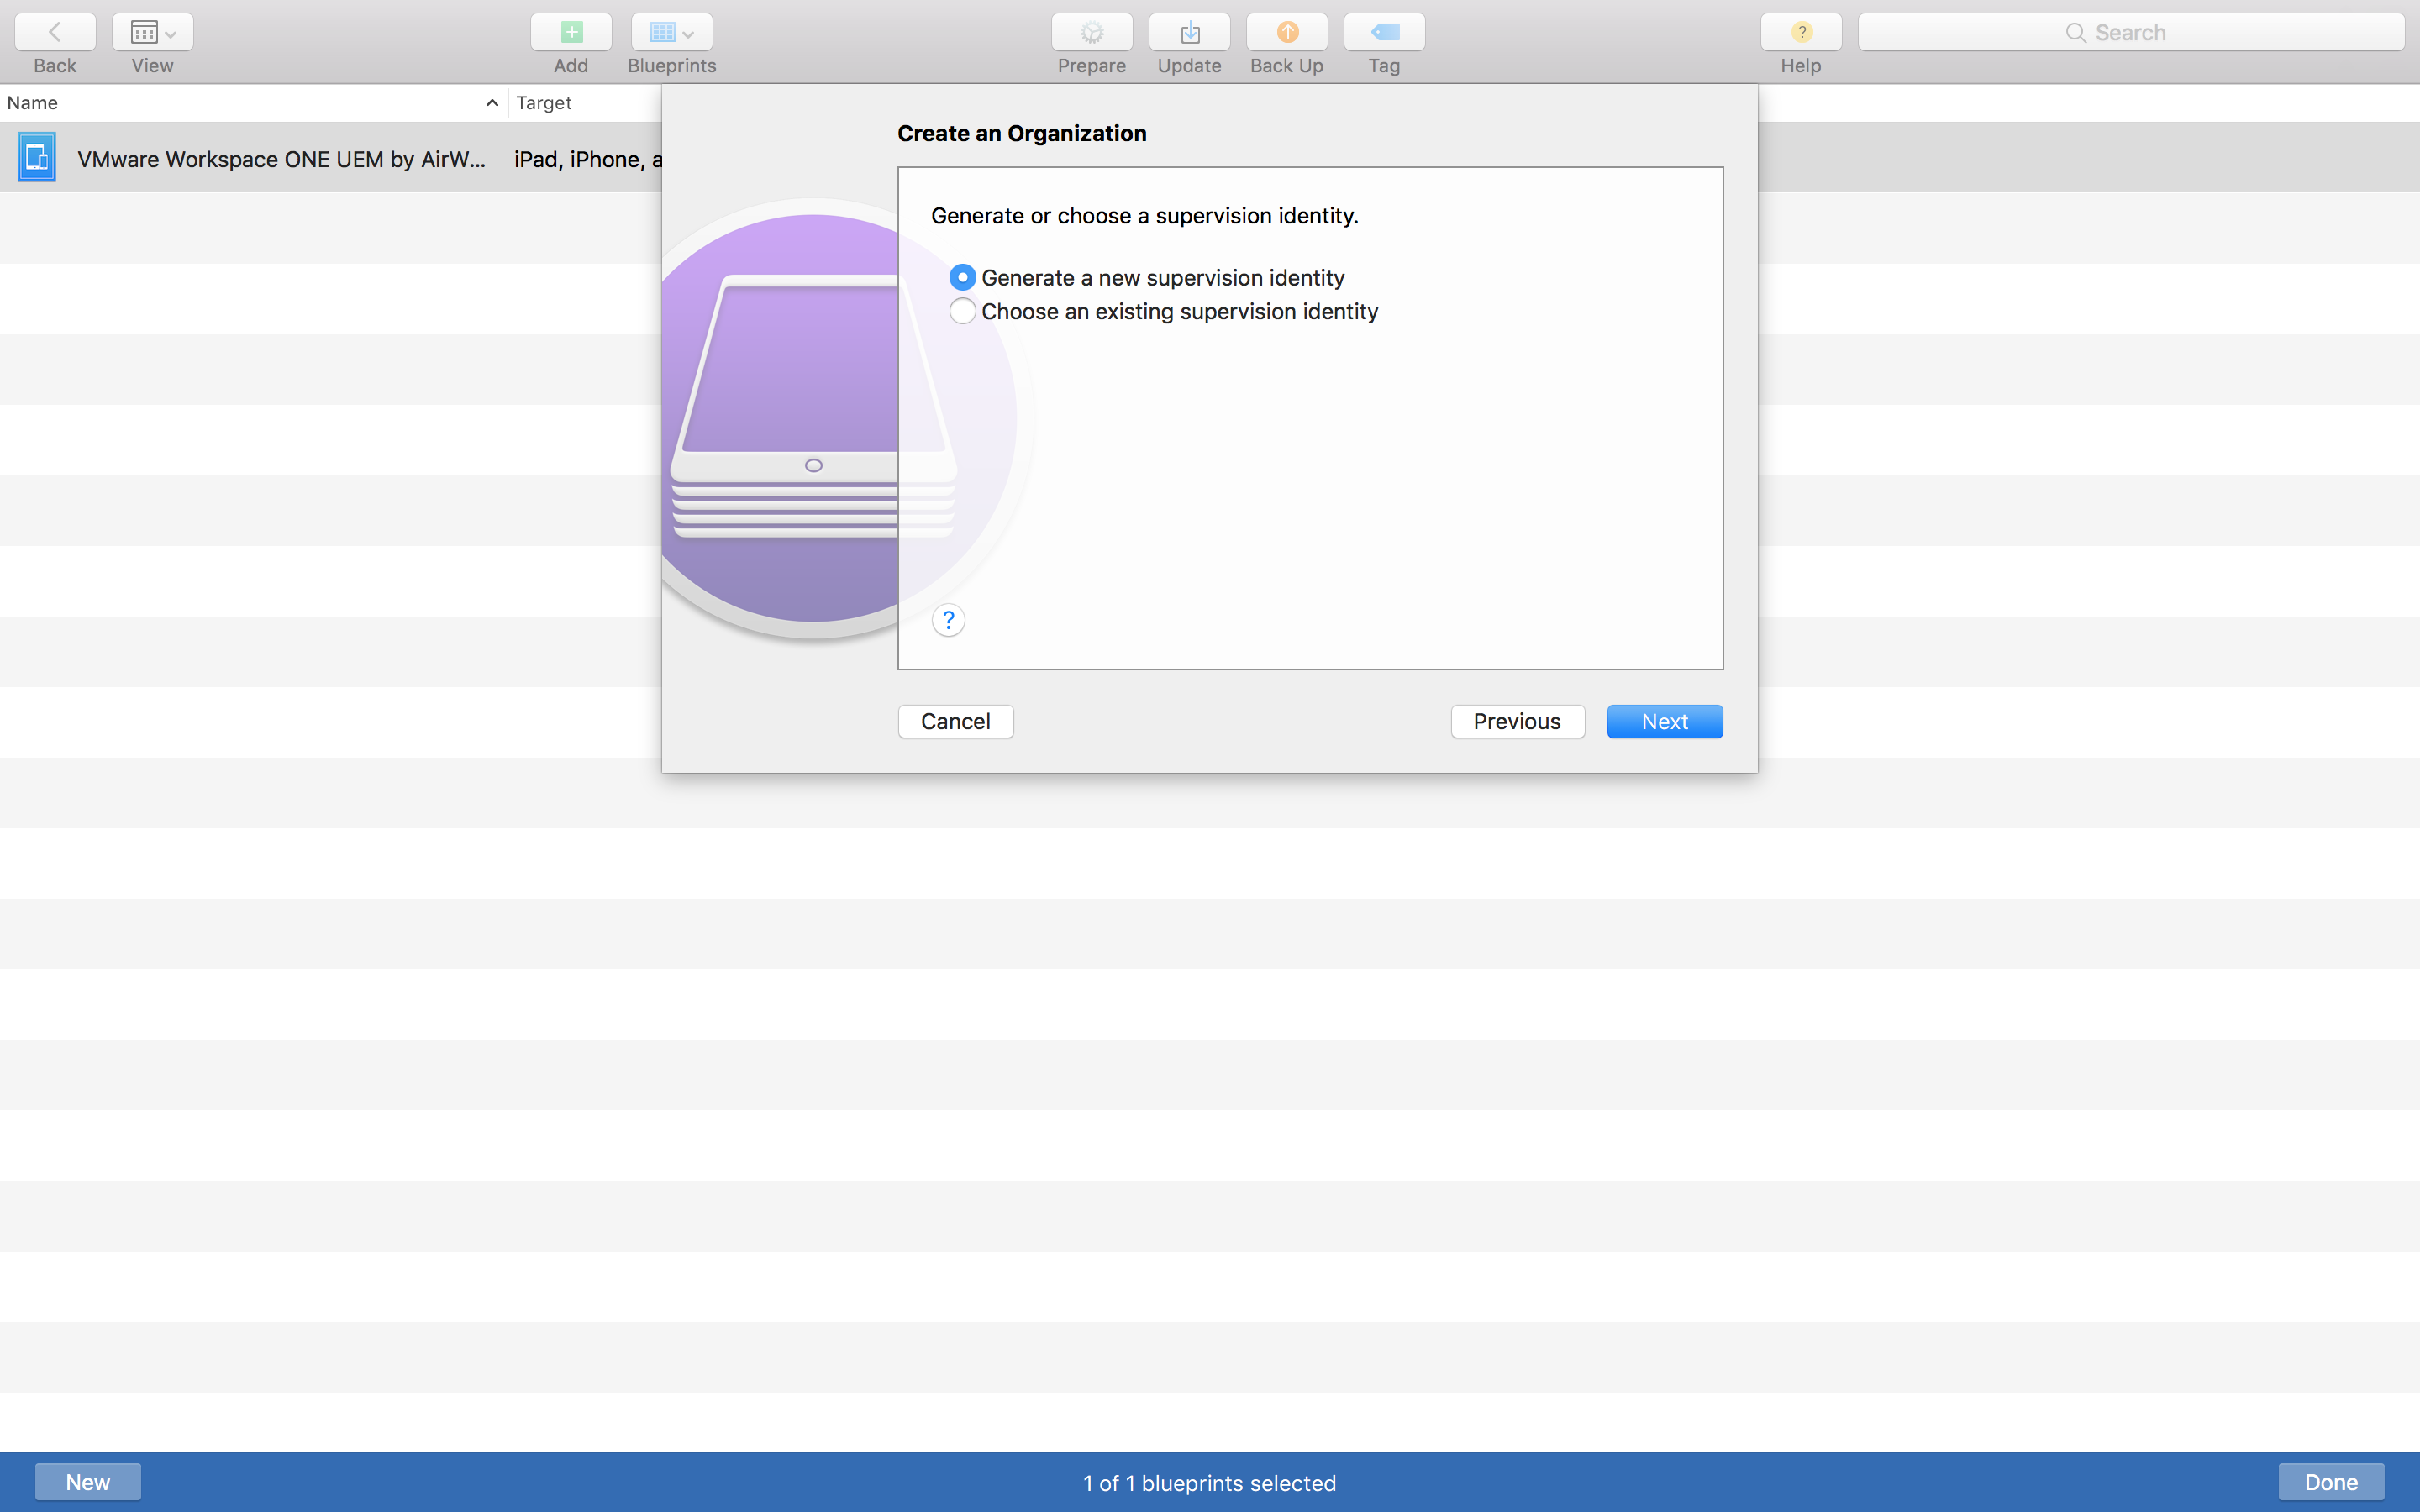
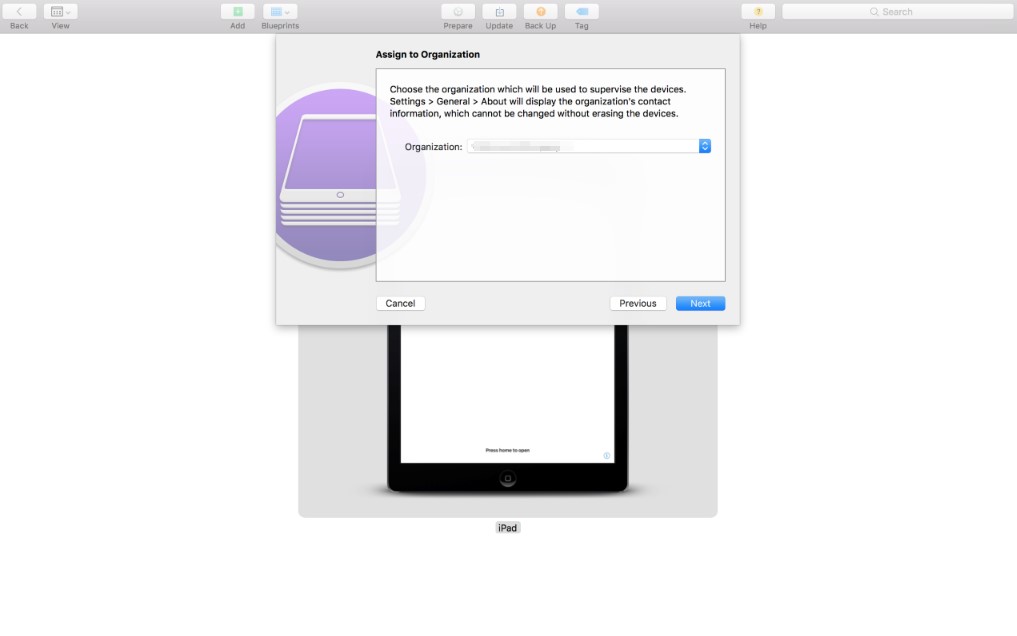
Create an Organization
Choose Generate a new supervision identity
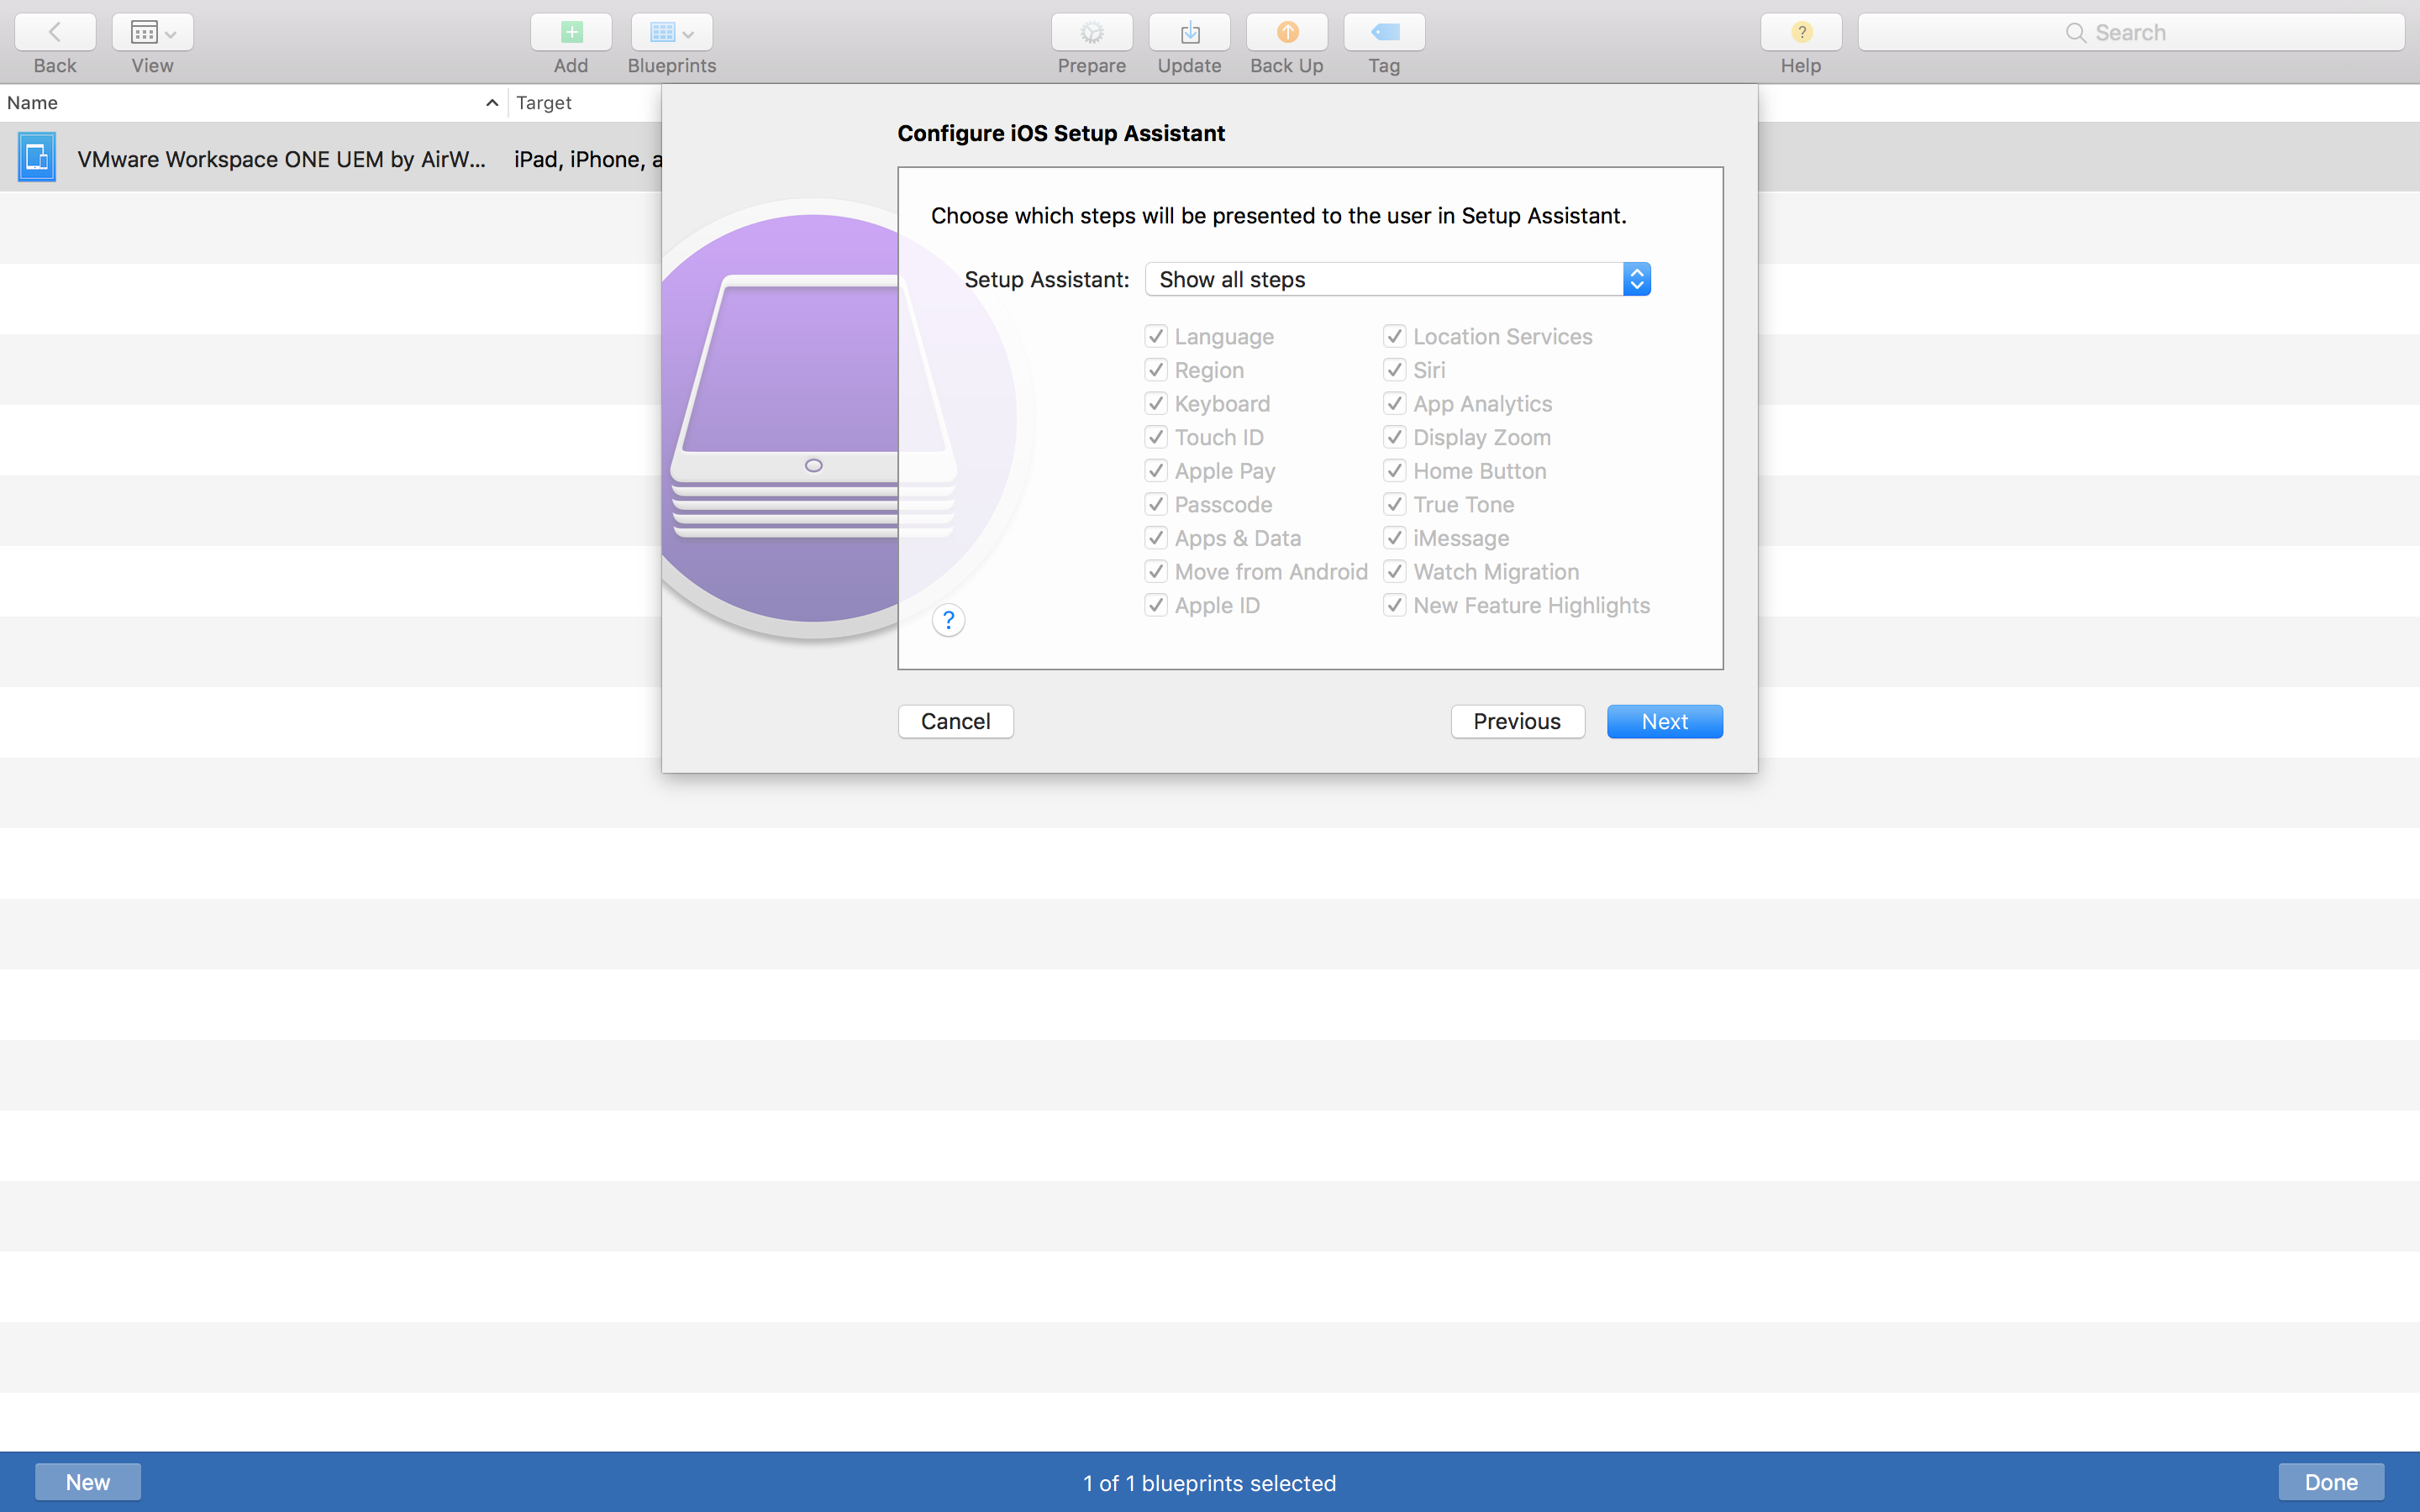
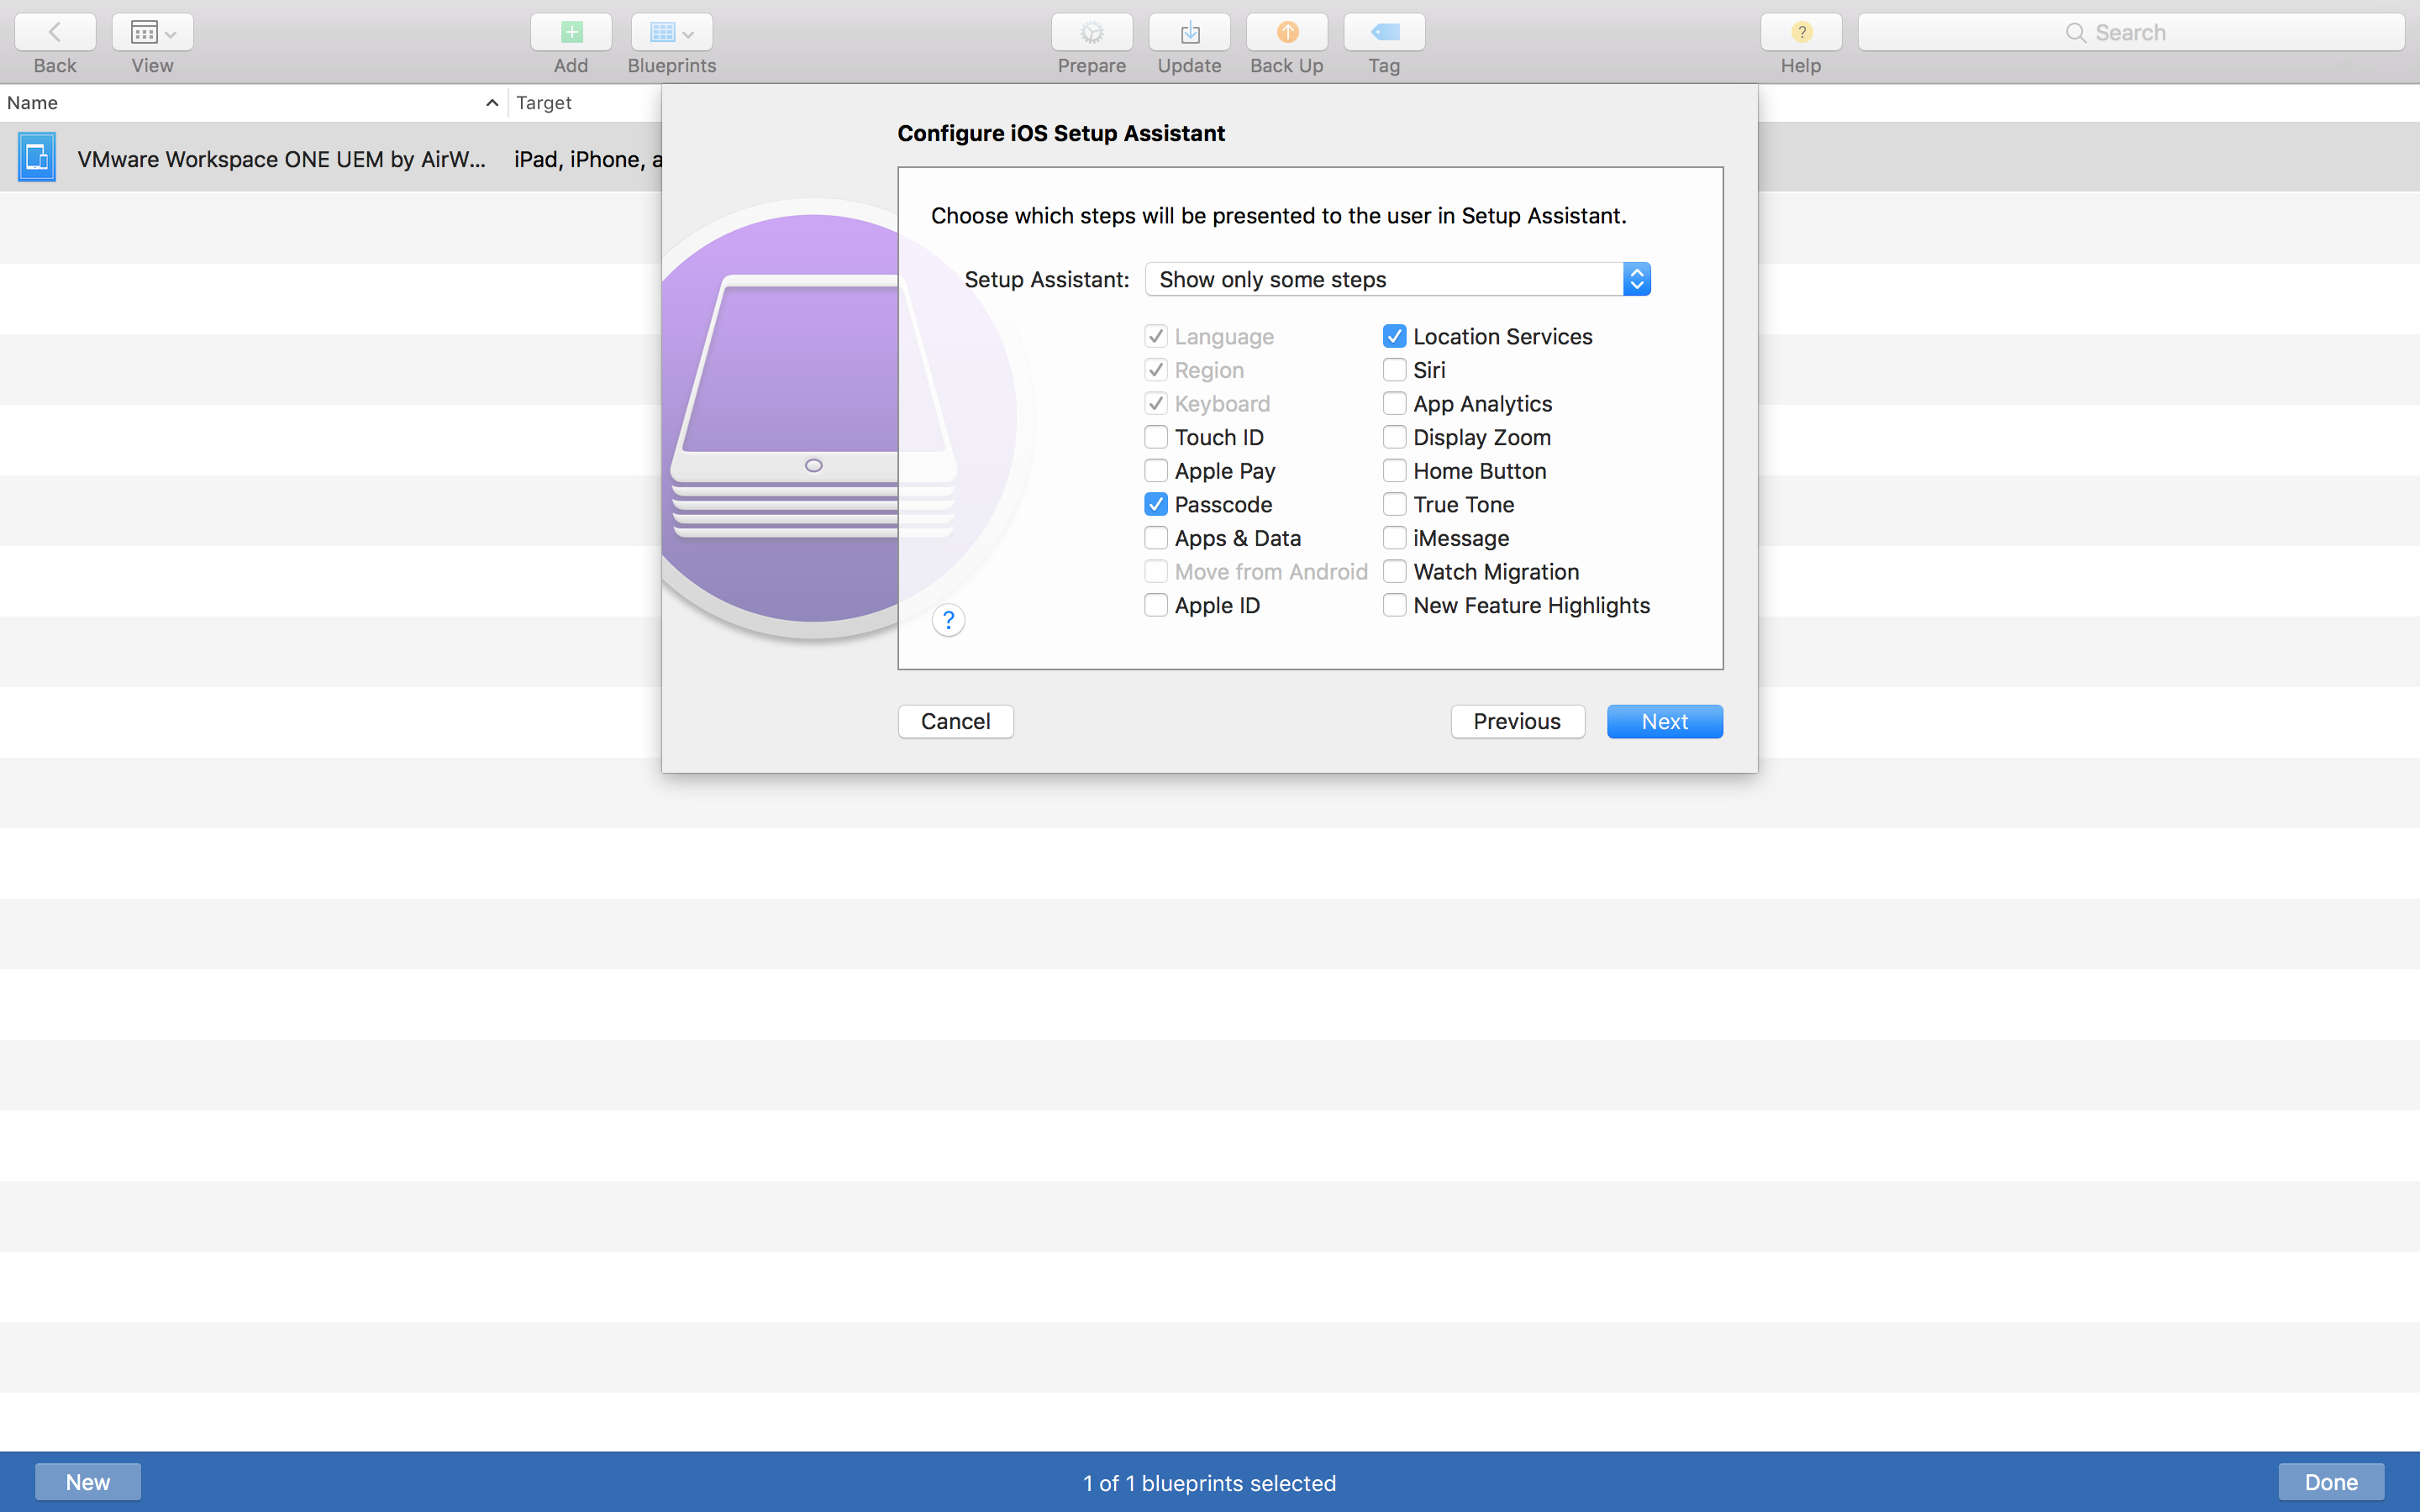
Configure iOS Setup Assistant
Check and uncheck as applicable. Actually, it doesn’t really matter as the DEP profile configured within VMware Workspace ONE will supersede the settings here.
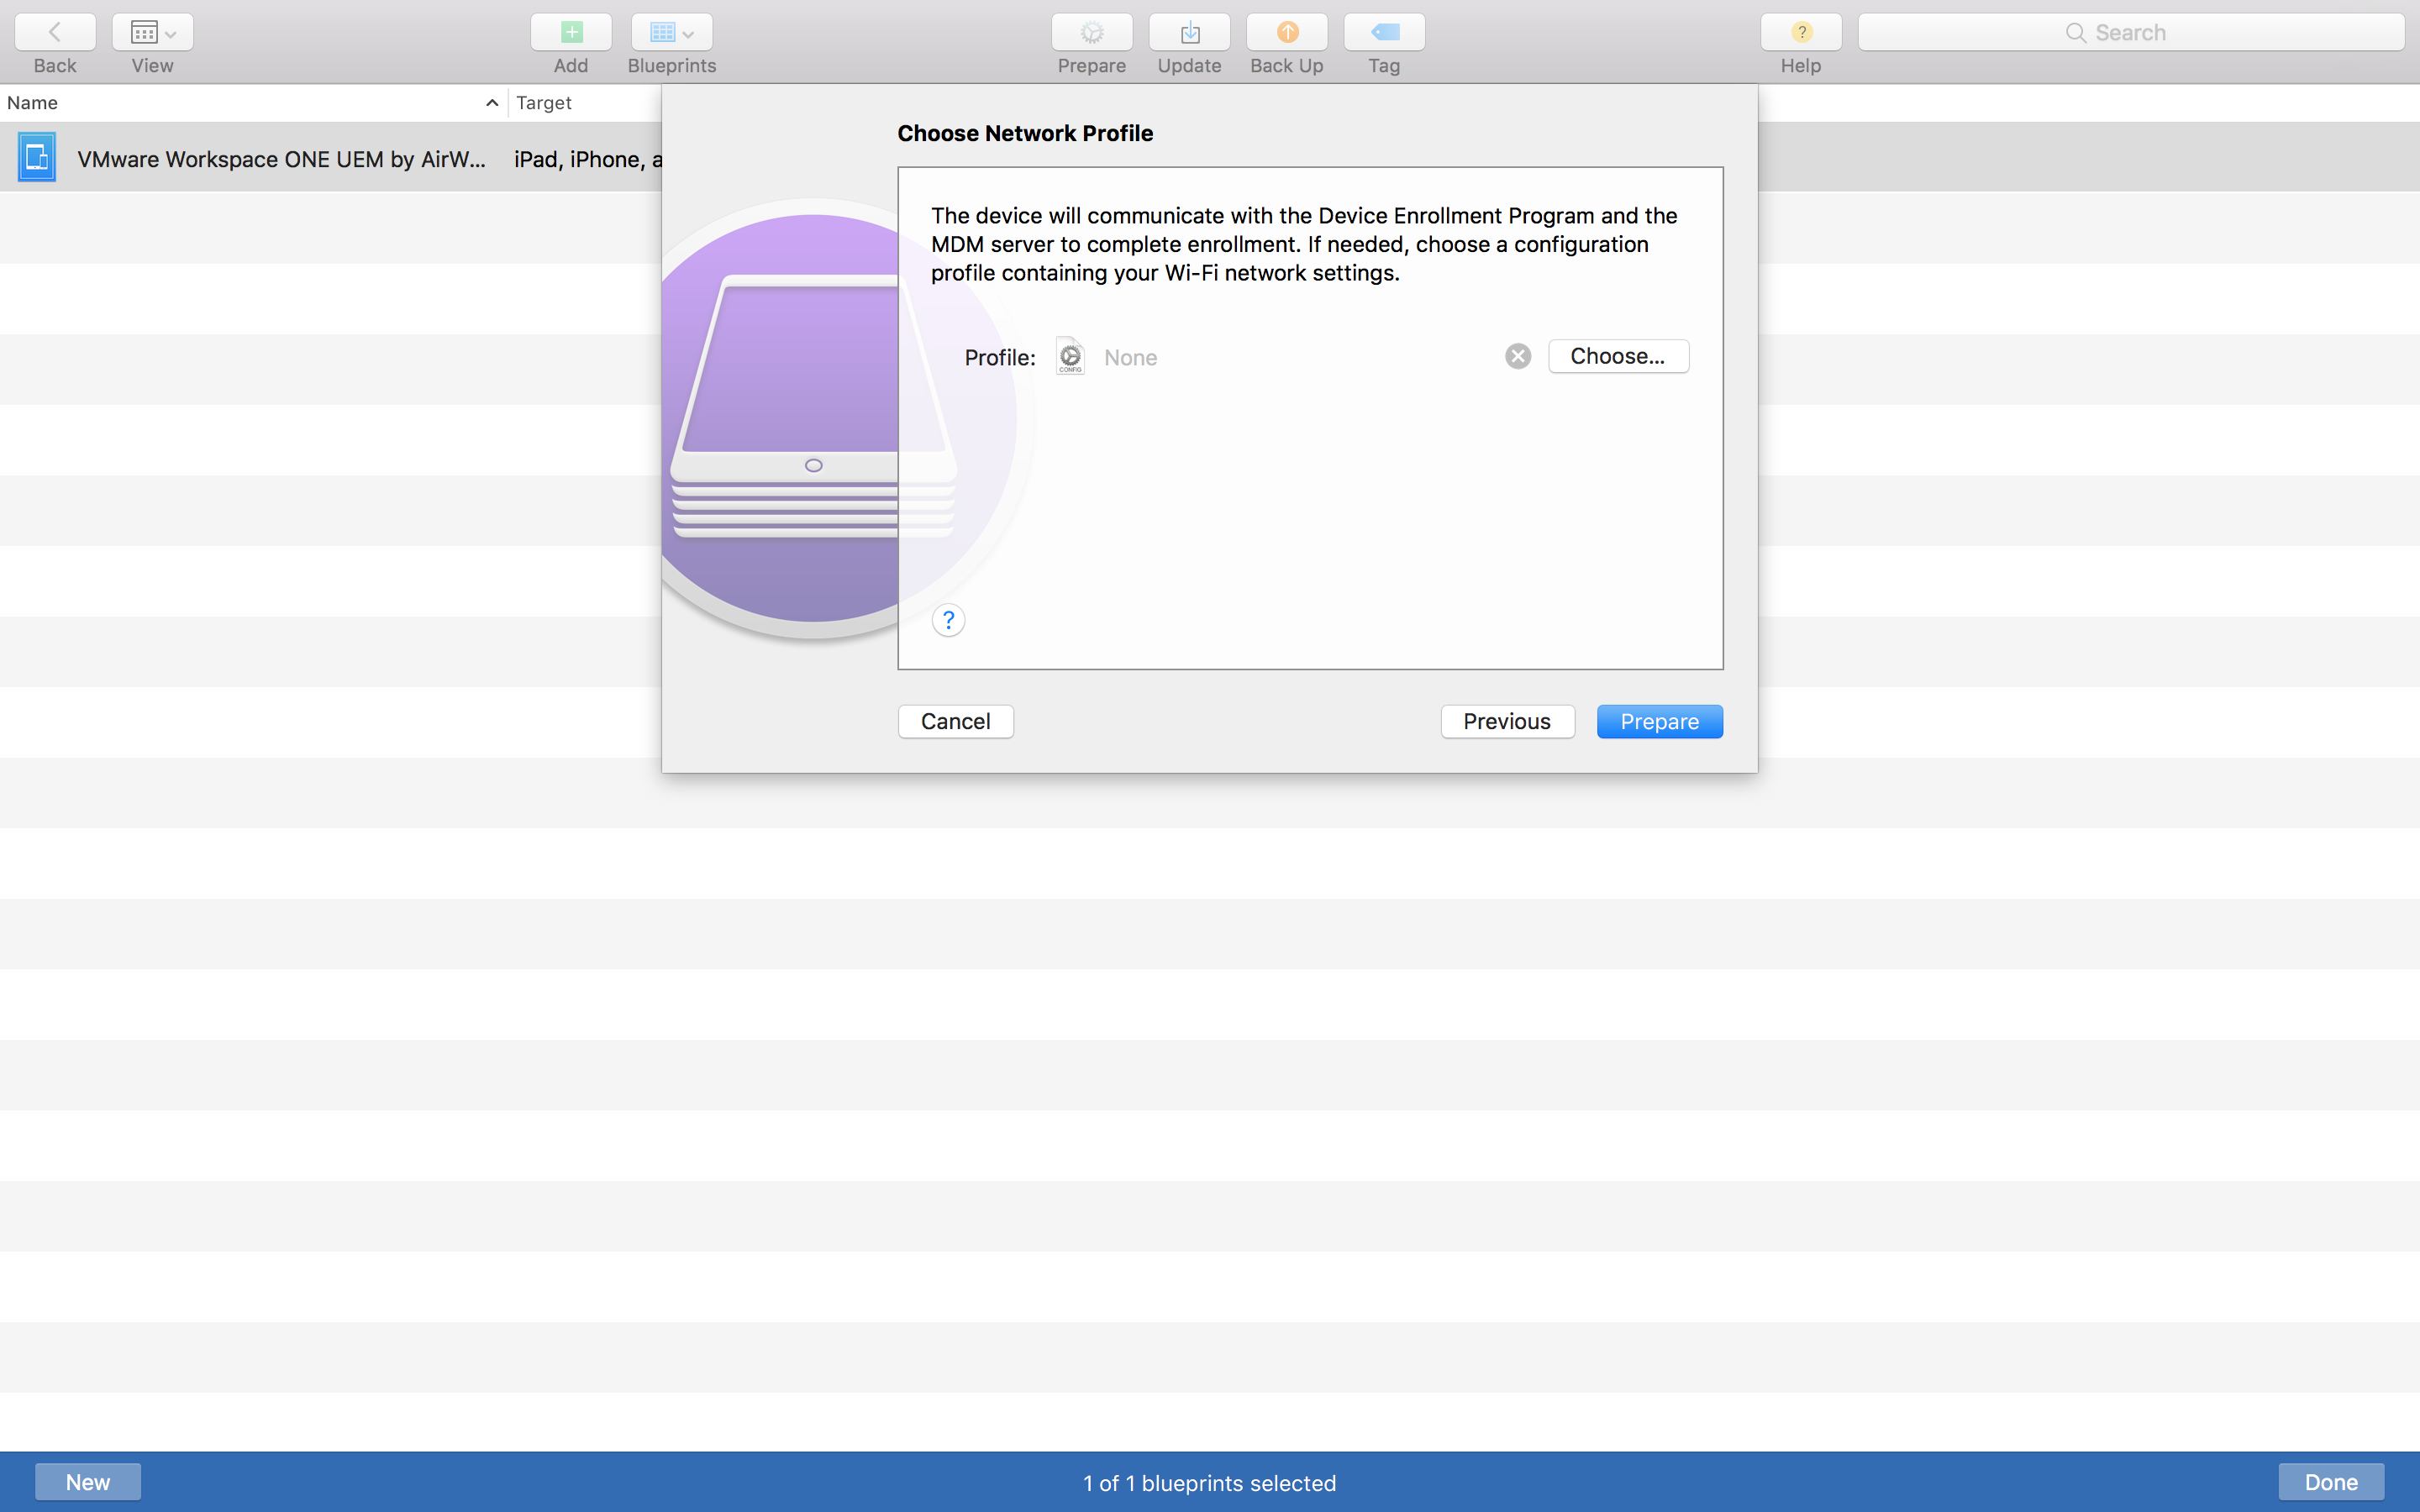
Choose Network Profile
Just click Prepare especially if you already configured Internet Sharing earlier, or attach the Wi-Fi profile created earlier. This step will prepare the device by pushing out the supervision profile.
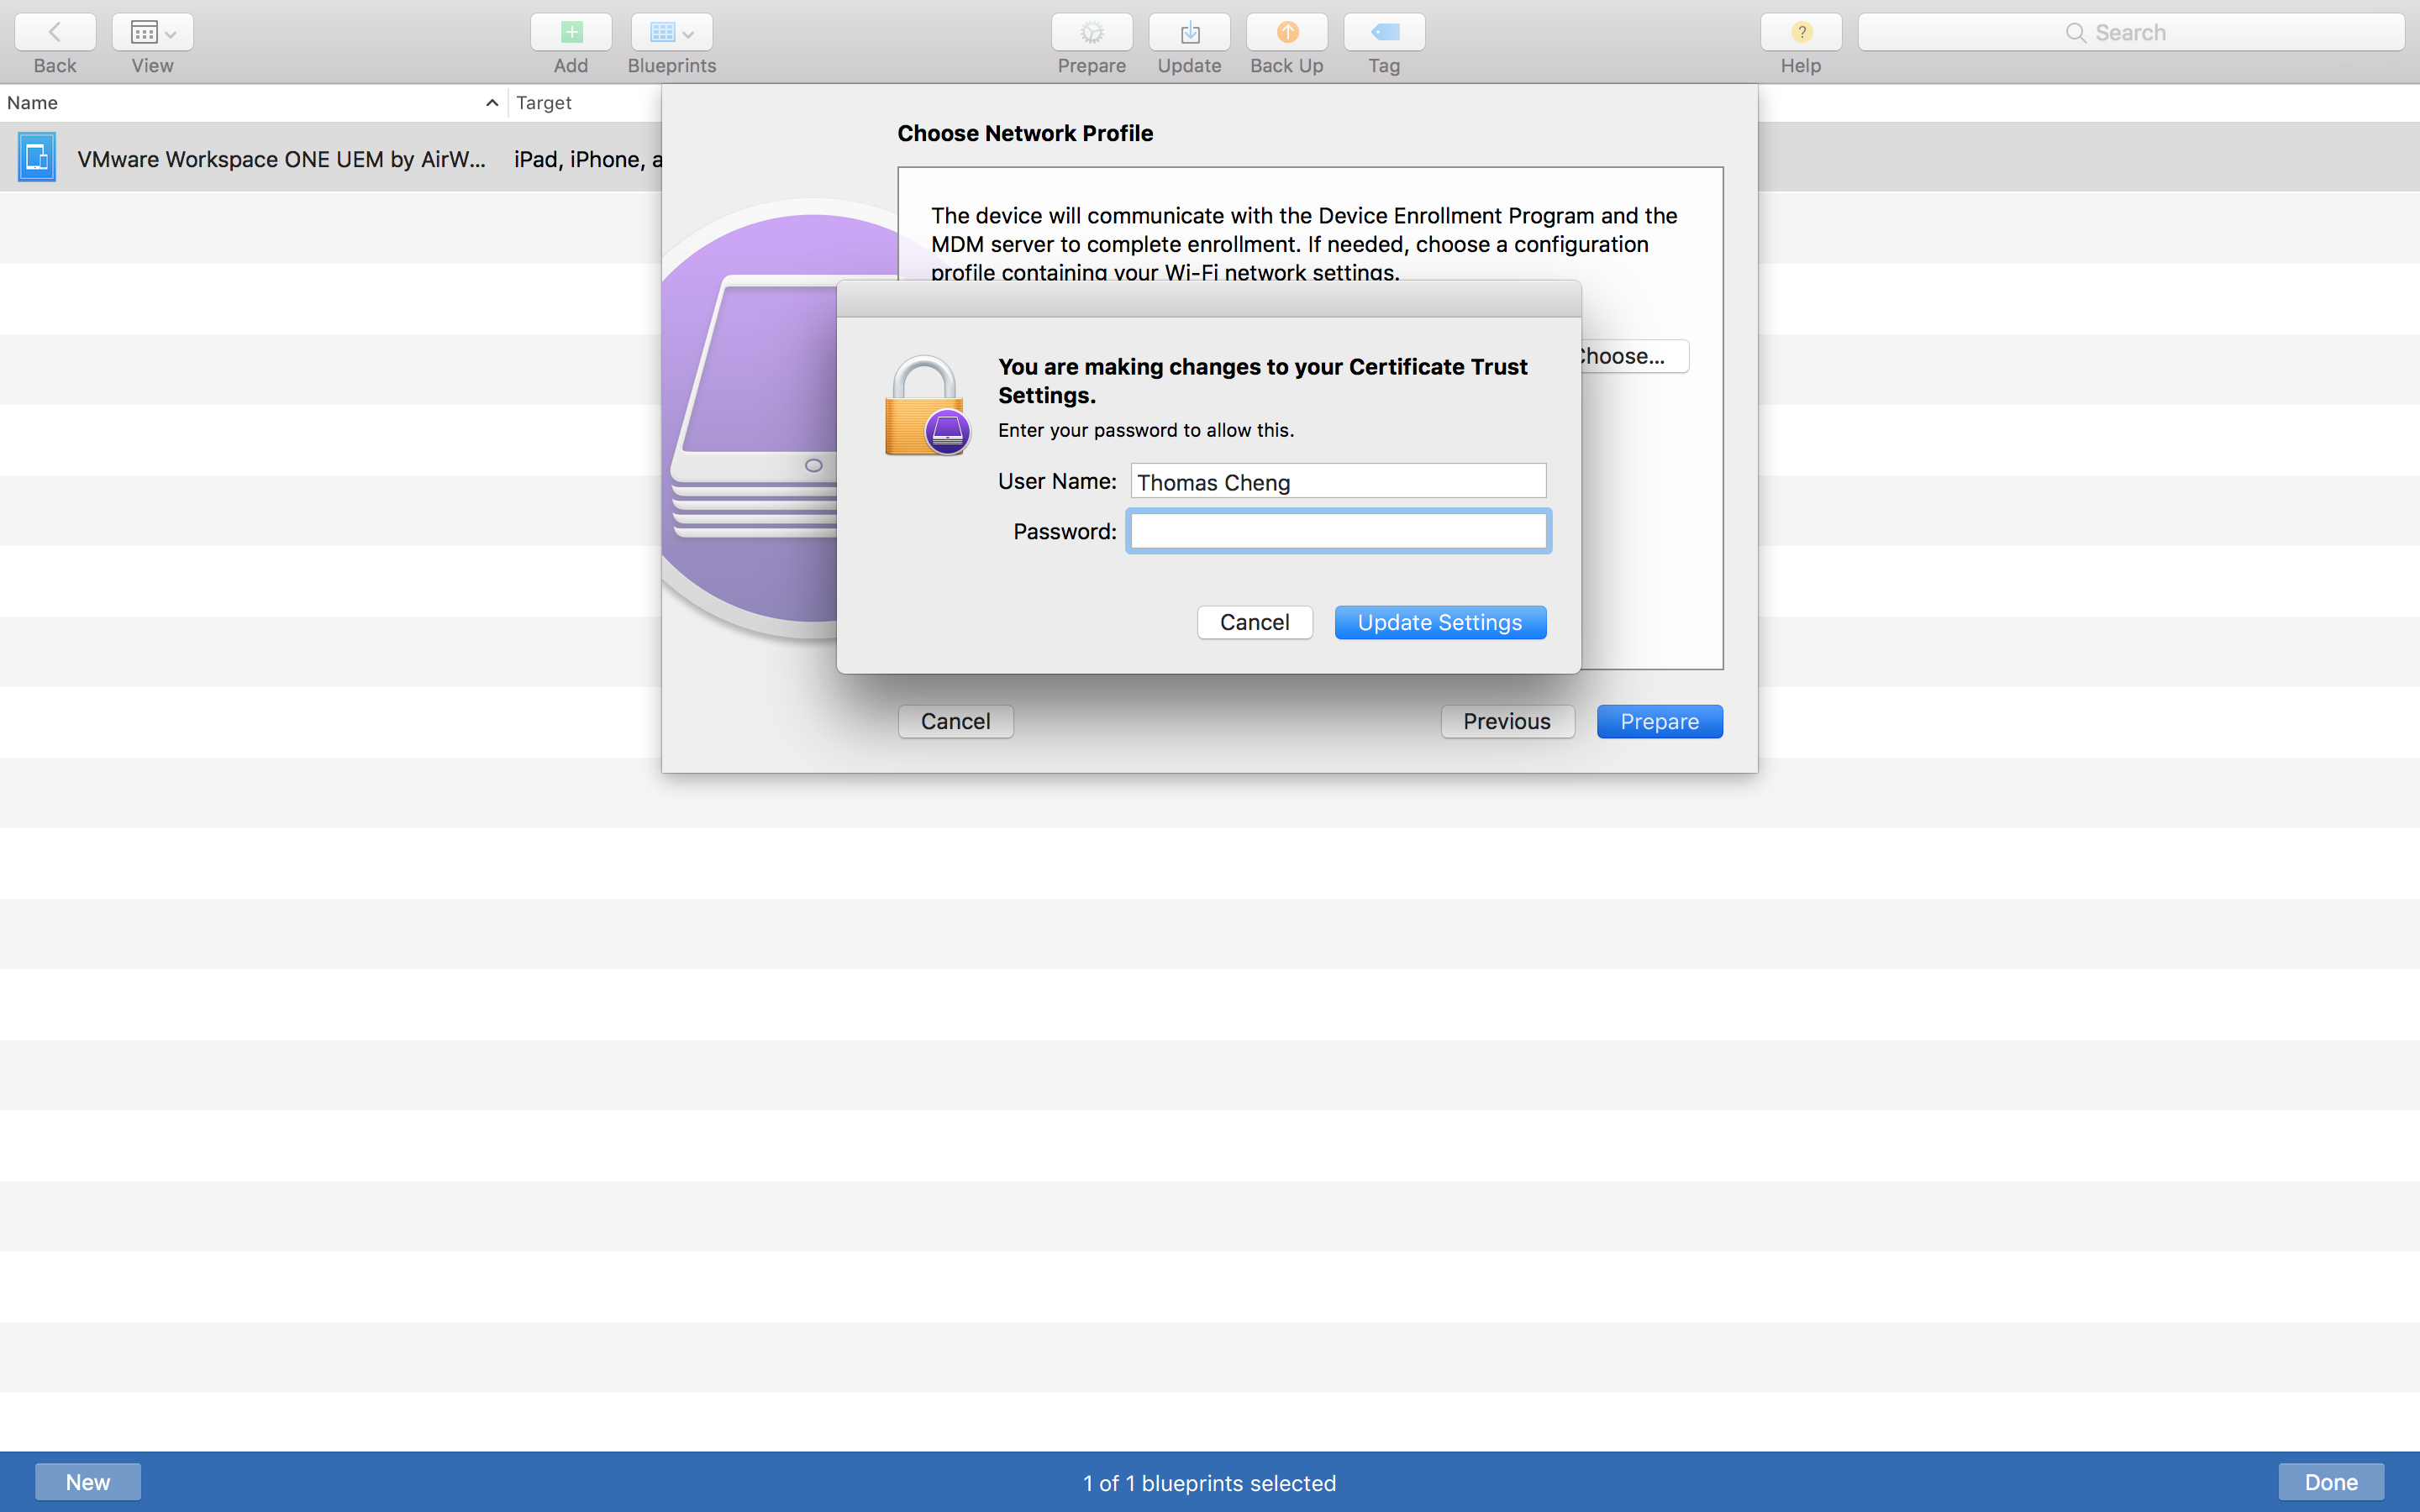
You are making changes to your Certificate Trust Settings
Enter your macOS password and click Update Settings, if applicable.
Click Done at the bottom right-hand corner of the screen. This will save the blueprint for future use.

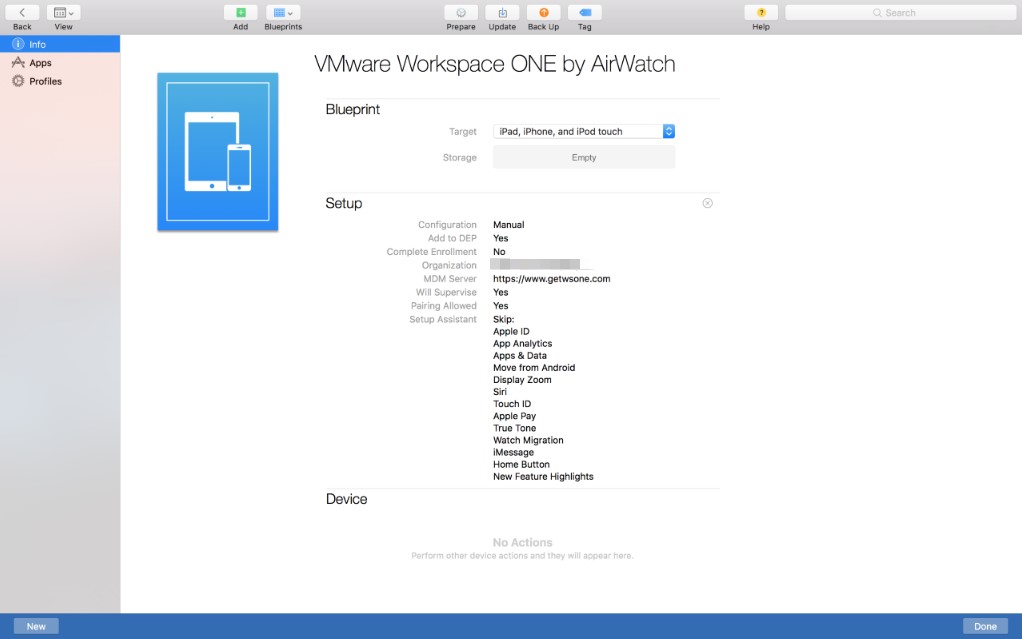
If you like, double-click on the blueprint to review the setup details.
* While I did attach the Wi-Fi profile toward the end of the blueprint creation, nothing is shown when I clicked on Profiles afterward. Per technical support, this is by design per Apple. You will only see additional profiles in the Profiles section if they are added after the blueprint is created.
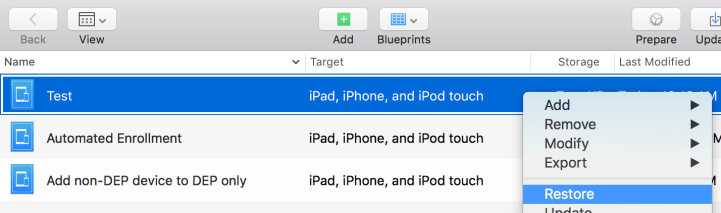
Somehow when I created another blueprint from scratch, I noticed an additional field Restore under Setup.
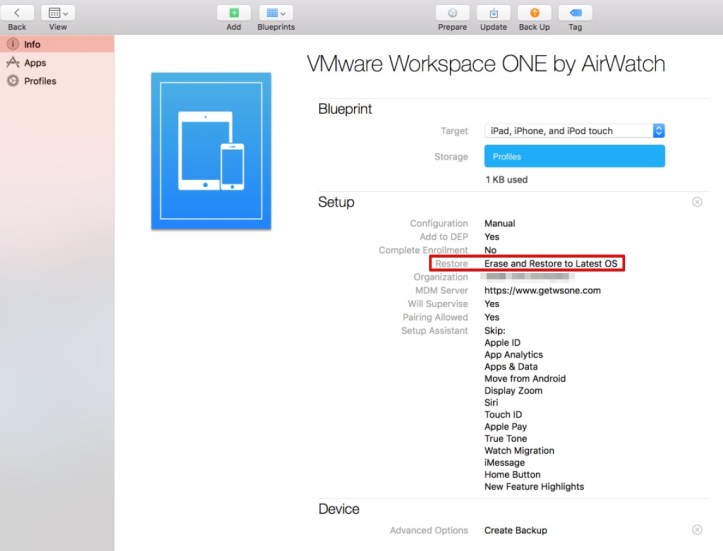
After speaking with technical support, this can be easily reproduced by right-clicking (or double tapping on macOS) on the blueprint and select Restore. If you wish to remove this, however, your only option is to delete the existing blueprint and re-create it.
Step 2: Apply new blueprint to non-DEP device
To apply the blueprint, connect the device to macOS with the USB cable. Then, select the device and click on the drop-down next to Blueprints and select the one that was created earlier.

Click Apply.
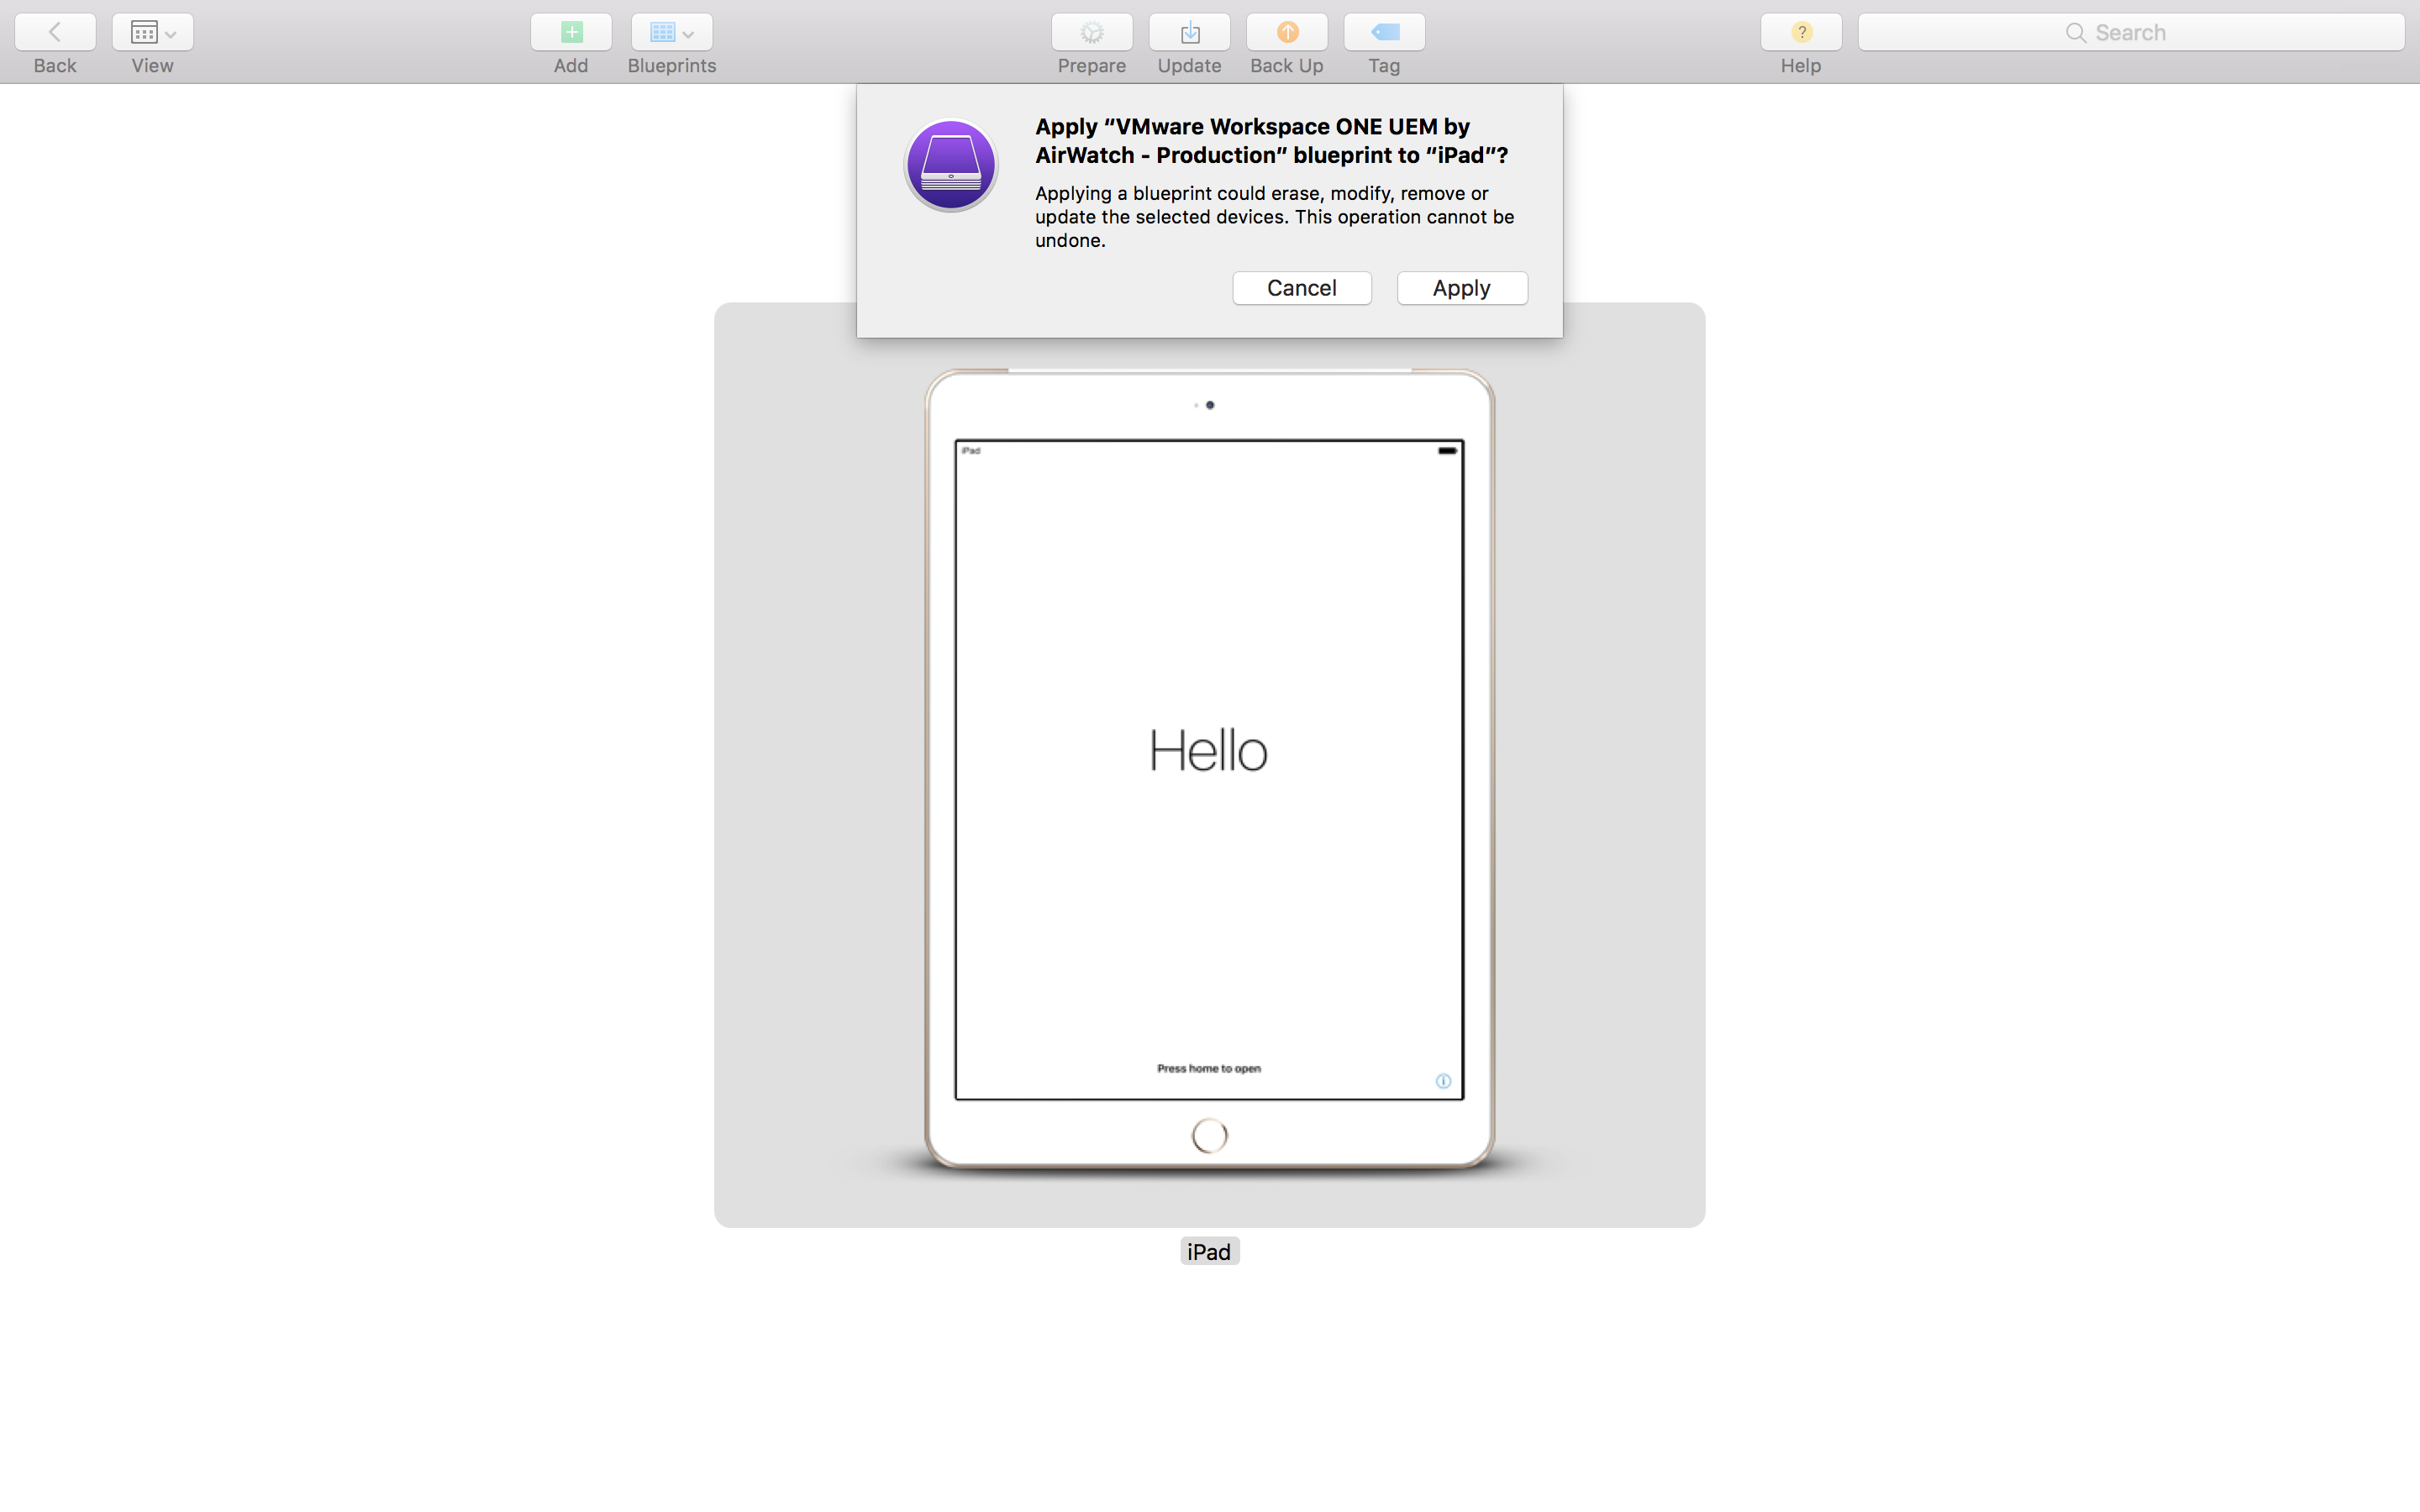

During the process, the device will reset itself. Once it completes, you may disconnect the device from macOS or leave it connected before continuing further.
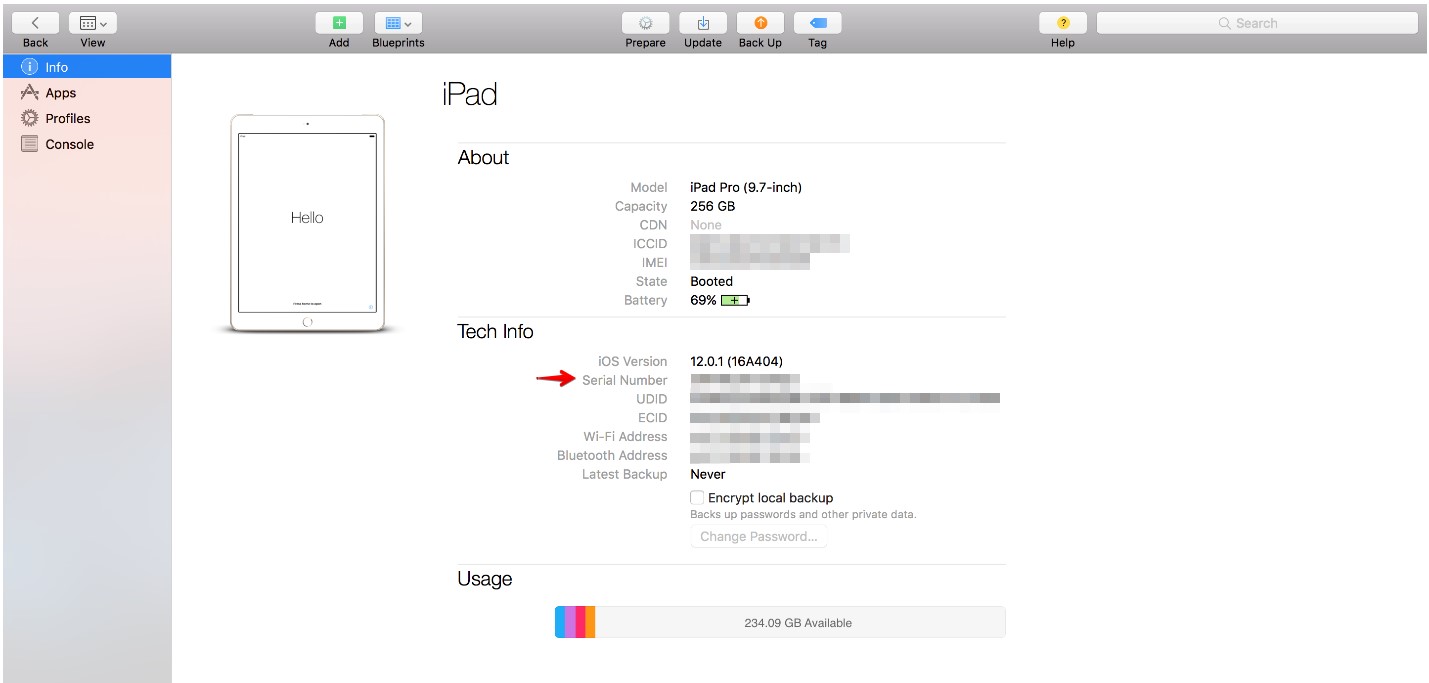
Within Apple Configurator, you will once again see the device at its normal state. Double click on the device and take note of the serial number for the remaining steps below.
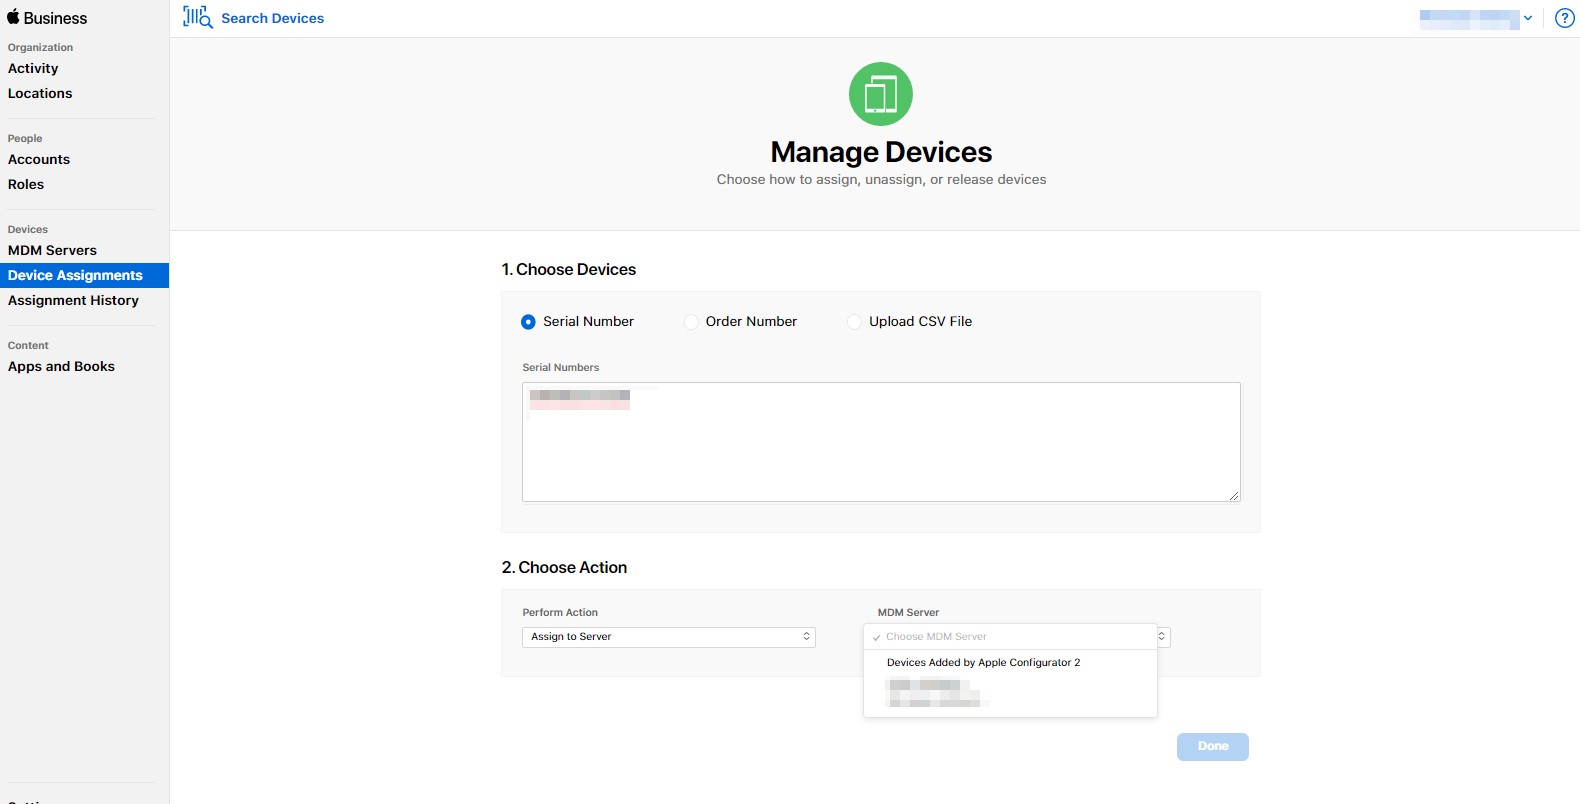
Step 3: Assign the newly added DEP device to MDM server
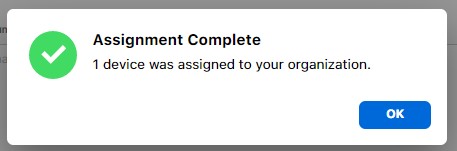
At this point, the device should have been added to your DEP account. You can verify this by visiting either Apple Deployment Program or Apple Business Manager website. Go ahead and assign it to your MDM server.
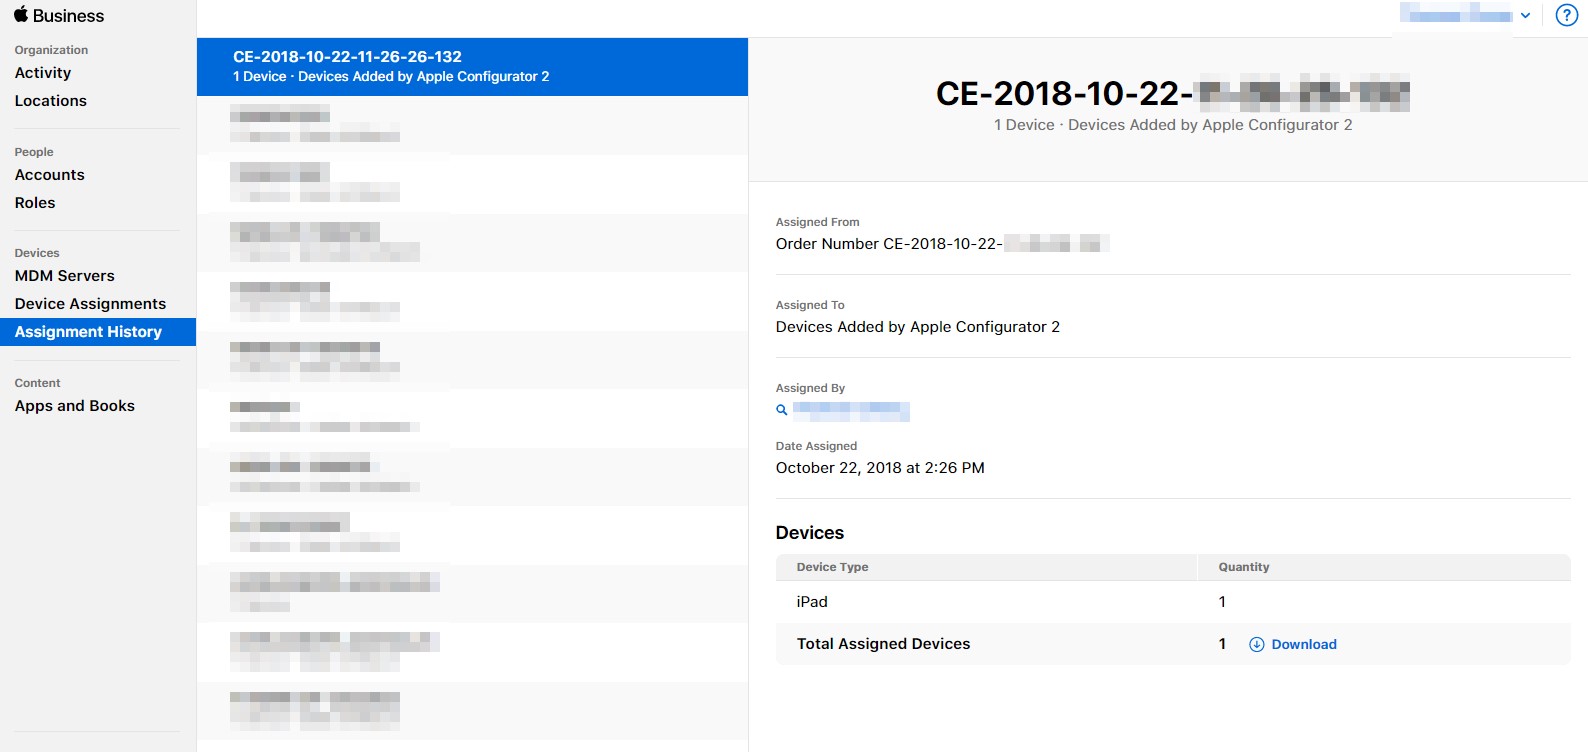
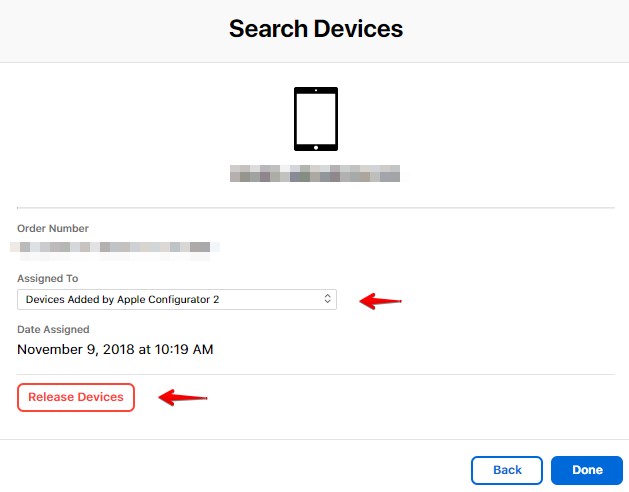
One feature I overlook is Search Devices near the top left corner of the page. It’s very useful to determine if a device is:
- added to DEP, and,
- assigned to any MDM server.
Within the same window, you can also assign the device to an MDM server or even release it from DEP.

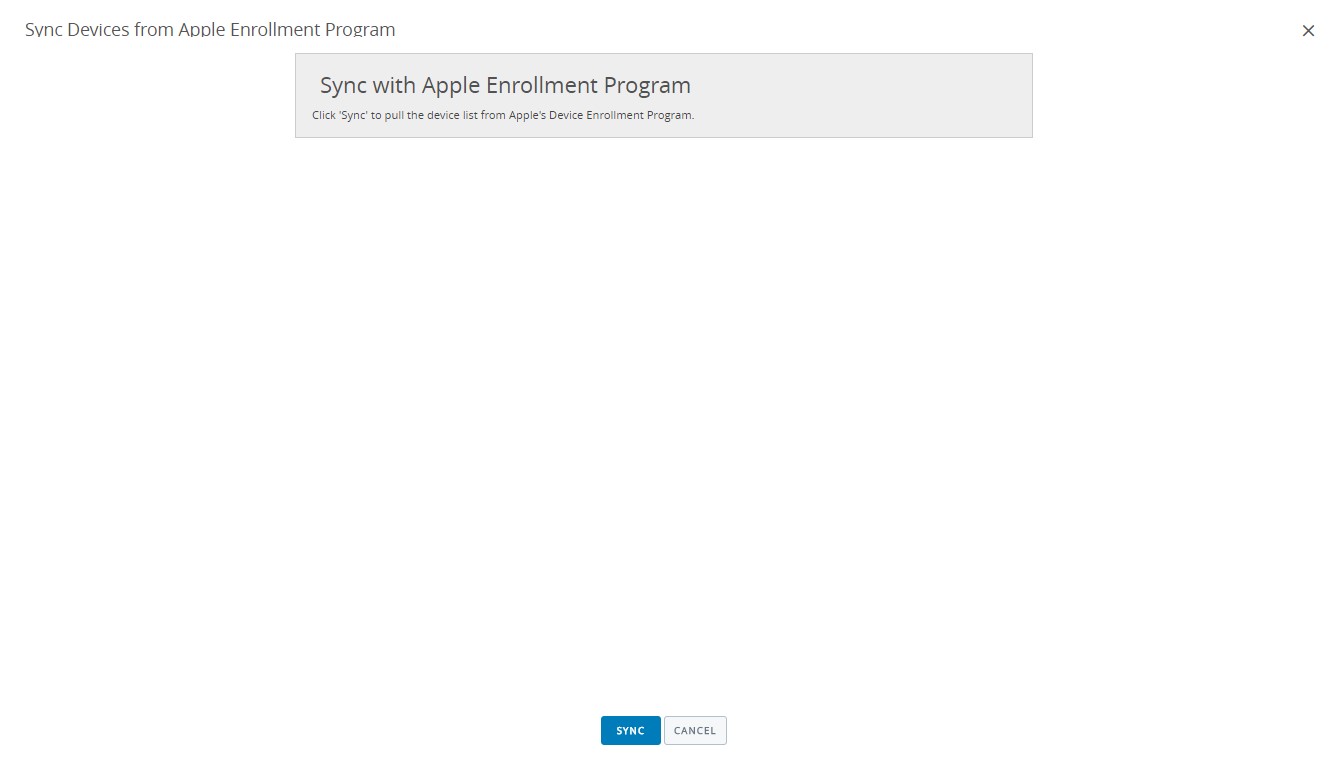
Step 4: Sync the newly added DEP device to MDM server
In the Workspace ONE console, go to DEVICES -> Lifecycle -> Enrollment Status. Click ADD on top. Then click Sync Devices.
* This will attempt to sync the newly added devices in DEP which are not present under the Enrollment Status page.

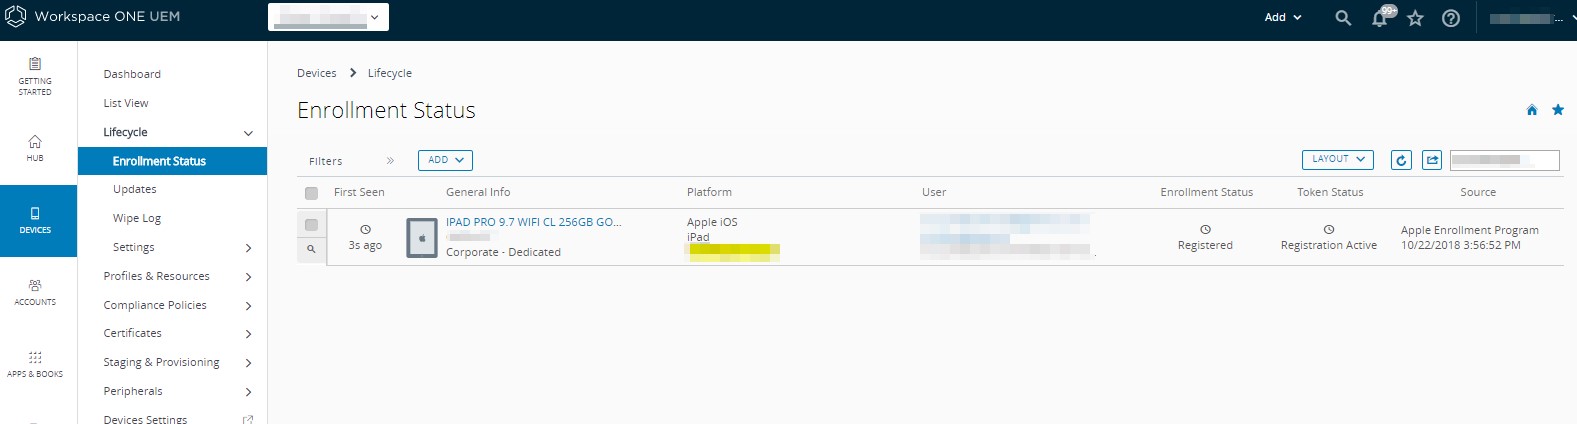
Notice under Enrollment Status, this device is now Registered (not Enrolled). Make sure this step is completed before continuing further.
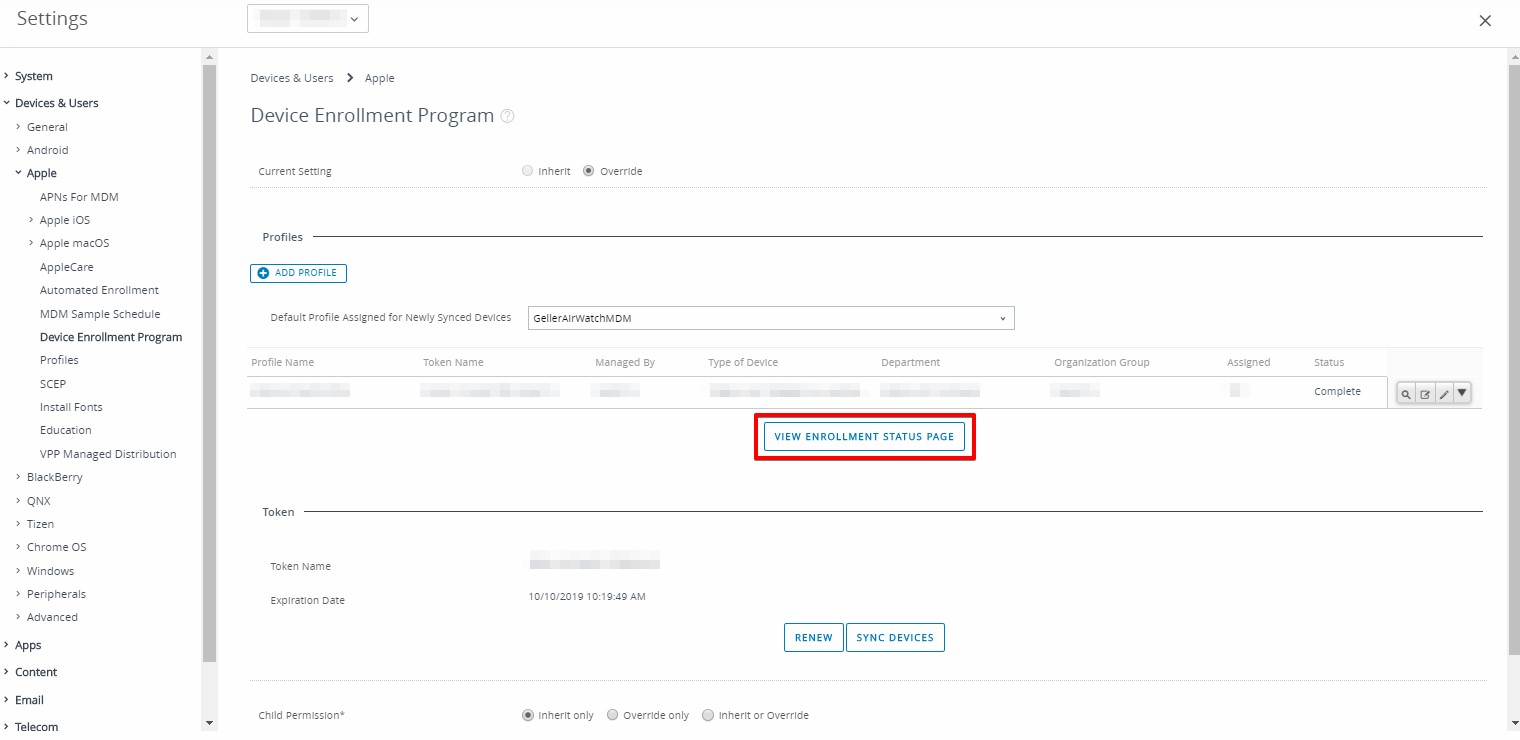
If the steps above doesn’t sync down the device, go to GROUPS & SETTINGS -> All Settings -> Devices & Users -> Apple -> Device Enrollment Program. Then, click SYNC DEVICES under Token section. This will attempt to sync all the devices from DEP which are assigned to the MDM Server under DEP portal. Check out this link for further details on this.
* This setting should only be used during the initial setup of DEP whenever possible.
Follow this link for further troubleshooting steps.
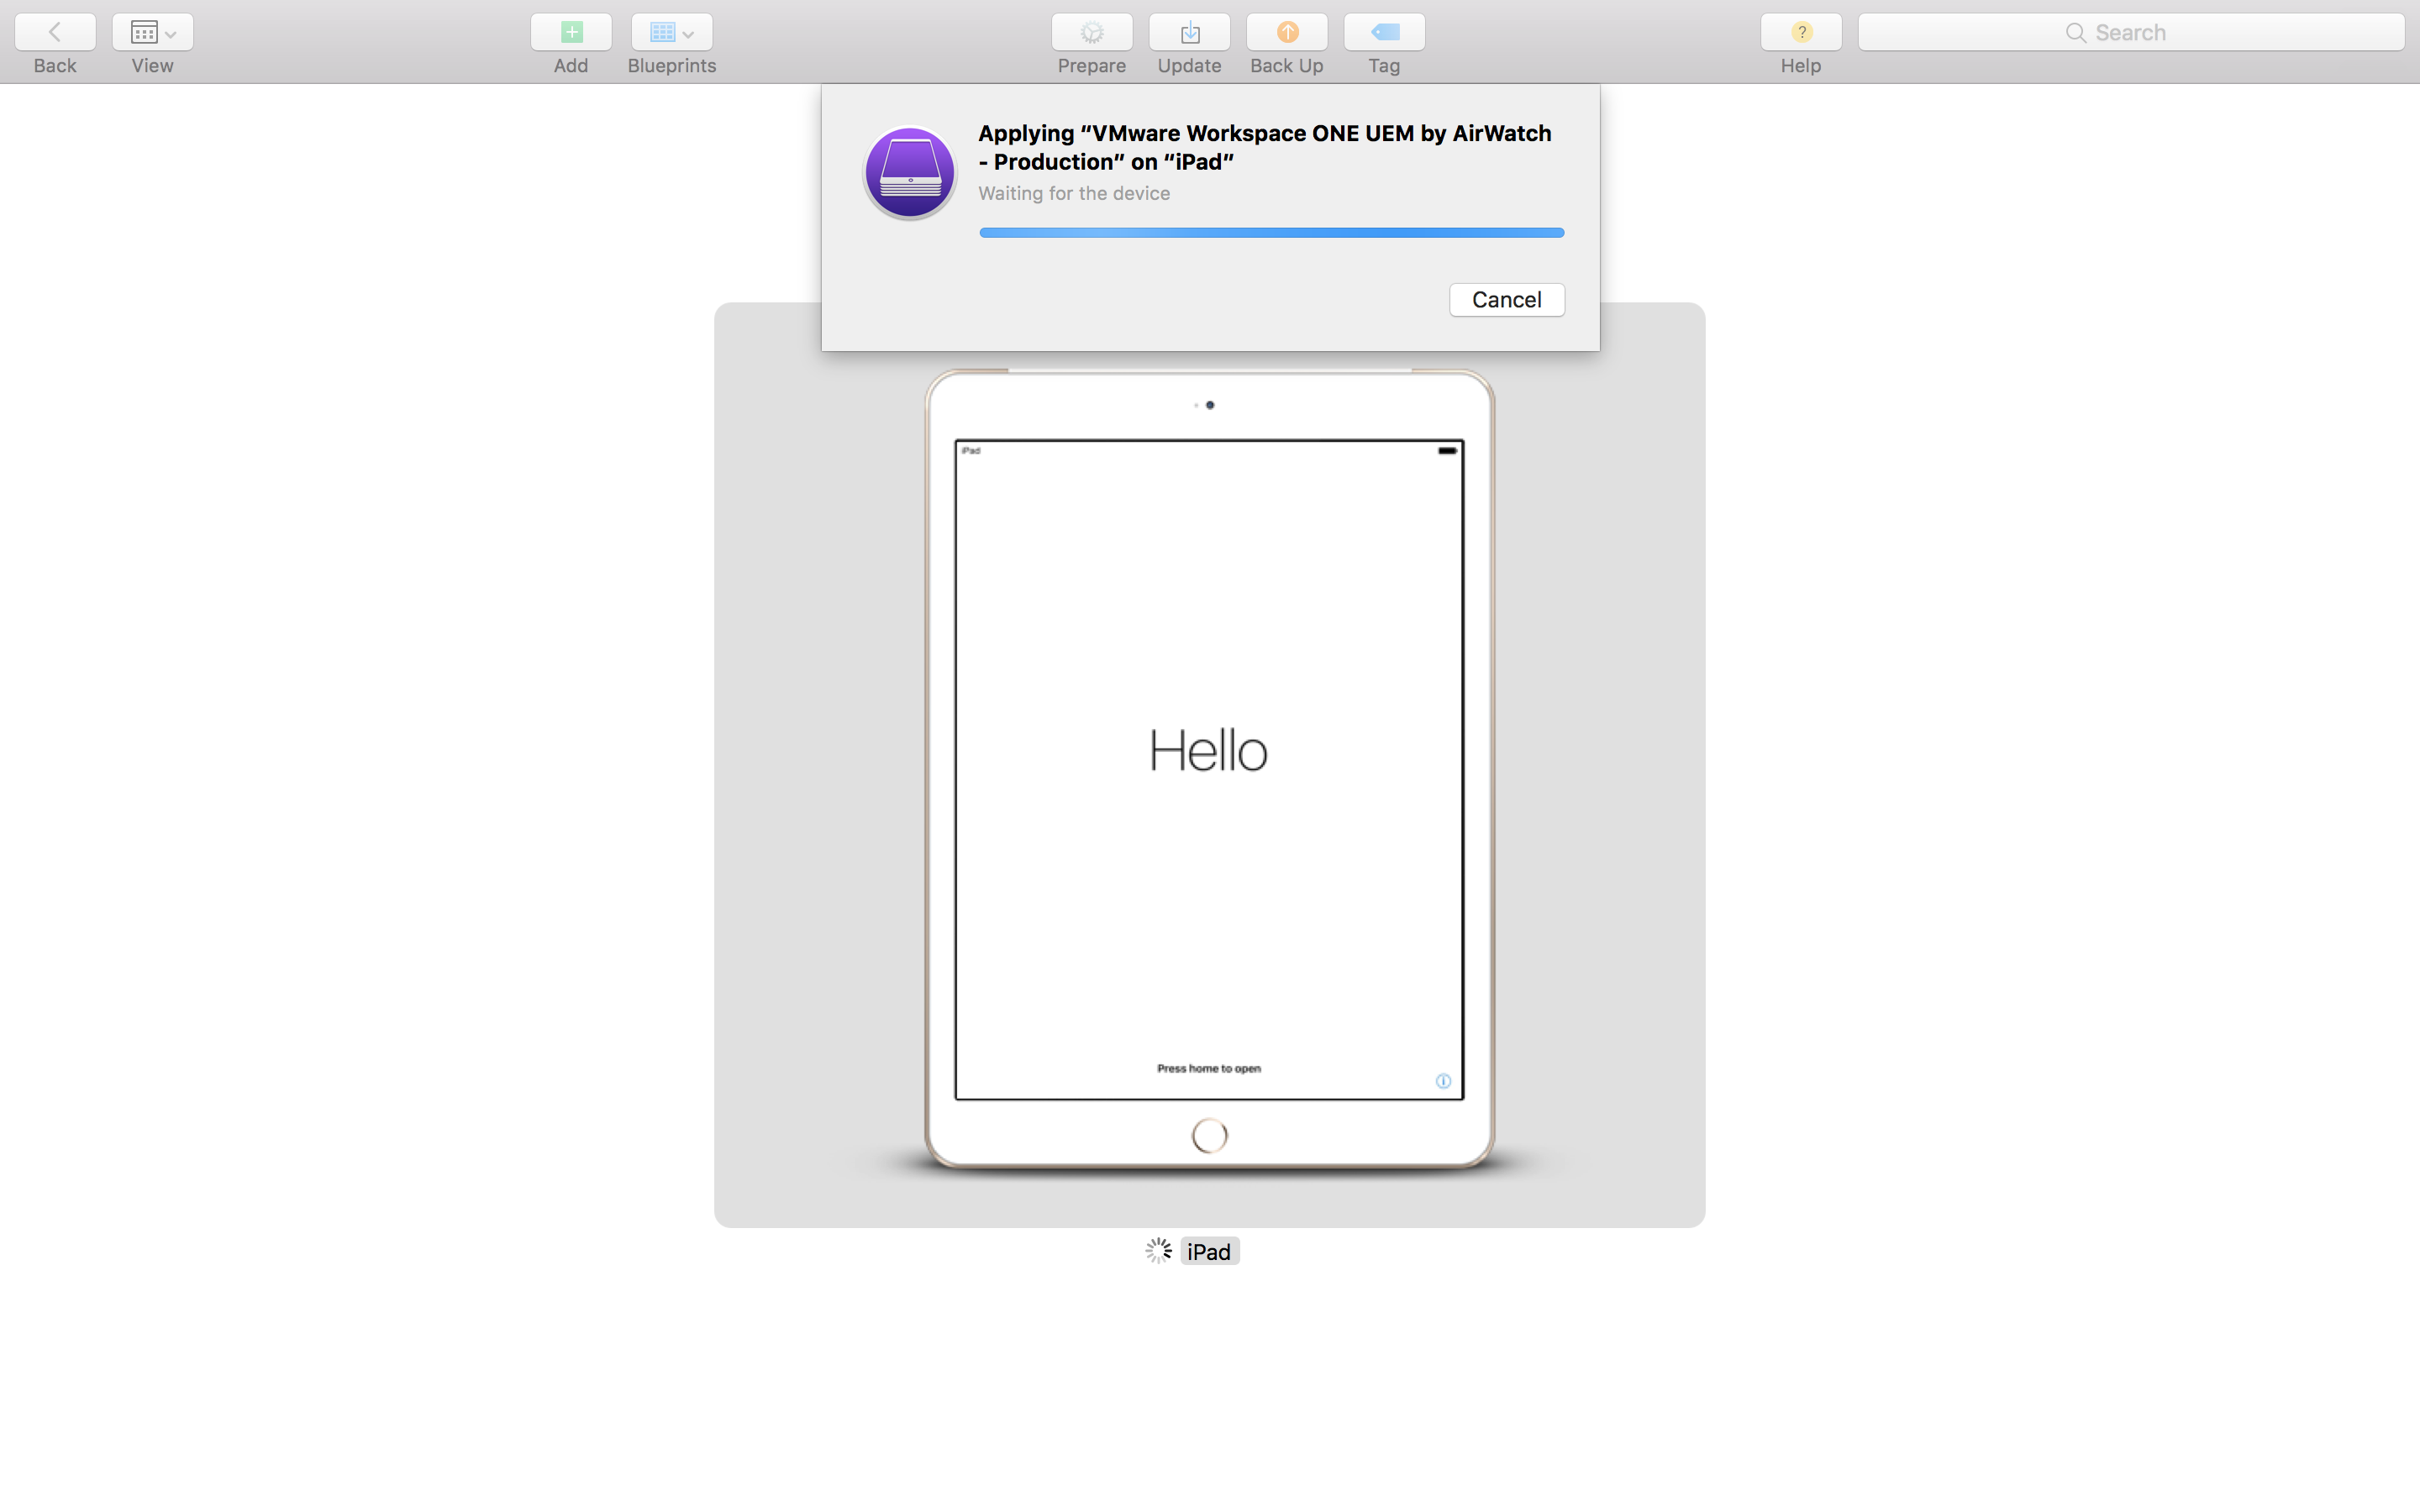
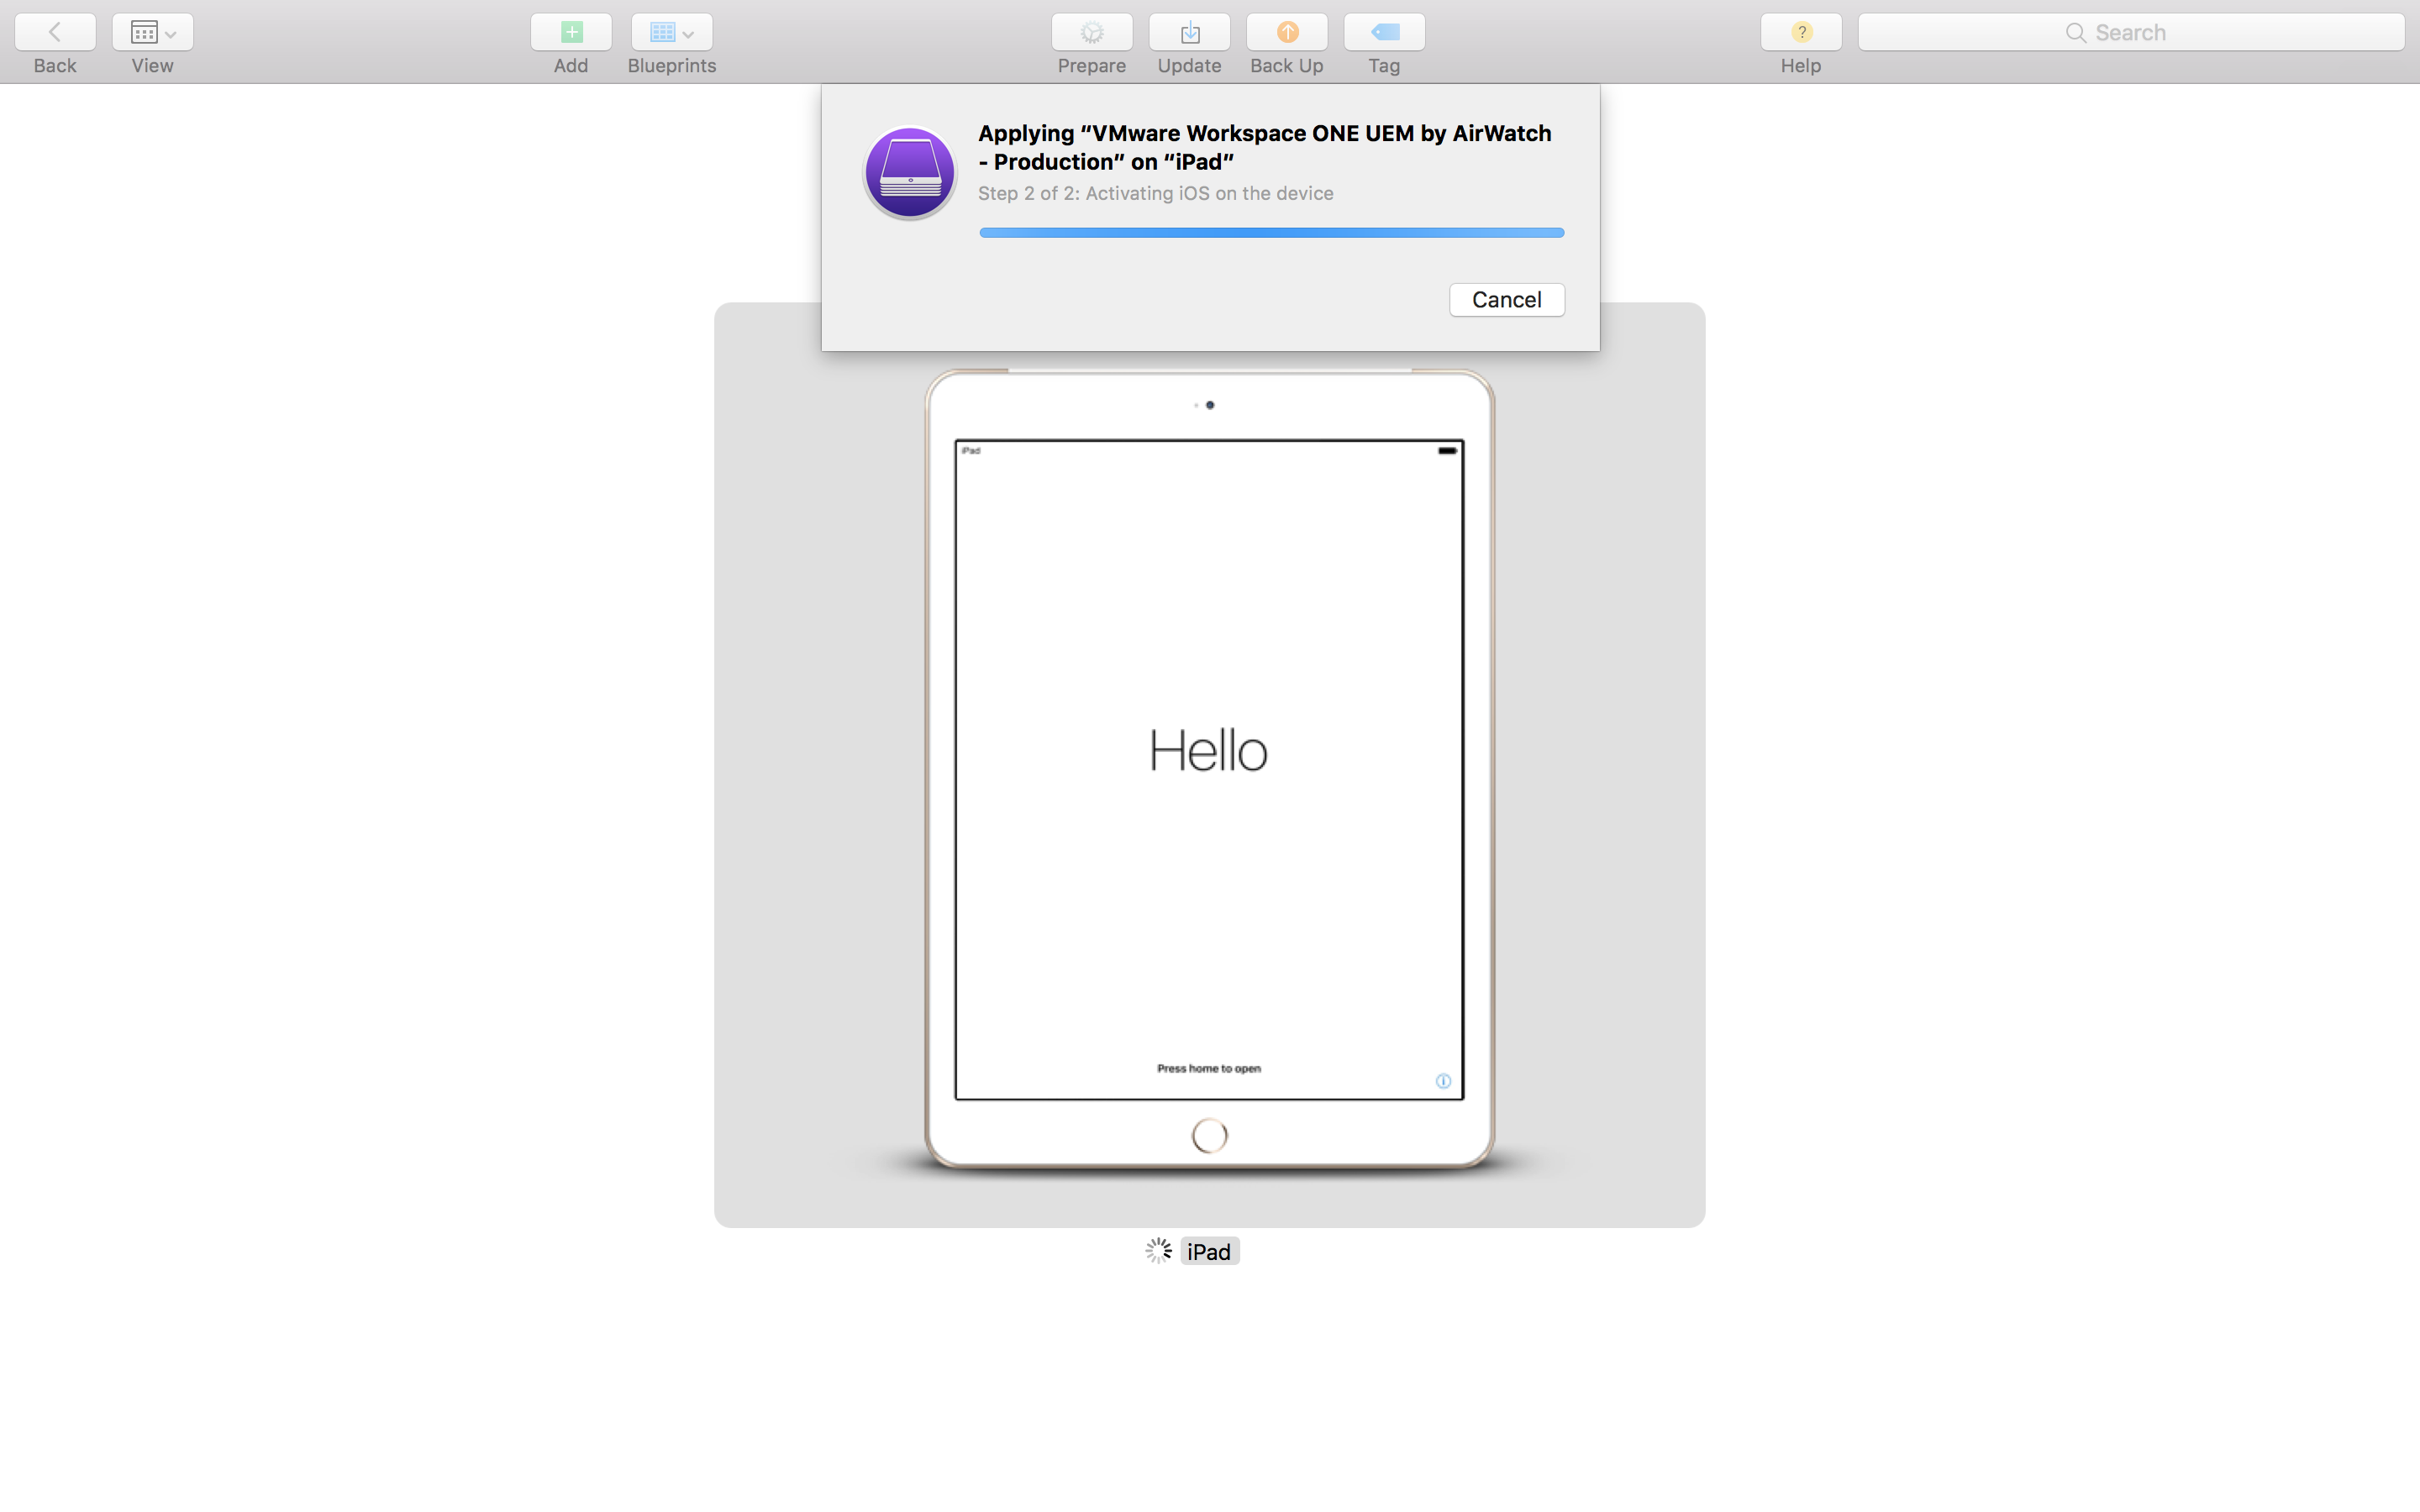
Step 5: Complete setup assistant on the device
Since we have assigned the device to a particular MDM server, I recommend restarting the device first before continuing to ensure it is staged with the right MDM server as the device makes contact with Apple server only once during initial setup.
From here on, proceed with the remaining steps on the device and you should see the profile install screen that you would normally see once the device is added to the DEP program and assigned to an MDM server.
Notice on the bottom that user already has the option to opt out of Remote Management during initial setup. If this is ever selected, you will need to re-apply the blueprint and start over again.
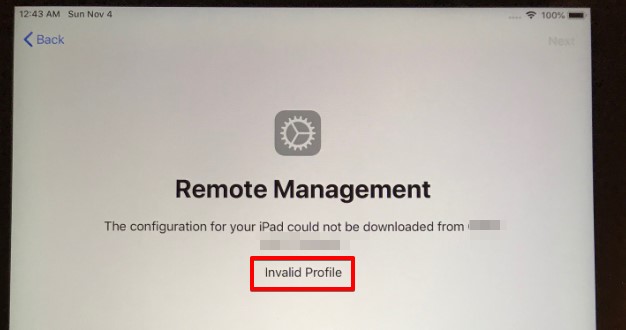
If you ever come across the error Invalid Profile, either of the solutions further below may help. It could be as simple as forgetting to assign the device to an MDM server with DEP profile configured before running setup assistant on the device. As stated earlier and per my conversation with technical support, the device must be in the Registered state on the console or else this error is expected.
- DEP token needs to be renewed after accepting the latest Terms and Conditions
- Various troubleshooting checklist
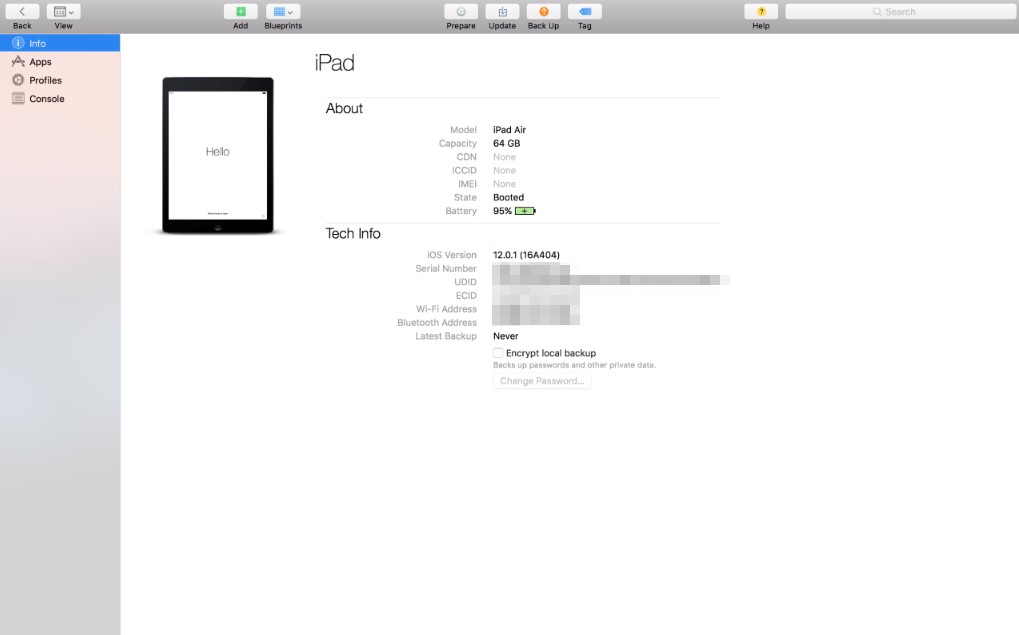
Once the initial enrollment completes, you can confirm its status within the Workspace ONE console changes from Registered to Enrolled under Enrollment Status.

Here are the steps to add a single device to DEP without the use of blueprint.
Connect the device to macOS with the USB cable. Then, press Trust if you get prompted on the device.
* You may need to disconnect and re-connect the device after pressing Trust.
Verify the device is not already supervised and take note of the device’s serial number. Then, select the device and click Prepare on the menu bar on top.
The remaining steps are very much the same as creating the blueprint. Since we already configured both the MDM Server and organization, you can simply select it during the enrollment process.
Unlike the blueprint creation, you will not see any confirmation within Apple Configurator once the enrollment process completes. Instead, the device will be added to your DEP account and you can verify this by visiting either Apple Deployment Program or Apple Business Manager website.
A little Q&A
Q: If a device was supervised by Apple or wireless carriers (i.e. Verizon, AT&T, etc.) and was later released in Apple DEP portal, can we use Apple Configurator to add it back to DEP?
A: A definite yes.

Does there any similar trick like in step: “Define an MDM Server – Part 2” in case you use BES? I always have a failed message in Apple Configurator, but at the end I can find it in DEP the phone under “Devices Added by Apple Configurator 2” MDM server.
The message like “A network error occured.” or “The device is not activated.”.
LikeLike
Not really. ABM is designed for pretty much a wide range of MDM vendors including Blackberry.
LikeLike
[…] my previous blog post titled Steps to enroll non-DEP device into Apple DEP with Apple Configurator for VMware Workspace ONE UEM b…, I explained in depth how to add a non-DEP device into Apple DEP with Apple Configurator. However, […]
LikeLike
[…] Steps to enroll non-DEP device into Apple DEP with Apple Configurator for VMware Workspace ONE UEM b… […]
LikeLike
Thank for your guide! Very helpful! For users who face DEP profile download error, I will recommend to read this guide https://iactivate.host/dep-invalid-mdm-profile-download-error/
LikeLike
Question. If i’ve already enrolled 100+ devices within AirWatch and not my newly created Apple configurator 2 server, do i have to re enroll every single device?
LikeLike
Not unless you want to manage them with Apple Configurator 2 versus AirWatch.
LikeLike