
Regular maintenance which includes patching (Windows and Exchange) is key to keep on-premise Exchange environment running in optimal shape. Sometimes, specific Exchange hotfix(s) or cumulative update(s) addresses an issue such as the one below uncovered since the product was implemented.
NDR after you accept or decline a meeting request in Exchange 2013

This post aims to detail the proper steps needed to install Exchange cumulative update also known as CU for short.
Multiple steps are involved to ensure the success of this install. As such, we will break it down into a multi-part series similar to other posts like this one I’ve written in the past.
- Part 1: Data collection and prerequisites
- Part 2: Preparation
- Part 3: Installation and verification
First, we need to identify what CU we have installed in our environment.
If you have just a single Exchange server, you can verify the version installed under Control Panel -> Programs and Features.

If you have multiple Exchange hosts in your environment, you can easily verify all of them at once by running a command within Exchange Management Shell.
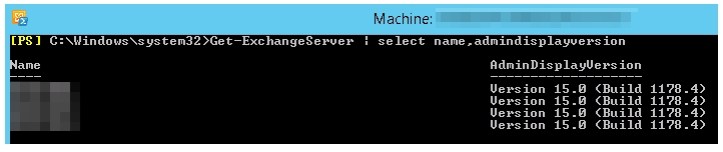
Next, head to the website Exchange Server Updates: build numbers and release dates to identify the CU version installed.

While technically, you can install the latest CU as it would have contained changes from previous versions, it’s not truly the case if you are running CU14 and below due to lack of .NET Framework 4.6.2 support. In this case, you must first upgrade to CU15 and then upgrade to .NET Framework 4.6.2 before installing the latest CU. You can learn about this through this post by Exchange guru
Here’s the link to check the .NET Framework version.

Once you have all the information, download the applicable installer and save to domain controller for part 2, and to Exchange server for part 3.
